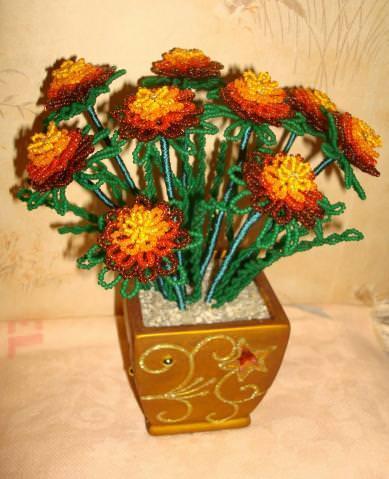
Marigolds or black grass – small flowers, which often decorate beds or plots of land in the yards. The color of their terry petals varies from gently yellow to a rich red-brown color. The bead work of this color will be dedicated today to our bead work lessons.


Master class on weaving marigolds from beads
Necessary materials:
- beads of orange color;
- yellow beads;
- beads of green color;
- wire for beading – 0.2 mm;
- threads of green color.
Fleece bud
For the bud of a single flower, we need to weave the petals consisting of four rows.
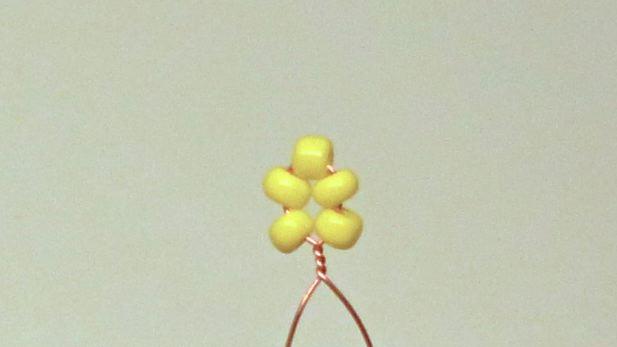
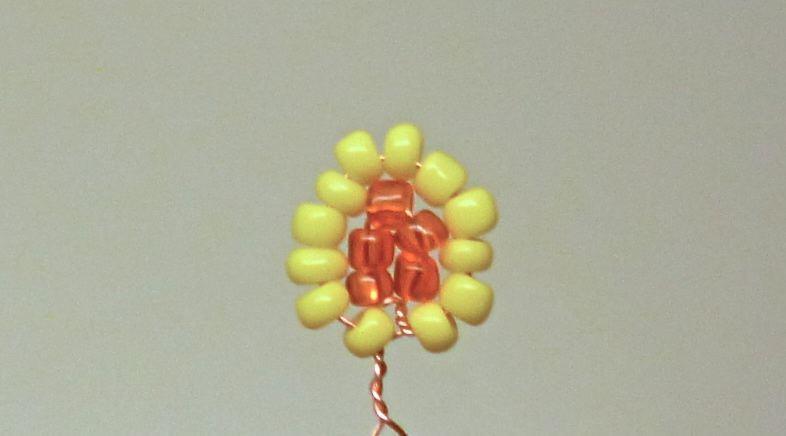
For the initial series we make petals of small size. We prepare a piece of wire at thirty-five centimeters and string five yellow beads. We move them to the center of the wire. Next, we need to form a loop of beads and twist the ends of the wire with each other by several turns. The loop should be in the center of the wire.
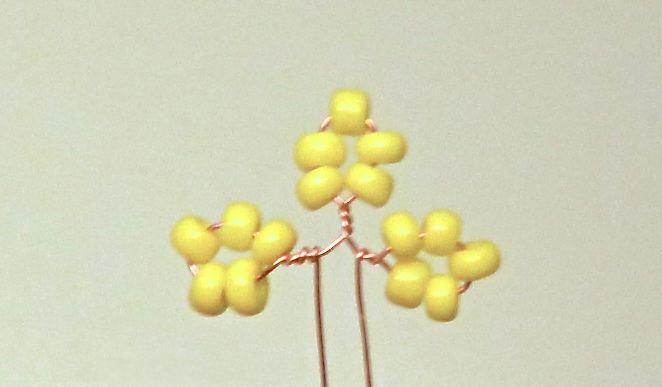
Now, at both ends of the wire, near the original loop, we form additional e-beads. At one of the ends of the wire you need to thread five yellow beads and make a second loop next to the initial one. At the next end of the wire we create a third beaded loop. Now we make the twisting of the ends of the wire and get the initial row of petals for the future bud.
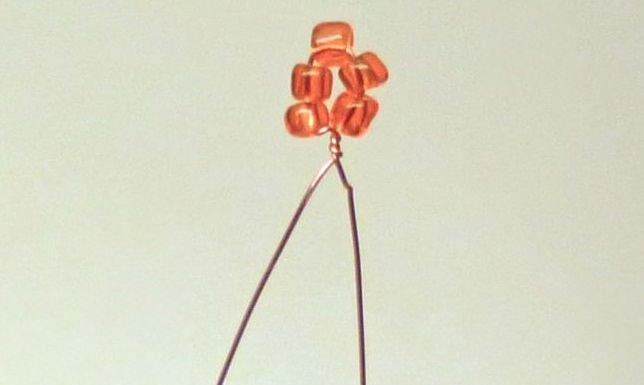
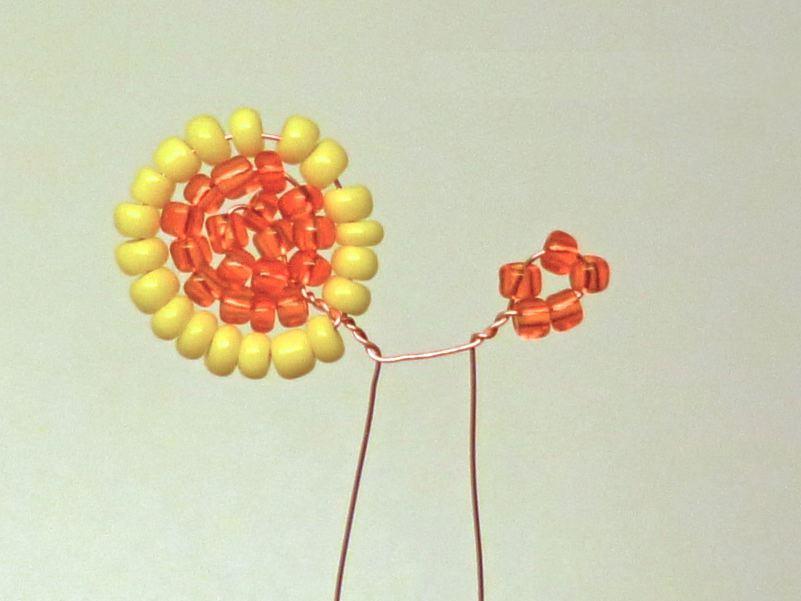
The second row of petals will be formed on a piece of wire in sixty centimeters. For this we string five orange beads and make a loop. To place such a loop is necessary at a distance of fifteen centimeters from the tip of the wire.
We continue the process of weaving, using the long tip of this wire. String twelve yellow beads and make them an arc over the very first loop.Now it is necessary to stretch the wire, so that the beads are closely located at the base of the first loop. Next, we twist the two wires together with a few turns. We got a second loop that frames the first. These loops form the initial petals of the next row.
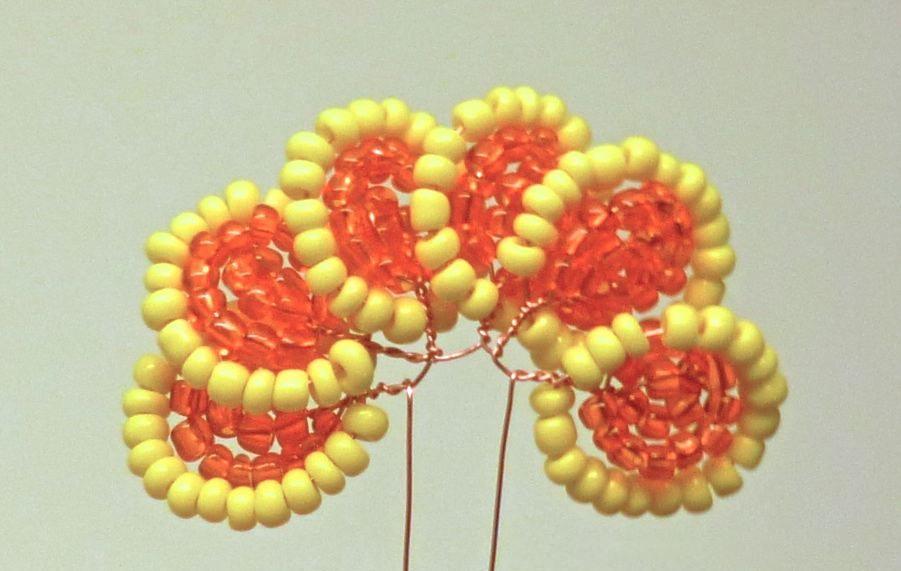
Now, in the same way, the five long petals on the same long tip of the wire are plaid. The first loop is formed from five beads of orange color. Then a loop is created, which is placed five millimeters from the initial lobe. String twelve yellow beads and make an arc of them, which is placed close to the initial loop of our second petal. We twist the ends of the wire and our next petal is ready.
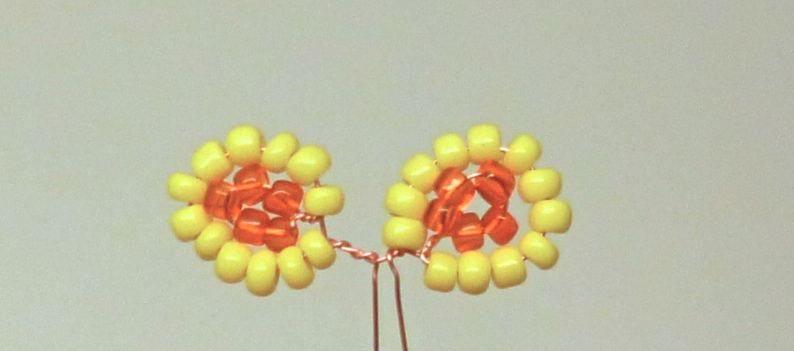
We continue to weave on a long wire such petals for the second row with a total of six pieces.
The number of beads for the arc can vary depending on their size. The main condition is that they closely adjoin each other and do not form empty gaps.
Increasing the number of created petals, they will slightly creep one on another.
Let’s proceed to join the created series. For this, the initial row of petals must be inserted into the center of the next row. Next we make the twisting of all the ends of the wires.
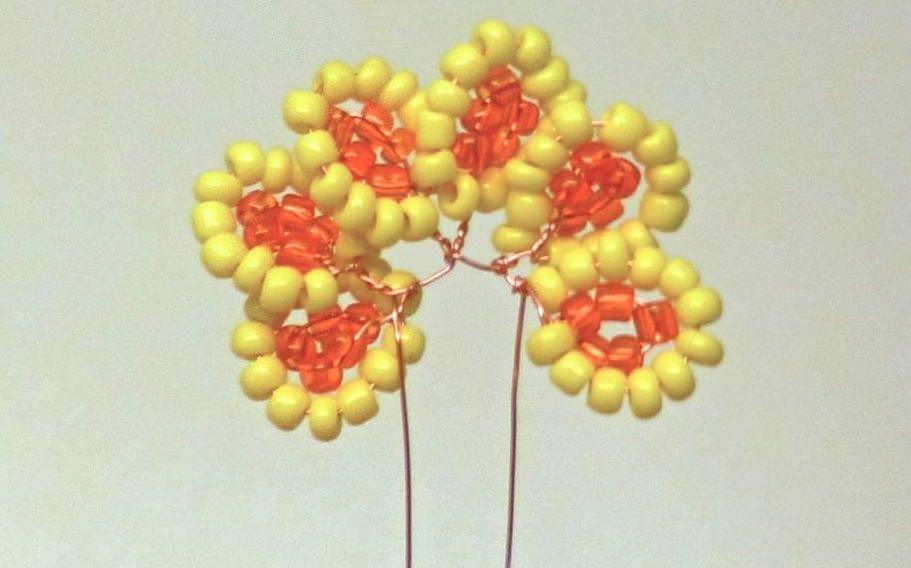
For weaving the next (third) row of petals, we prepare the wire by eighty centimeters. We create on it six petals on a similar pattern of weaving the second row. The only difference is that the number of its constituent loops will be equal to three.
The original loop of the first petal includes five orange beads. We place it at a distance of fifteen centimeters from any tip of the wire. Next, the process of weaving continues on the long tip.
The next loop includes twelve beads of orange color. The third one is nineteen beads of yellow color.
All subsequent petals must be weaved in the same way. The initial loops of each of the petals, consisting of their five orange beads, must be placed at a distance of eight millimeters from the preceding petal.
For the second loop of this row of this row we string about twelve beads of orange color, depending on their size, it will be necessary to add or reduce beads.
For the third loop, we collect nineteen beads of yellow color.
In total, on the current piece of wire we need to weave six petals making up the third row of the bud.
Having finished making this series, you need to attach it to the bud. For this we have the first blank of two connected rows of petals, which must be put inside the row just made (the third one under the account). It remains to twist the ends of the wire. All the petals need to be equally distributed in a circle.

In the fourth row, a tattoo of the same type petals. Each petal will be created on its piece of wire, the length of which is forty centimeters.
Weave an initial loop of five beads of orange color and place it in the center of the wire segment.
The second loop is a shawl on the shorter tip of the wire, stringing on it twelve beads of orange color. We form an arc over the initial loop and produce twisting of the wires with several turns.
The third loop is padded on the long end of a wire of nineteen yellow beads. Make an arc of strung beads over the second loop and pass the end of the wire through the final of the dialed beads.
Next, we tighten the wire in such a way that the yellow beads create the next (third) loop over the preceding first and second loops. We twist the ends of the wire and the petals are made.
Plait in this way all eight petals.

Now, it is necessary to collect all the woven eight petals into one. We prepare the wire thirty centimeters long, and one by one we collect on it the created petals for the fourth row, passing the end of the wire through yellow beads, is the base of the petals, as in the photo:

We have the petals side by side and equate the tips of the additional piece of wire. Next, we need to twist the tips of this auxiliary wire between each other, without touching the ends of the wire that come from the petals themselves.
We join the work piece from the combined three rows with the fourth row, inserting it into its center.
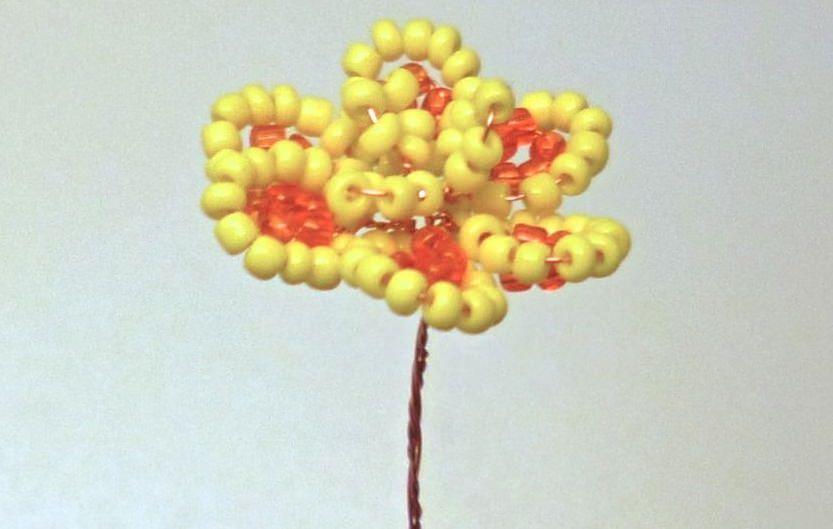
In the next step, you need to put the bud on the work surface and straighten the tips of the wires that go from the petals. Next, we need to string on eight beads of green color on a pair of tips of wires. We also do the same with an auxiliary wire, to which we typed the petals of the fourth row. Look at the photo to make it easier for you to understand this process.
Further, we connect all the wires with the dialed beads and advance the green low to the base of the bud and produce the twisting of wires between each other.
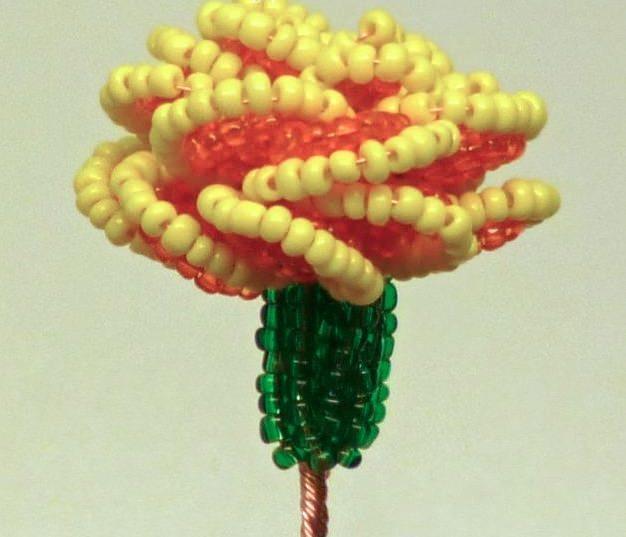
So we made a bud for our marigold of beads.
Flattering Leaves
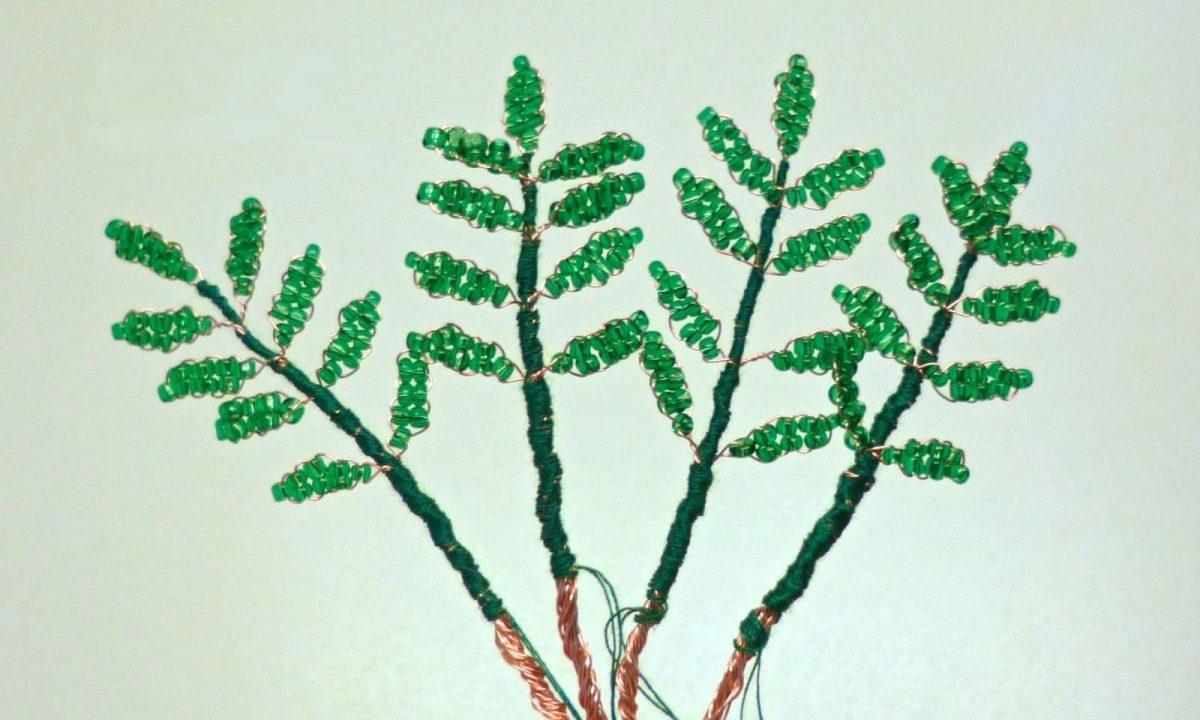
Leaves for marigolds will consist of multiple narrow leaves, which will be joined in pairs after the central leaf. Such leaves are created on sections of wires 0.25 m long in the parallel weaving technique according to the following scheme:
- the first row is one green bead;
- the second row – two green beads;
- third row – two green beads;
- the fourth row is two green beads;
- The fifth row is one green bead.
- thus weaving four leaves.
Flower Assembling
The final stage of our master class will be the formation of our flower.
Using threads of green color, we need to wrap all the wire stems of each leaf and bud.
Next, we attach leaf twigs to the stem of the bud in a circle, continuing the winding with green threads of the entire surface of the stem.
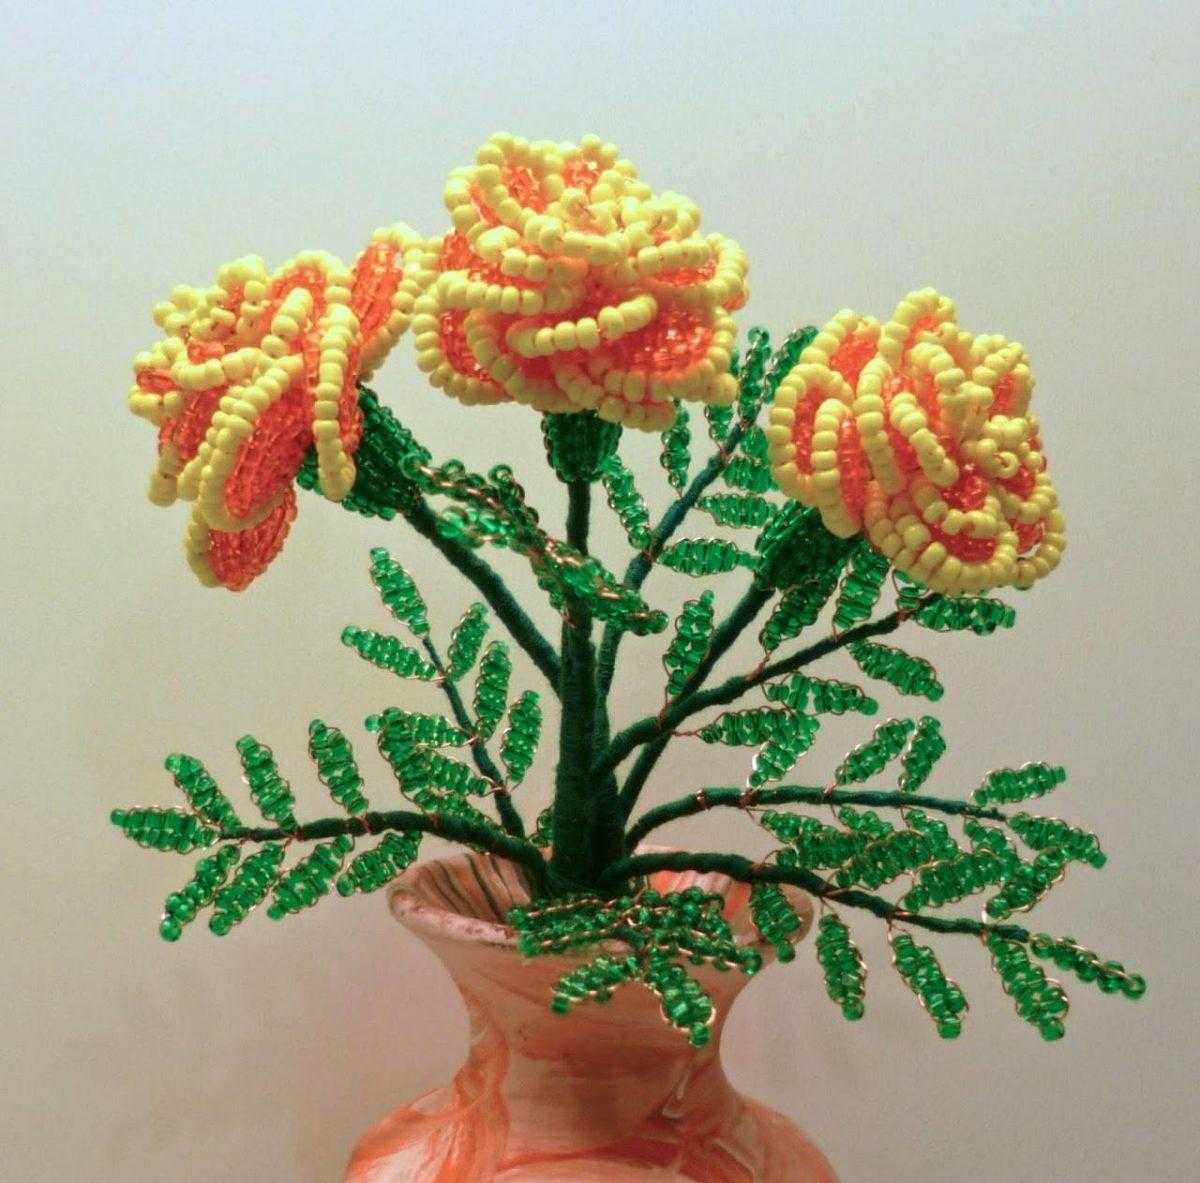
To create a full bouquet, we need to add two more such twigs and put your first marigolds of beads created with your own hands in a vase or fasten the flower in a pot with alabaster or gypsum mixture.
Video: The lesson of weaving marigolds from beads
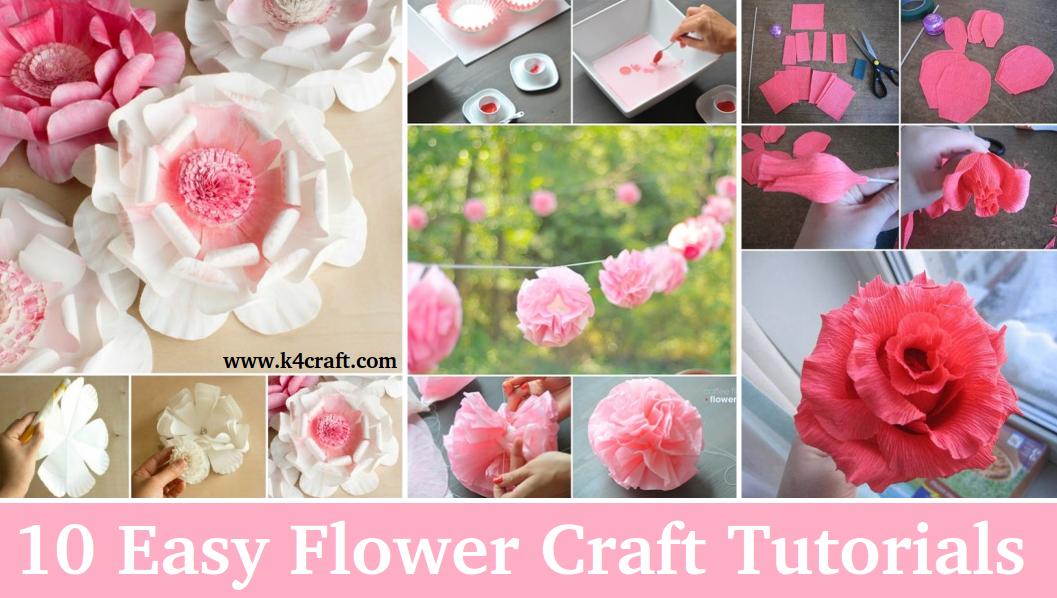
How To Make 10 Different Flower Craft Tutorials – Step by step
You’ll also like:
- How to make flower vase from newspaper tube
- Easy Tutorial To Make Flower Vase From Cardboard at Home
- How to Make Flower Vase from Plastic Bottle
- How To Make Flower Vase Using Shopping Bag And Plastic Bottle
- How to make flower vase using cotton buds


