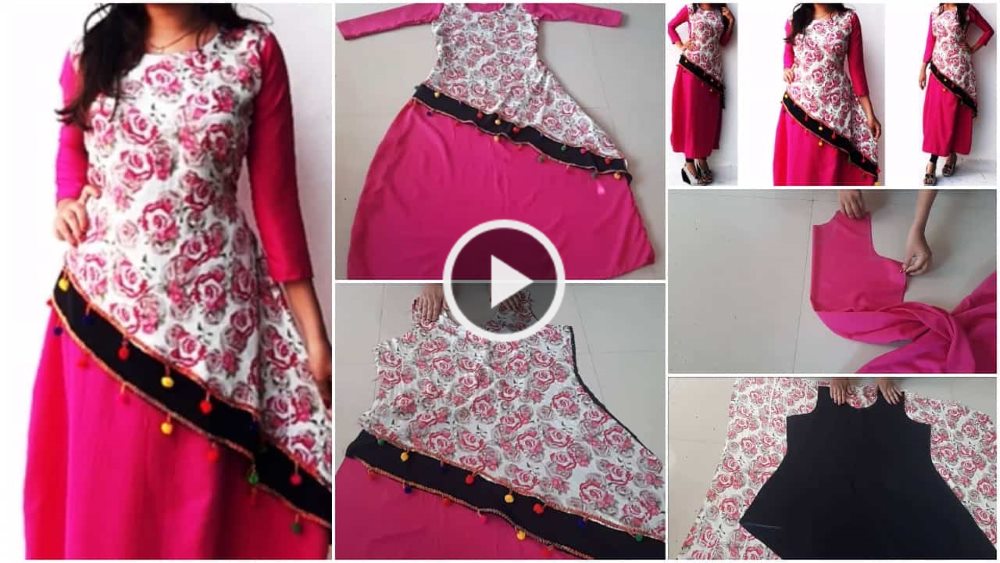
Designer Layered Kurti Cutting and Stitching Tutorial
Want to add instant drama and flow to your silhouette? A layered kurti is your answer! I love this style because it’s forgiving and effortlessly chic. The secret isn’t complex pattern-making; it’s all about cutting multiple tiers of increasing length and width.
Here’s the breakdown:
The Base: Start with a basic kurti pattern that fits you well at the bust. This is your topmost layer.
Plan Your Tiers: Decide on 2-3 tiers. For a 3-tier kurti, the second tier should be 1.5x the width of the first, and the third tier 2x the width. This creates that beautiful, flowing volume.
Cutting & Assembling:
Cut your first tier (the bodice) to your desired length, typically to the hip.
Cut the second tier as a rectangular strip. Its length should be 1.5x the bottom edge of the first tier, and its height is your chosen drop (e.g., 6 inches).
Gather the top edge of the second tier to match the bottom edge of the first tier and stitch together.
Repeat for the third tier, making it the widest and longest.
Pro Tip: Use a contrasting fabric for one of the tiers or add a delicate lace trim between layers for a truly designer touch. Finish with side slits for ease of movement!
Designer layered kurti cutting and stitching tutorial
Read More
- Quick Easy Bun Hairstyle for Parties
- Stylish kurta designs to try this season
- How to make ribbon work saree
- Different type of Sleeves Design cutting and stitching
- How to make French Roll Hairstyle – Step by step (Tutorial)