Paper quilling is a magical craft that transforms simple strips of paper into intricate 3D art. Creating a flower fairy is a delightful project that’s easier than it looks! I made one for my goddaughter’s room, and it’s her favorite piece of art.
Let’s Create Some Magic:
Shape the Body: Tightly roll a strip of skin-toned paper for the head. For the body and dress, use a wider strip of colored paper, rolling it into a loose cone shape.
Craft the Wings: This is the fun part! Create two identical teardrop shapes for wings using your favorite colors. Gently pinch one end to form the classic teardrop quilling shape.
Make the Flowers: Create an assortment of small flowers using loose circles (for petals) and tight coils (for centers). Use green paper to form leaves and delicate vines.
Assemble Your Fairy: Glue the head to the body. Attach the wings to the back. Finally, adorn her dress and the space around her with your beautiful quilled flowers and vines.
It’s a whimsical, personalized project that makes a heartfelt gift.
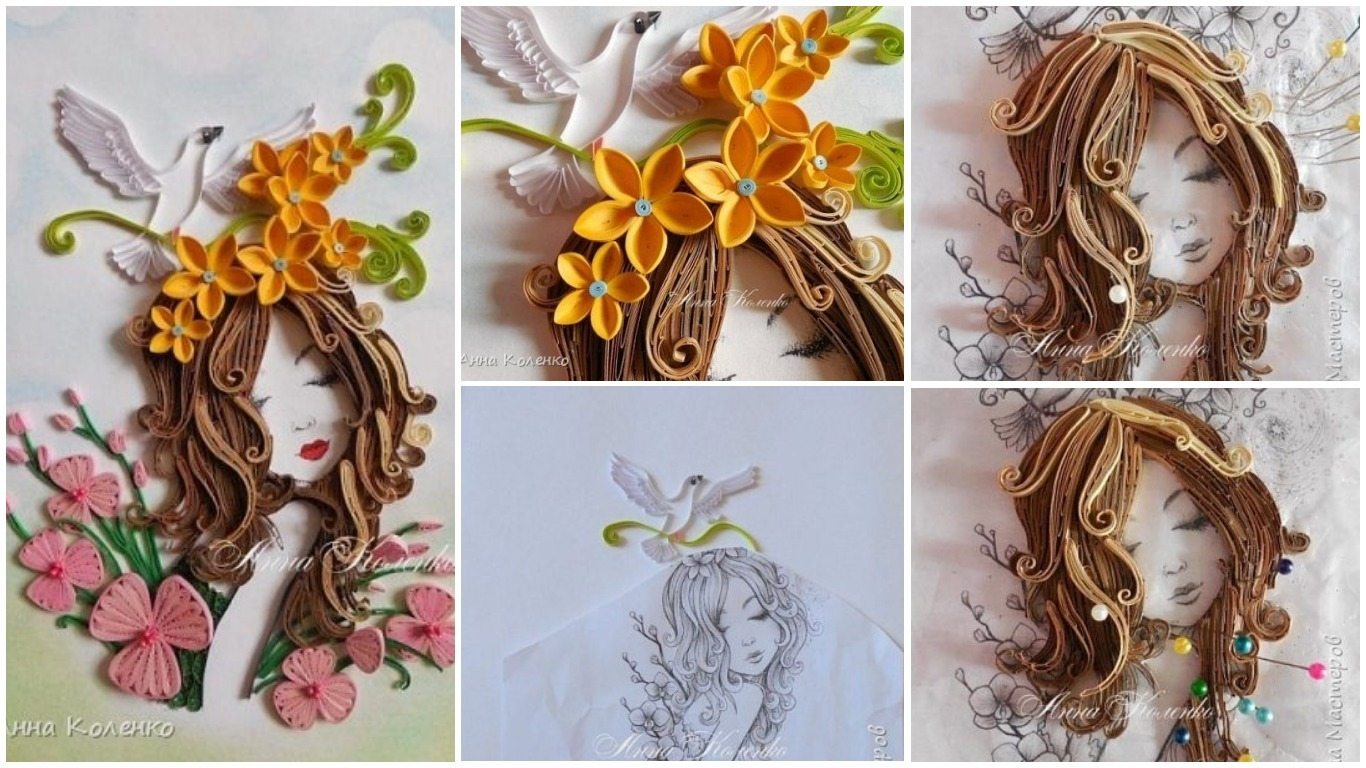
Let’s make quilling flower fairy girl. In the work, I used strips from 1.5 to 3 mm.
The process of work. The picture was pasted into a file and a lock behind a string “increased” hair
On the lower layer of hair glued curls. If the main hair I made from strips 3 mm wide, then the top from 3 to 1.5 mm ..
There’s one side with curls, and the other is not. The difference you see?
In the contour qwillenge made a dove.
Released through the printer one more picture (on paper for watercolor), cut out the head and part of the hair. She dyed her hair.
I stuck the hair to my head.
So, as my girl’s hair turned out to be a little more voluminous than in the figure, the dove, hand and back which I made in the contour qwillenge, circled separately.
We put our head …… we plan where the hand will be ..
I stuck my head.
Volume
Thank you!
courtesy: stranamasterov


