Trendy Grand Kalamkari Jhumka Earring Tutorial
Kalamkari art isn’t just for fabric anymore! I’ve been seeing these stunning, grand jhumkas everywhere from fashion blogs to local artisans’ fairs, and I just had to make a pair. They combine traditional motifs with a massive, statement-making silhouette that’s perfect for weddings and festive occasions.
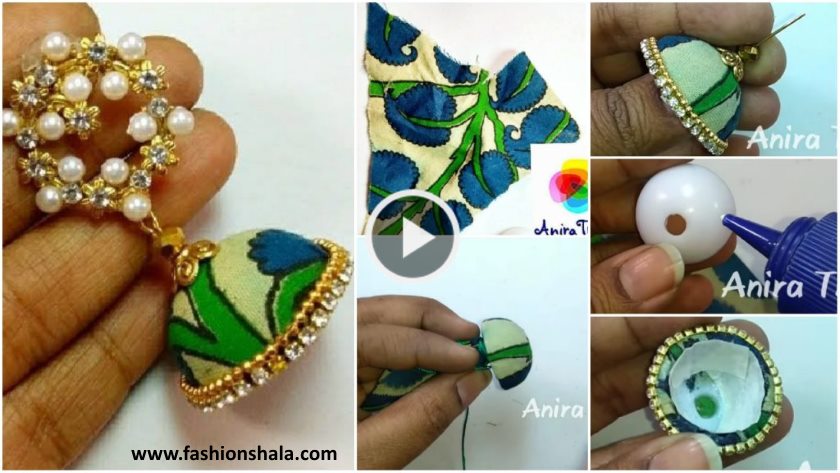
You’ll need: Plain brass or silver jhumka bases (the bigger, the better!), black and colored fine-tip enamel markers (or acrylic paint with a tiny brush), clear varnish, and jump rings.
Let’s get crafty:
Clean the Base: Wipe your jhumka bases with rubbing alcohol to ensure the surface is free of grease for the ink to adhere properly.
Sketch the Motif: Lightly draw your design with a pencil. Classic Kalamkari elements are peacocks, floral vines, paisleys (mango motifs), or intricate mandalas. Don’t worry about perfection! The hand-drawn look is part of the charm.
Ink It In: Use your black marker to carefully trace over all your pencil lines. This defines the design, just like the original art form.
Add Color: Fill in the patterns with earthy tones—deep reds, indigo blues, and greens. Let each color dry completely to avoid smudging.
Seal the Deal: Apply a thin layer of clear varnish to protect your artwork from scratches and wear. Once dry, attach them to earring hooks.
You’ve just created a wearable piece of art that’s totally unique and on-trend!
DIY Trendy Grand Kalamkari Jhumka Earring Tutorial How to make fabric earring Jhumka at home.
Read More
- How to transform your flip flops with mod podge and jewellery
- Jewellery embroidery for kurti,blouse and saree
- Brazilian Embroidery Flower – Step By Step (Tutorial)
- How to make jewellery box at home with waste material
- Traditional Indian Antique Jewellery For Women

