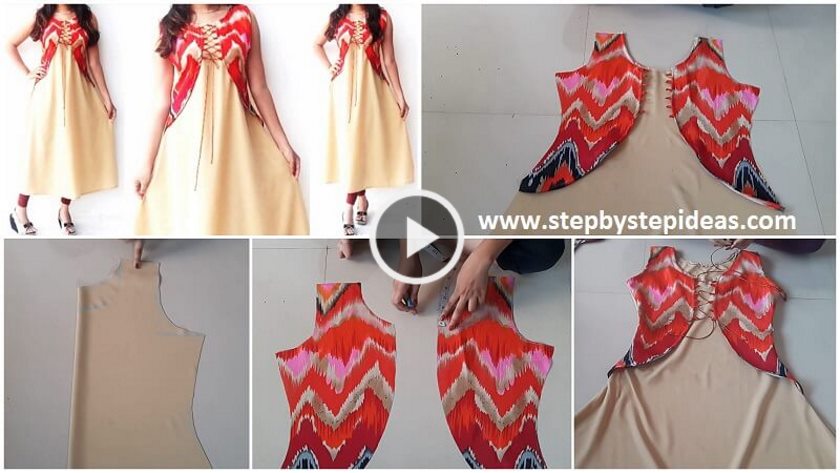
Designer Attached Koti Kurti Cutting and Stitching Tutorial
The attached koti (or jacket) over a kurti is a look that screams high-fashion and effort, but I’ve found a way to make it surprisingly simple to sew. It’s all about cutting the koti and kurti as one connected piece, which eliminates the hassle of making two separate garments.
The Secret? The Dolman Sleeve.
The Cut: This is the key. Instead of cutting a separate koti, you’ll extend the shoulder line of your kurti pattern outward dramatically. Imagine cutting a huge, batwing sleeve. The underarm seam will be very deep, and the outer edge will become the front opening of your koti.
Stitching: Sew the shoulder seams of this giant piece. Then, stitch down the side seams of the kurti only up to the wrist. The deep, extended “sleeve” remains open, creating the koti overlay.
Finishing: Finish the raw edges of the koti (the front opening and the bottom hem) with bias binding or a folded hem. You can add buttons, ties, or just leave it open.
This method creates a seamless, designer-looking attached koti without any complicated pattern matching. It’s a brilliant shortcut that offers a major style payoff.
Designer attached koti kurti cutting and stitching tutorial. Indian kurtis are versatile traditional attire which has transformed as everyday wear with time. Indian designer kurtis are nowadays flaunted by the ladies with jeans or with churidars and brings out best thing about them, which is their versatility to go along with anything, albeit its practical.
बेस्ट कुर्ती डिजाइन जो इन दिनों ट्रेंड में हैं|
Read More
- Stylish kurti neck design cutting and stitching in an easy way
- How to make a designer fancy cut saree at home
- How To Make Hexagonal basket From Paper (Step by Step)
- Kurta / Kurti Neckline with Salwar Leftover Fabric (DIY)
- Kurti front leaf neck design cutting and stitching


