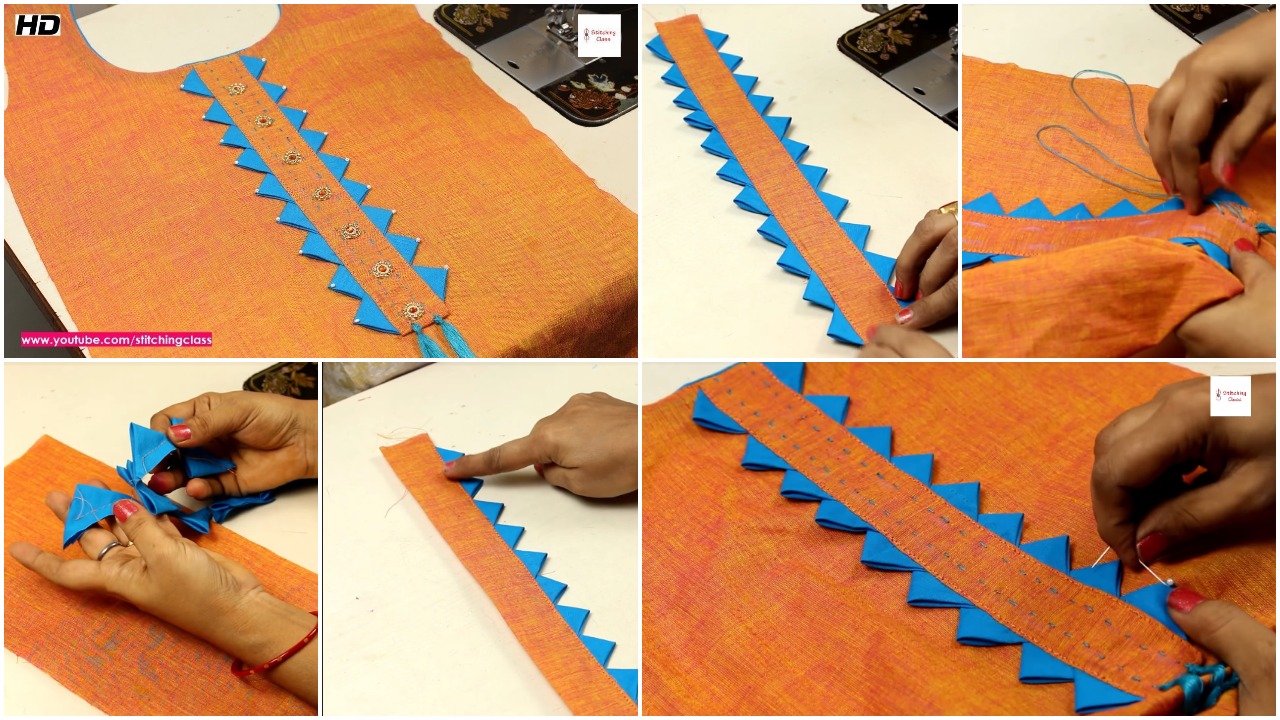
Stylish Kurti Neck Design, Cutting, and Stitching in an Easy Way
Tired of the same old round neck? The easiest way to add a designer touch is by changing the neckline shape. My go-to hack for beginners is the Keyhole Neckline. It looks complex but is surprisingly simple to execute and adds instant style.
Here’s the easy way:
The Cut: After cutting your basic kurti front piece, mark the center of the neckline. Now, instead of cutting a round curve, cut a small 1-2 inch vertical slit down from the center.
The Facing: Cut a strip of fabric (or use bias tape) long enough to go around the entire neckline and the new keyhole slit.
Stitching: Pin the facing right sides together along the neckline and the slit. Stitch slowly along the entire curve and down both sides of the slit.
The Flip: Clip the curves and the point of the slit, turn the facing to the inside, and press. You now have a clean, professional-looking keyhole!
The Final Touch: Add a small button or a fabric tie to fasten the keyhole. This tiny detail makes it look store-bought.
It’s a minimal pattern alteration with maximum style impact, perfect for elevating a simple, solid-colored kurti.
Hi Friends, Today, I am going to show you Neck Design Cutting and Stitching in very simple steps. Please watch the video till the end to learn the complete method of cutting and stitching.