Beautiful Baby Frock Design – Step-by-Step Tutorial
Looking to create a cute and comfortable frock for your little one? Making a baby frock at home is not just fun, but it also lets you personalize every detail. I remember a client who wanted a simple cotton frock for her baby girl’s birthday. After we followed a step-by-step tutorial, the frock turned out adorable, and she loved that it was handmade with care!
Why Make a Baby Frock at Home?
In my experience, homemade frocks are more comfortable, unique, and customizable than store-bought ones. With 2025 trends leaning towards soft fabrics, pastel colors, and delicate embellishments, creating a frock at home allows you to experiment with patterns, necklines, and sleeve designs while ensuring the baby’s comfort.
Materials You’ll Need
- Soft cotton or muslin fabric
- Matching the thread and needle or the sewing machine
- Measuring tape and pins
- Buttons, lace, or ribbons for decoration
- Scissors and chalk
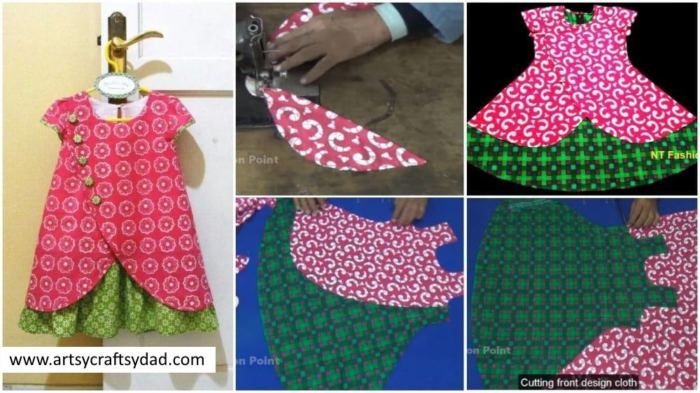
Step-by-Step Tutorial
- Take measurements – Chest, waist, frock length, and sleeve length.
- Cut the fabric – Create the front, back, and sleeve pieces.
- Sew the main pieces – Join the shoulders and side seams carefully.
- Add sleeves and neckline – Attach with neat stitching and finish the edges.
- Decorate – Add lace, ribbons, or buttons for a cute finishing touch.
Final Thoughts
I once made three frocks using this method for a client, and each one looked like it came straight from a boutique! Don’t underestimate the charm of a homemade baby frock—it’s comfortable, adorable, and made with love.
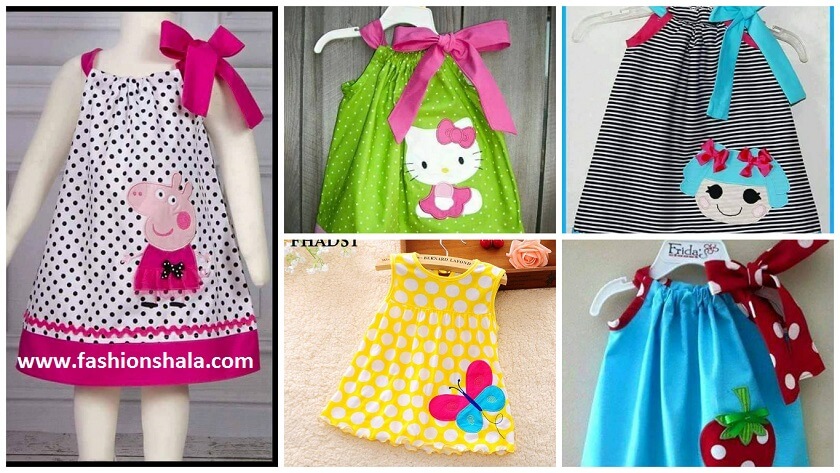
Simple Frock Design For Baby Girl
You’ll also like:
- 25+ Different types of frock designs for kids
- Best girl’s party wear frocks and dresses designs for wedding
- Different types of frocks designs for kids
- How to cut and sew different type of frock
- Different Types of Frock Designs for Kids

