How to Make a Beautiful & Colorful Dream House (A Craft Project!)
When I think of a “dream house,” I don’t just think of buildings; I think of the joy of creating a miniature version. This is a fantastic project to do with kids or to add a whimsical touch to your shelf. We’re not talking about blueprints, but about cardboard, color, and creativity!
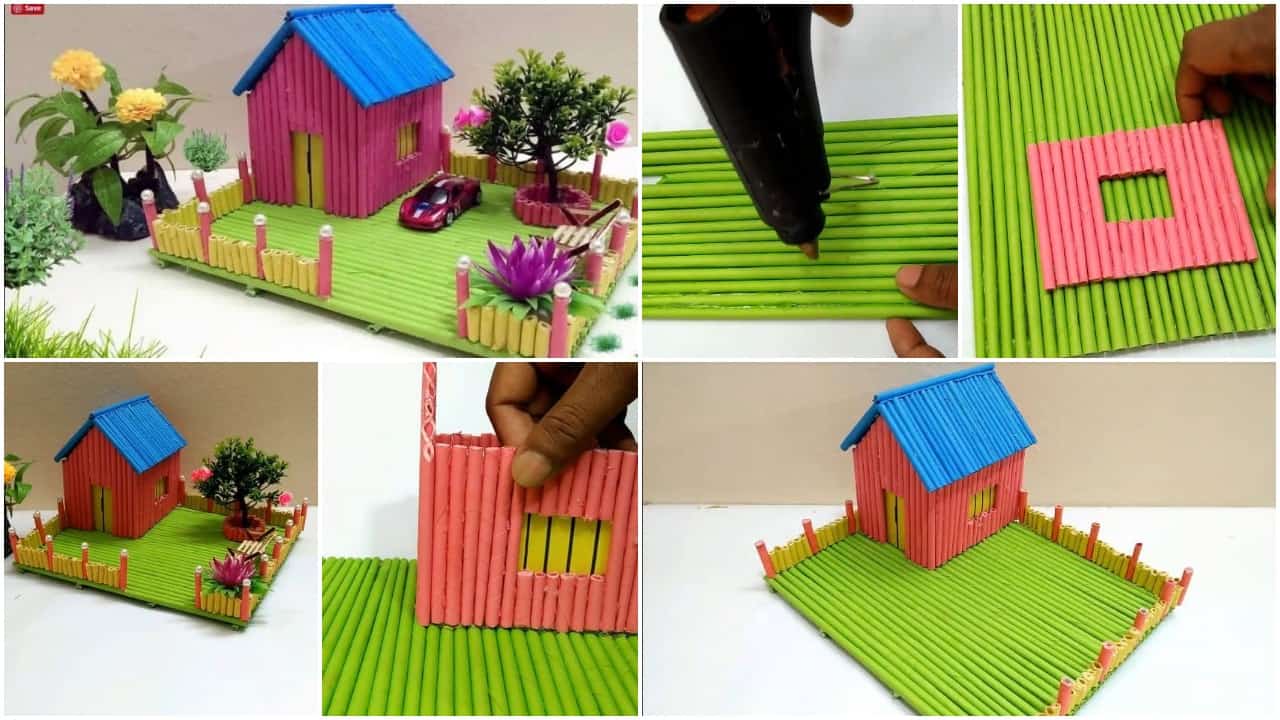
Here’s how to build your colorful cardboard dream home:
You’ll need: Cardboard boxes (cereal boxes are perfect), a ruler, a pencil, a craft knife, strong glue (PVA or a hot glue gun), and your coloring media—this is key! I love using acrylic paints for bold colors, but markers, colored paper, or even fabric scraps work wonderfully.
Design & Cut: Sketch your simple house shape (a square for walls, a triangle for the roof) onto cardboard. Use a ruler and craft knife for clean cuts. Don’t forget to cut out windows and a door!
Assemble: Glue the walls together and then attach the roof. Hold the pieces firmly until the glue sets. This is the most satisfying part—seeing it become 3D!
Decorate (The Fun Part!): This is where personality shines.
Paint: Use bright acrylics to paint the walls. Maybe one wall is sunshine yellow and another is sky blue!
Add Details: Glue small beads as doorknobs. Cut out little flower shapes from paper and create a garden. Use a marker to draw brick patterns or window panes.
Get Textured: Glue down scraps of lace for curtains or sprinkle sand on glue around the base for a garden path.
There are no rules. Your dream house can be a rainbow cottage or a minimalist modern cube. Let your imagination decide!

