How to Make an Indoor Planter Using Plastic Bottles
Bring a little greenery inside without spending a dime! Plastic bottle planters are my go-to for propagating herbs like mint and basil on my kitchen windowsill. They’re lightweight, easy to make, and surprisingly stylish.
You’ll need: A clean plastic bottle, scissors, acrylic paint (optional), and a small plant or seeds.
Two Chic Styles:
The Hanging Planter: Cut the bottle horizontally about 1/3 of the way from the top. Poke holes on opposite sides near the cut edge and thread through string or yarn for hanging. The top half can be used as a cloche to create a mini greenhouse for seedlings!
The Self-Watering Pot: Cut the bottle in half. Invert the top half (neck down) and place it into the bottom half. The bottle’s cap acts as a wick, drawing water from the reservoir below into the soil in the top half. It’s brilliant for forgetful waterers!
Pro Tip: Paint the outside with acrylic paint to hide the plastic. Decorate it with twine, or leave it clear for a modern, minimalist look. Always poke drainage holes in the bottom if it’s not a self-watering system.
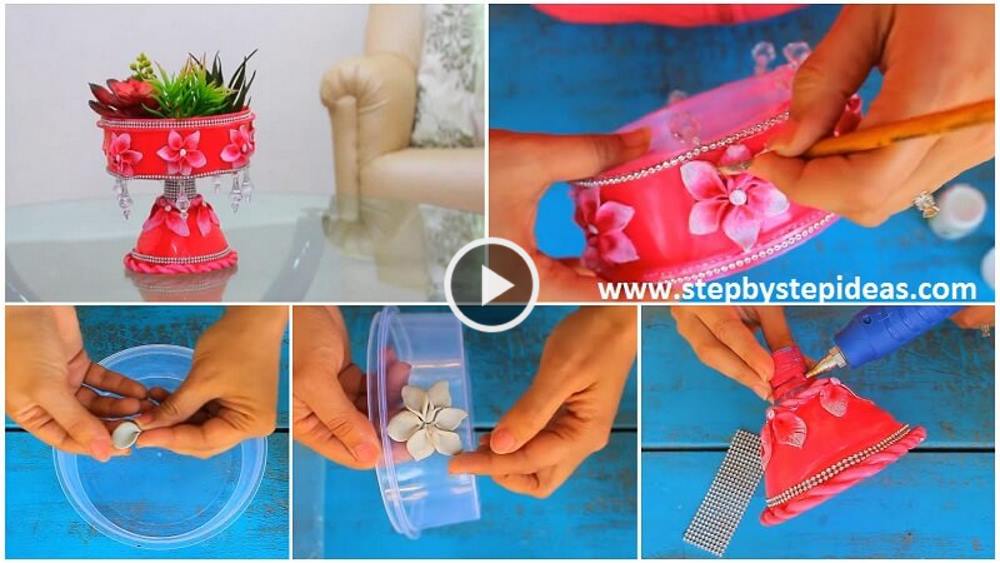
Lets make a Indoor planter for Succulents using waste material , Which you can also use as a Storage Box …..try making it for your home and make your space look even more beautiful.
Materials Required:
- Cookie Box
- Plastic Bottle
- Acrylic Colours
- Shilpkar Clay / Modeling clay
- Flat Brush and Round Brush
- Pendants & Lace
- Glue or Glue Gun
Read More
- How to Make Toilet Paper Roll Nutcracker Craft
- Best Out of Waste : Jewellery Organizer Box DIY From Plastic Balls
- Easy DIY Tutorial : How To Make Handmade Bag At Home
- 8 Great ideas to use old toys for home decor
- Your hair will never be the same after trying these hair hacks