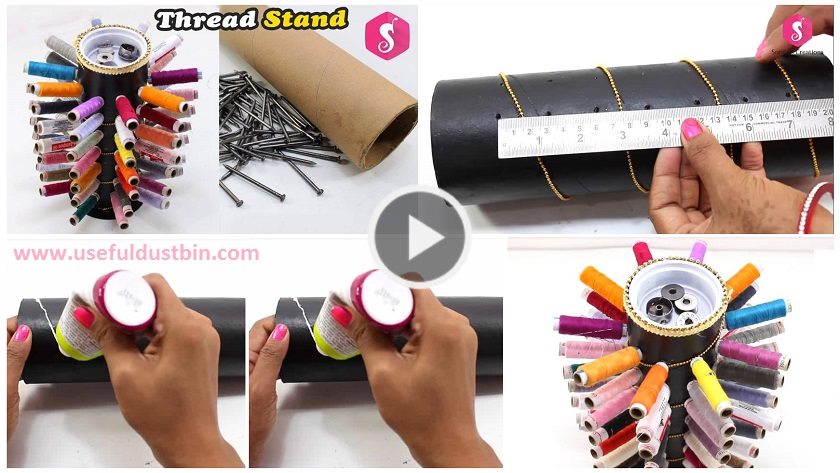
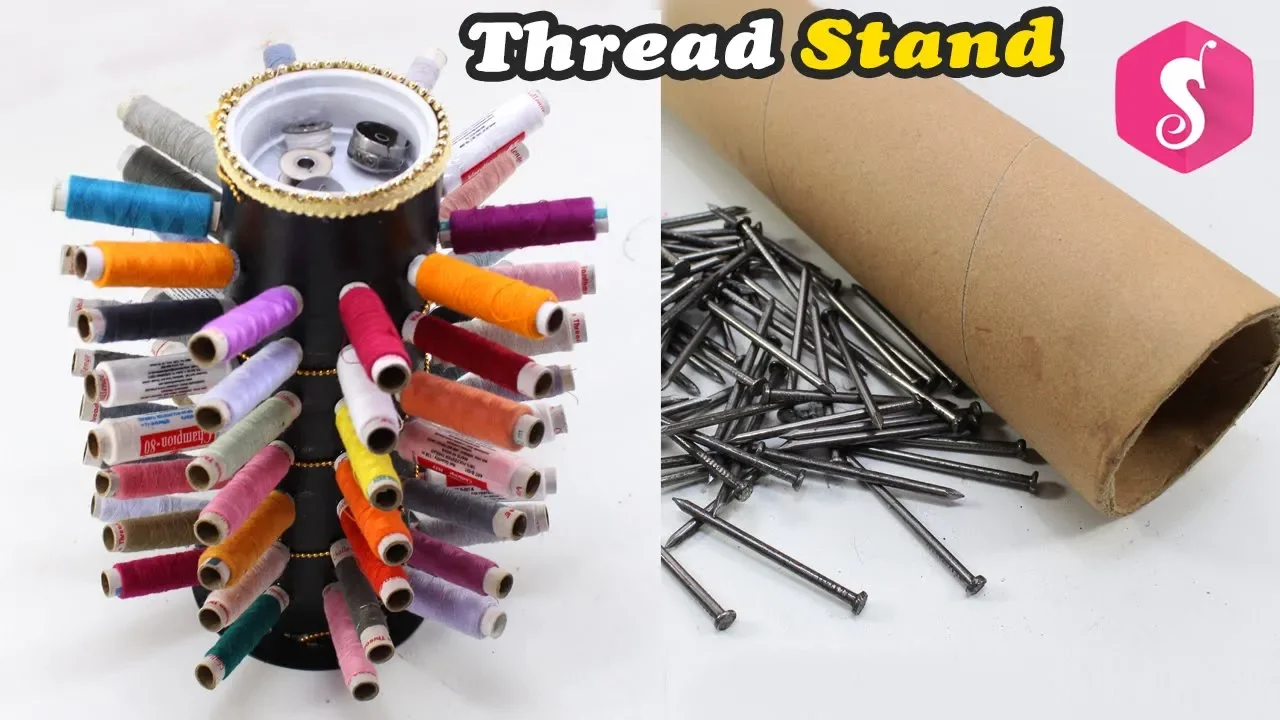
How to Make a Thread Stand Using a Cardboard Roll and Nails (Reusing)
Tired of your embroidery threads becoming a tangled mess? I was, too! That’s why I came up with this super easy DIY thread stand using items you’d normally toss: a cardboard roll (from paper towels or wrapping paper) and a few nails. It’s a game-changer for keeping your colors organized and accessible while you work.
You’ll need: 1 cardboard roll, a small wooden block or a heavy cardboard base, 6-8 nails or long pins, and a hot glue gun.
Let’s get organized:
Create the Base: Stabilize your stand by gluing the cardboard roll upright onto the wooden block or a sturdy square of cardboard.
Insert the Nails: Evenly space the nails around the top rim of the cardboard roll. Gently hammer or push them in at a slight outward angle so they stick out like spokes. Don’t push them all the way in; you need enough protrusion to hang your thread spools.
Load It Up: Simply hang your thread spools on the nails. You can group them by color family or project. The center tube is also perfect for storing scissors, needles, and other small tools.
This project takes 10 minutes, costs nothing, and is the perfect way to keep your crafting space tidy and efficient.
How to use Waste Cardboard Roll & Nails in the best way. Don’t throw them and make this amazingly beautiful craft by using minimum stuffs.Enjoy this best out of waste idea.
How to make jewelry organizer using cardboard
Read More
- How to make cardboard corner shelf
- Easy Tutorial To Make Flower Vase From Cardboard at Home
- How to make Homemade Hand Fan from cardboard paper
- How to make a cardboard furniture for computer
- How to make a flower vase out of cardboard (Tutorial)

