DIY Woolen Puff Flower – Step-by-Step Guide
Looking to add a cozy, handmade touch to your décor or craft projects? Making woolen puff flowers is a simple yet satisfying craft that can brighten up your space or be used in accessories. I remember a client who wanted to decorate her baby’s nursery with soft flowers. After we created a few woolen puff flowers together, the room looked so warm and inviting—it was amazing how a small craft could make such a big difference!
Why Woolen Puff Flowers Are Fun
In my experience, working with wool is not just therapeutic but also versatile. Woolen puff flowers are trendy in 2025 for DIY home décor, gift wrapping, and even fashion accessories like brooches or hair clips. Kids and adults alike enjoy making them because they’re soft, colorful, and easy to customize.
Materials You’ll Need
- Wool yarn in your favorite colors
- Scissors
- Needle (for sewing) or glue
- Optional: Buttons or beads for the flower center
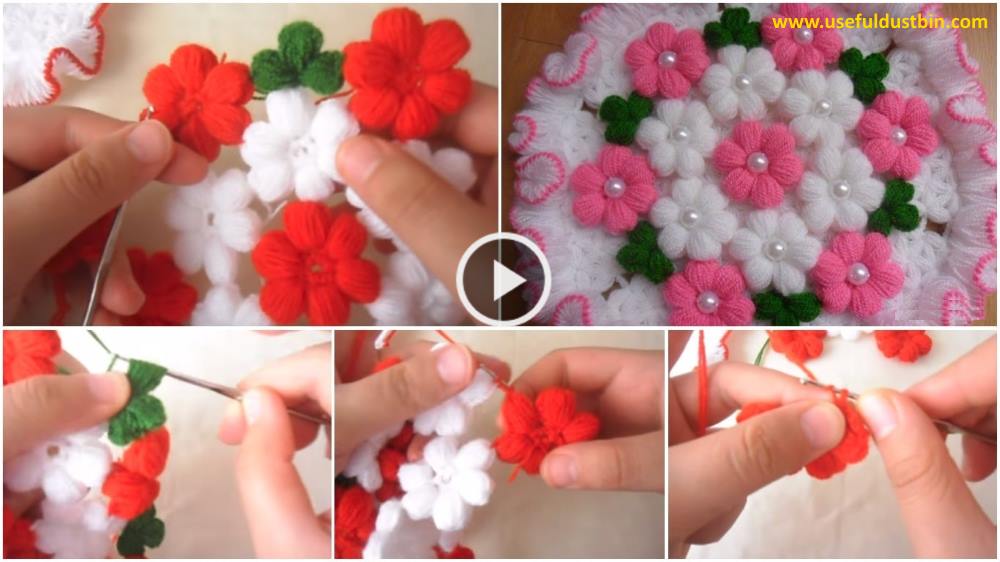
Step-by-Step Tutorial
- Cut the wool – Wrap it around your fingers or a small cardboard piece to create loops.
- Tie the center – Carefully secure the loops in the middle using a thread or small piece of yarn.
- Trim the edges – Shape the loops into a fluffy puff by cutting the ends evenly.
- Fluff and shape – Adjust petals to get a full, rounded look.
- Optional decoration – Add a button or bead in the center for extra charm.
Final Thoughts
I once hosted a small workshop making woolen puff flowers, and participants were amazed at how simple yarn transformed into beautiful, soft blooms. Don’t underestimate the joy of handmade crafts—they’re relaxing, fun, and make thoughtful gifts!
How to make a woolen puff flower
Read More
- How to Make Woolen Door Hangings at Home
- How to make matchstick wall hanging at home
- How to Make Plastic Bottle Wall Hanging (Home Decor)
- How to Make Paper Quilling Wall Hangers For Room Decoration
- How to Make Newspaper Waterfall Showpiece


Lovely