Plastic Cups Amazing Wind Chime Design
Turn those leftover party cups into a whimsical garden feature! I made a rainbow wind chime with my nieces last summer, and the gentle, soft clinking sound it makes is so much more soothing than metal. It’s a fantastic way to add color and movement to your porch while upcycling.
You’ll need: 5-7 plastic cups, acrylic paints, a strong needle, fishing line, a stick or embroidery hoop, and beads.
Let’s create some magic:
Paint & Decorate: Paint your cups inside and out with vibrant colors or patterns. Think gradients, polka dots, or even simple ombre effects. Let them dry completely.
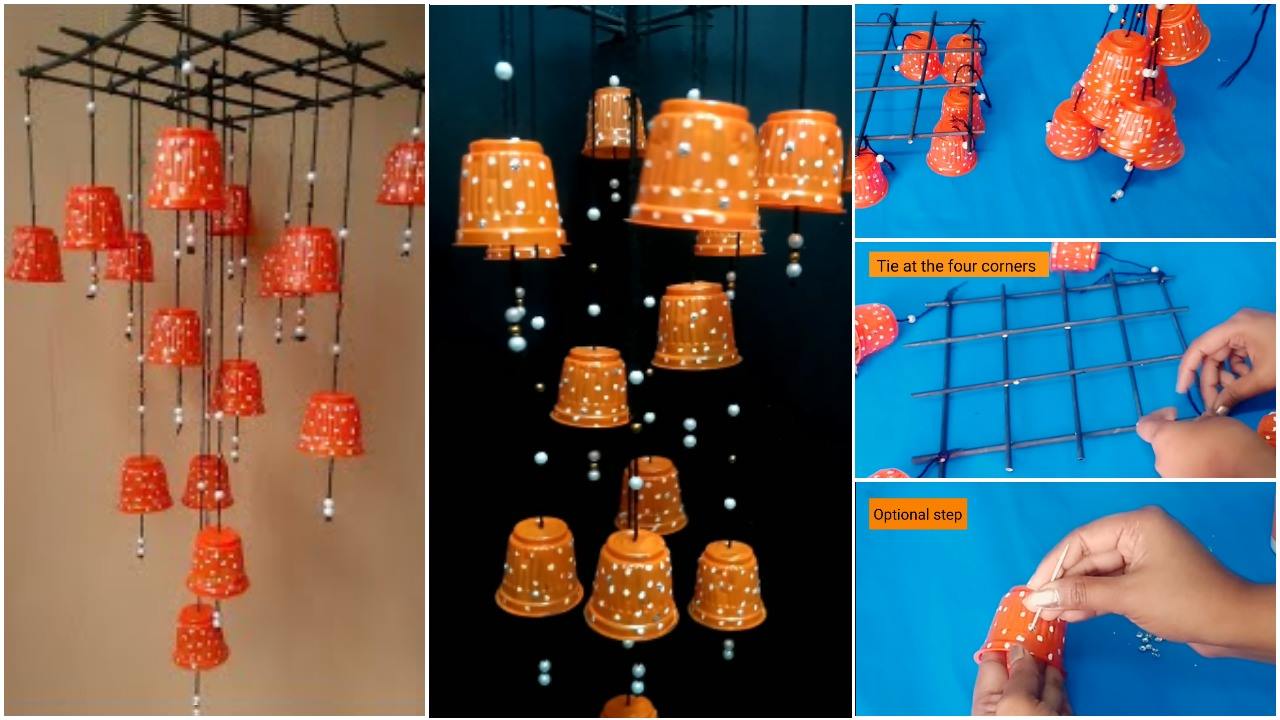
Punch Holes: Use a hot needle or small drill bit to carefully punch a hole in the bottom of each cup. Then, punch two holes on the rim of one cup—this will be your top “hub” cup.
String It Up: Cut different lengths of fishing line. Thread each through a bottom hole of a cup, add a few colorful beads (these will create the lovely clicking sound against the cup), and tie a knot underneath. Tie the other end of each line to your stick or hoop at varying heights.
Hang the Hub: Thread two lines through the top cup’s rim holes and tie them to the stick to create a hanging point.
Hang it up and let the wind do the rest! It’s a cheerful, kid-friendly project that brings joy every time there’s a breeze.
Hi friends, I m with my one more new DIY craft, plastic cup wind chime. Decorate your homes with this idea. Hope you will like it. I love hands on activities with my little child – making something together that I can assist her with and after that set up for others to see and utilize. We made this basic breeze toll for the garden that can be outside amid the late spring months and produces a beautiful pixie sound. These are ideal for some fine engine aptitudes advancement and will look stunning throughout the entire summer. Made out of reused materials it’s amusing to make together and a perfect art venture for either babies or preschoolers.

