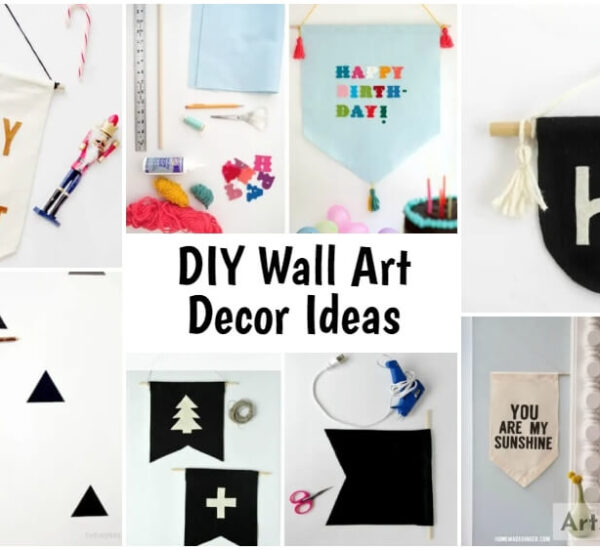
The New Year is a holiday that gives us a truly unforgettable atmosphere. It’s no surprise that children and adults are eagerly awaiting this fantastic celebration! And without which the New Year is absolutely impossible? Of course, without a festive decor! The anticipation of the holiday appears only when Christmas tunes start to sound on the streets, the air fills the smell of tangerines, showcases blossom themed decorations, and thousands of lights are lit on trees and roofs.
Before the onset of the most magical night of the year, you should decorate your house or apartment . In each house or apartment they take out boxes with toys from the mezzanine , hang garlands , arrange thematic handicrafts and installations on the shelves , and for the day or two before the holiday they solemnly install a beautiful herringbone. Nevertheless, one place, which can also be decorated for the New Year, often remains completely unclaimed.
Cardboard and colored paper will create an unforgettable New Year’s decor! Speech, of course, is about the windows! To decorate the windows and window sills, there are many simple but surprising ideas that can present a magical mood to the residents themselves, and to random passers-by. Beautifully decorated windows will not be left without attention of guests and relatives who will come to you on a holiday. In addition, such a decor will give you the most pleasant sensations and increase the degree of mood during the winter holidays.
Naturally, in the shop windows you will find a huge amount of New Year’s attributes, but recently it is fashionable to decorate the house with objects that the owners made with their own hands. And in order that you do not break your head when choosing a New Year’s decor, we picked up the most original ideas and master classes on the use of stickers, the creation of window paintings, the manufacture of stitches and garlands of the simplest materials!
Idea number 1: Decoration of windows with toothpaste
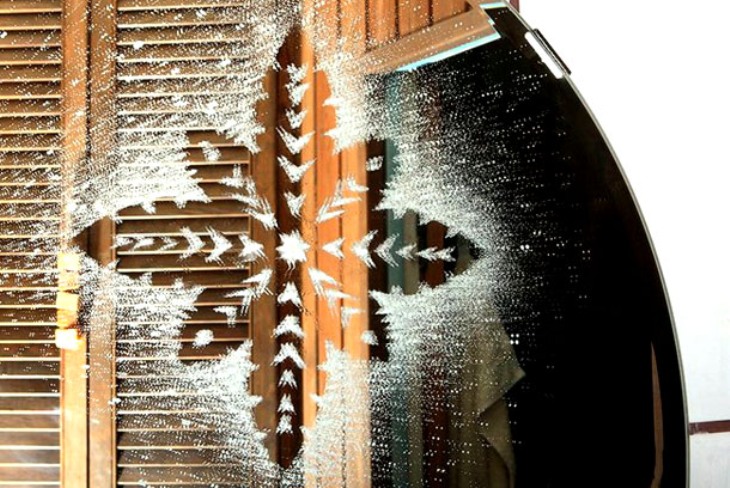 Toothpaste can be issued not only windows, but mirrors in the house The older generation remembers perfectly well that during periods of Soviet deficiency toothpaste was the main tool for creating New Year’s decor. She was painted not only the windows of apartments, but also the windows of schools or kindergartens, attracting children to this fascinating process. It should be noted that toothpaste – a universal artistic material, which allows you to create several types of painting – both ornamental and negative.
At the second kind of a list the drawing is similar to the image of a film, that is, dark, unpainted places become accent. By the way, this is the simplest type of painting, which even a child can easily cope with. Be sure to involve the kids in the process of creating fabulous pictures on the windows! Another positive thing is that after the end of the celebrations you can easily clean the windows from the picture, simply wiping the glass with a wet cloth. Before you getstarted, you need to prepare:
- a foam sponge or an old toothbrush;
- a piece of adhesive tape;
- bowl; water;
- scissors;
- a rag; pencil;
- paper.
Procedure
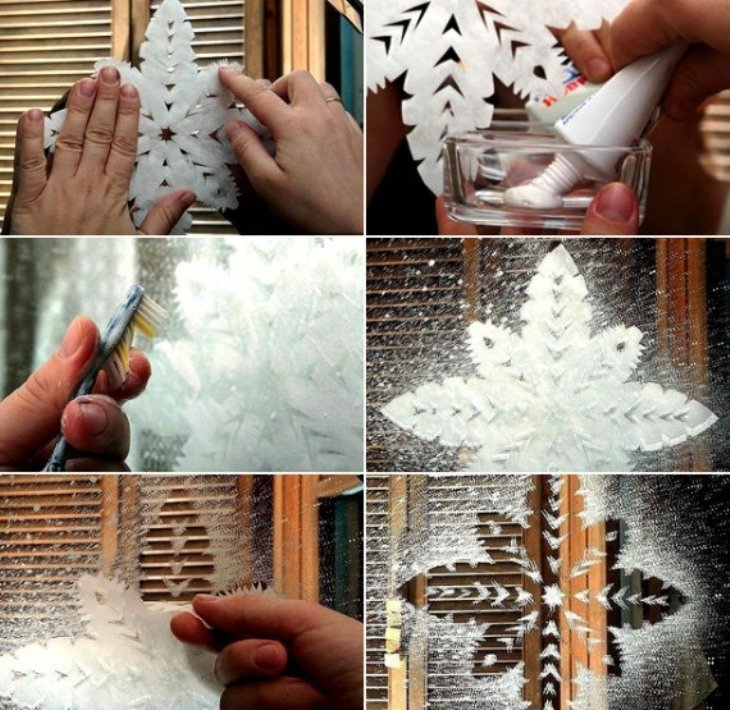
Step-by-step instruction on window decoration with toothpaste
- 1. Download on the Internet several liked stencils of the New Year theme. These can be Christmas bells, snowflakes, deer, penguins, Christmas trees or Santa Clauses. Print the drawings on paper and cut them with scissors. Stencils with small details should first be prepared by shading the pencil of the place, which must be cut out so as not to be mistaken in the process.
- 2. Water the pattern with water, literally for a couple of minutes immersed in a bowl. You can also put the pattern on a flat surface and walk along it with a wet sponge.
- 3. Attach the template to the selected location on the window glass.
- 4. Gently pat the paper with a dry flannel.
- 5. Squeeze the toothpaste into the bowl and dilute with water until liquid sour cream is standing.
- 6. Take a toothbrush, immerse it in a paste, shake it off a bit and, using your finger on the bristles, spray a window in the place where the stencil is stuck.
When the paste evenly covers the window, open the paper. The drawing is ready! You can also use a piece of foam rubber sponge for this purpose – soak it in a paste, shake off excess moisture, and then gently press it against the glass around the stencil.
If you have at least a minimum of artistic skills, you can paint the window manually, but for this purpose you first have to make yourself a brush. To do this, twist the foam in the form of a tube and wrap it with a piece of scotch. It is better to make a pair of brushes with different diameters to draw both large and small parts.
Extrude the paste on a plate, dab your brush and draw fir branches, snowmen, christmas balls and serpentine. When the paste dries, take an orange manicure stick or toothpick and scratch the small details – dots or asterisks on balls, eyes of snowmen or needles on fir paws. By the same principle, you can create window paintings painted with gouache paints or artificial snow from a can.
Idea # 2: Snowflake stickers
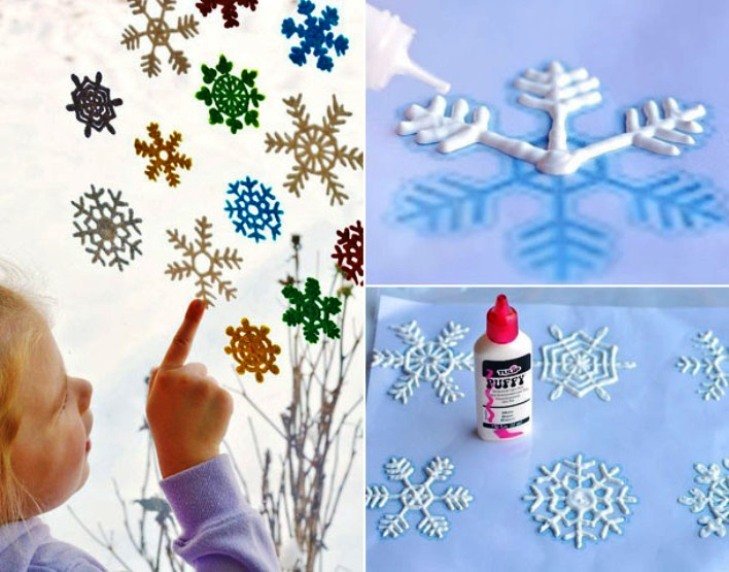
Handmade snowflakes will please children much more! Snowy winter with soft fluffy snowdrifts is the dream of most children and adults. In the end, it is so nice to ride a sled, to make a snowman, to arrange a snow battle, or to go to the forest for a walk! Unfortunately, not everyone New Year pleases us with a snowball, and the slush spoils the whole impression of the holiday. However, you can create a snow whirlwind at home. To do this, you need to decorate the windows with unusual stickers from PVA glue. Who would have thought that from such a simple material an unusual decor could be created? In the afternoon, while it’s light outside, snowflakes seem almost transparent and do not interfere with the survey. But in the evening, when the moonlight or the beams of lanterns falls on the window, it gleams like a real frost! By the way, this decoration can last for several years – it’s enough to remove snowflakes neatly, lay them with paper, put them in a box and send them to a dry place until next year. To make snowflakes, you need to have:
- paper or ready-made cardboard orplastic stencils;
- Strong film or files for papers
- ; a jar of PVA glue;
- a medical syringe (no need for a needle);
- brush;
- glitter (you can use the ones used for manicure).
Procedure
Step-by-step instruction on creating and decorating snowflakes
- Insert the stencil inside the plastic file or place it between the layers of the film. If you do not have a ready-made stencil, select the snowflakes to your taste, print them on paper and put them in a file.
- Circle the stencil lines with glue mass, squeezing it out of the medical syringe with a thick layer. Correct the drawing with a brush. Important: do not get carried away with making lace snowflakes! Small details, most likely, simply merge into a common mass, so choose patterns with simple lines and large curls.
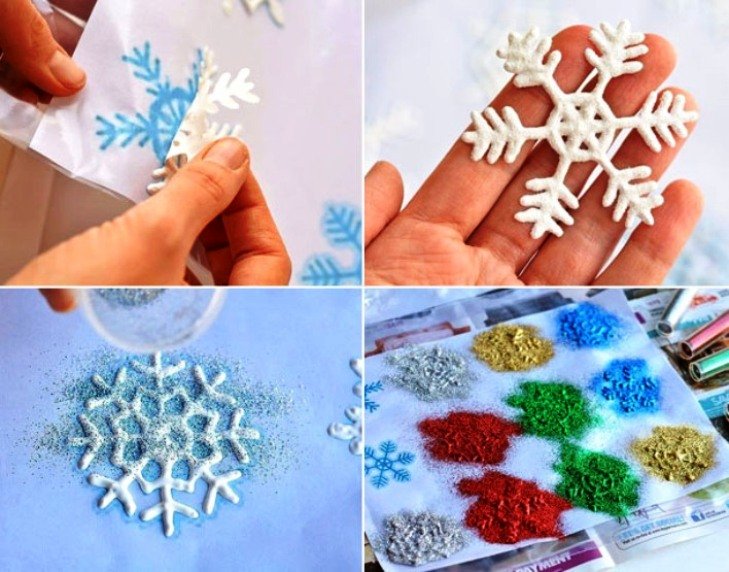
- Gently move the stencil to the sill or to another location located near the heaters. Let the patterns dry out a little. When the glue becomes clear, but not completely dry, remove the frozen snowflakes from the film and glue them on the window.
- For the manufacture of brilliant multi-colored snowflakes, repeat all the stages of manufacturing, just before sending it to dry, sprinkle the blank with multicolored sparkles.
Idea # 3:Cutting out for windows

An example of a window decorated with Christmas decorations Vytynanki are silhouettes of paper or cardboard sheets with which you can create amazing composition scenes. A little patience – and you have on the windows will be settled fabulous little animals, snowmen and Santa Claus! Each window will become a real picture, which can be watched for hours. We have collected for you a few nice vytynanok, each of which will look great on the glasses. Before proceeding with their manufacture, make sure that:
- sheets of white paper;
- a simple pencil;
- stationery knife;
- brushes; soap;
- sharp scissors (suitable for those that are in the manicure set)
- a small sheet of smooth plywood;
- tweezers.
Procedure
Examples of beautiful New Year theme sketches
- 1. Save your favorite pictures from the Internet or draw the ones that you like. Make a printout of the drawings.
- 2. Paint all small details with a pencil so as not to be mistaken when cutting out the template.
- 3. Carefully cut all the excess beyond the picture. Remove the parts that must be empty. The smallest pieces should be removed with tweezers. Large parts can be cut with a clerical knife, placing a piece of plywood under the cutout.
- 4. Arrange the pictures on the table to add the final picture-panel.
- 5. Pour water into the bowl. Dilute the soap so that a strong solution is obtained.
- 6. Take the patches, soak them with a soap solution, and then glue it on the window, transferring the picture-panel from the table to the glass.
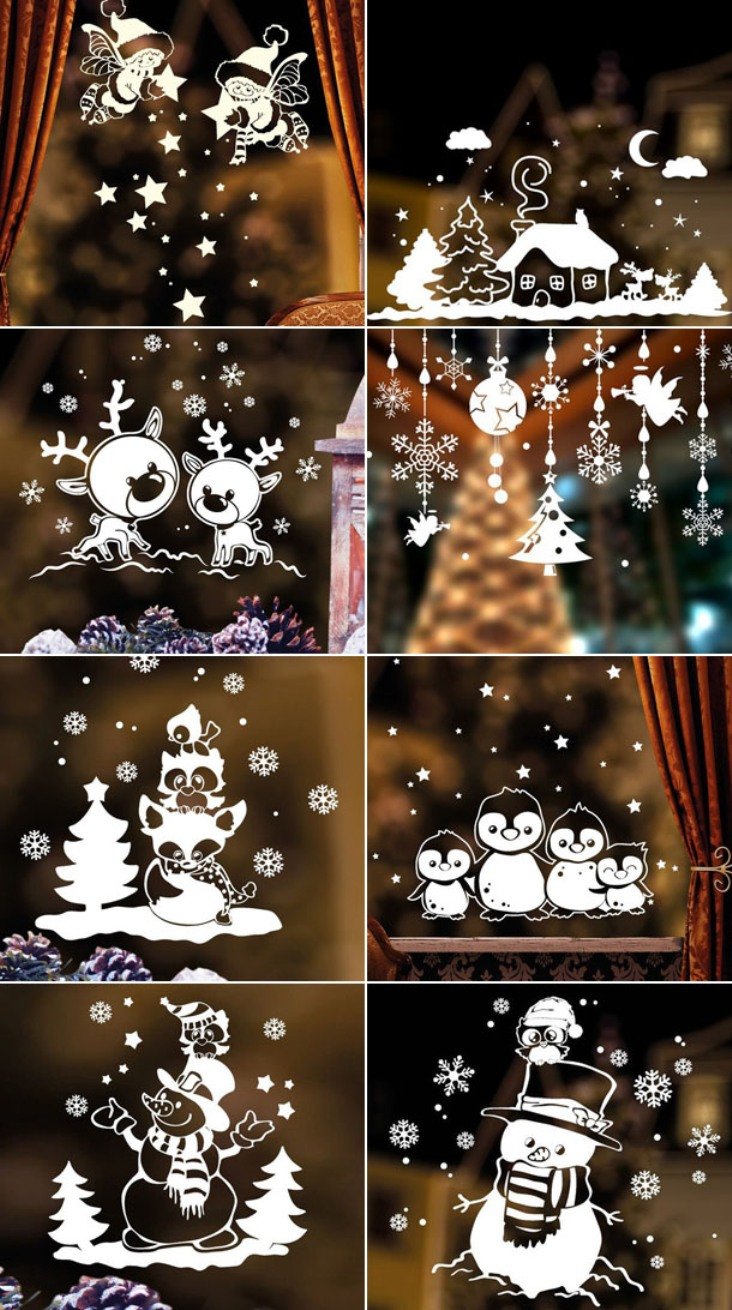
Idea # 4: Stickers on windows Stickrse

in A3 or A4 format will quickly decorate any window! The simplest and colorful version of the New Year decor is stickers that will help you decorate the glasses with funny thematic characters. Of course, such pictures need to be glued to the room in order to smile every time, glancing at the window. Now in it will look lovely Rudolph, lovely snowmen, amusing penguins or kind Santa Claus. Of course, you can use ready-made labels by buying them in the store. However, now in every city there are copy-centers that provide a service for printing drawings on paper-self-adhesive. You can just download the picture in good quality, and then carry it for printing.

Do not worry that you can not get rid of the windows after the holidays! Simply warm the sticker with a warm air jet from the hair dryer, remove it, and then wipe the place with a cotton swab soaked in a liquid to remove the varnish. If you are afraid of “grandfathering” methods, then just buy a stationery store for the removal of stickers, and then wash a greasy place with soap or a means for washing glasses.
Idea # 5: Decorating with candles
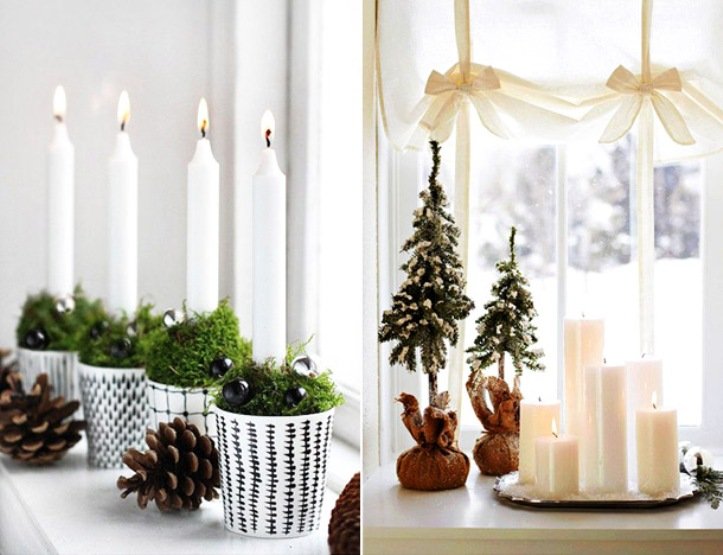
Window-sills can be decorated with candles and natural materials Candles are always associated with us with warmth and comfort, so that they are the best fit for creating a festive mood. Of course, it is completely impossible to describe all kinds of candle decor. Fortunately, having understood the basic principle, you can easily create yourself. So, you will need:
- candles;
- fir cones;
- artificial moss;
- several small Christmas balls;
- paper;
- glasses.
Procedure
- 1. Take paper cups without decor or with a laconic drawing (any geometric pattern will do).
- 2. Fold the sheets of paper into tight lumps;
- 3. Place a long candle in the center of the glass and firmly fill it with paper, trying to keep the vertical position of the candle.
- 4. Spread the artificial moss and Christmas tree decorations on top of the glasses.
- 5. Put the candles on the windowsill, arrange the fir cones and light the lights.
Candle-tablets can be placed in glass cups with fragments of small twigs on the bottom. Fill the containers with water and gently lower the candle – and the candlestick is ready! If you do not have glasses at hand – it does not matter, you can simply install 7-9 different candles on the decorative tray, combining thick and thin, long and short candles in random order. This installation looks great on the windowsill.
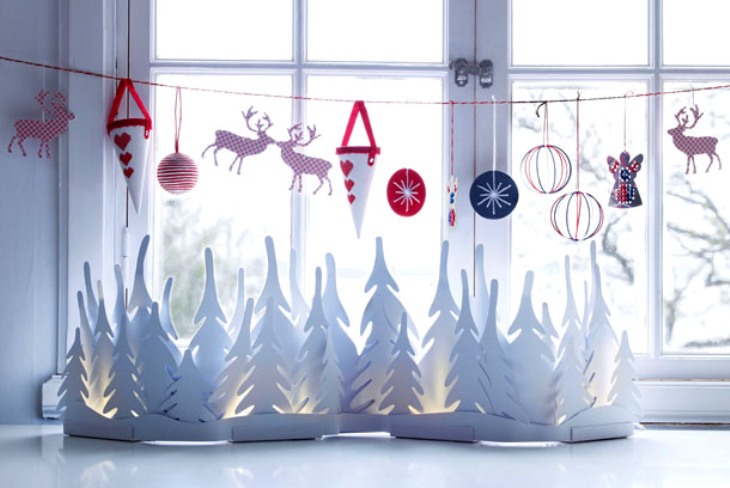
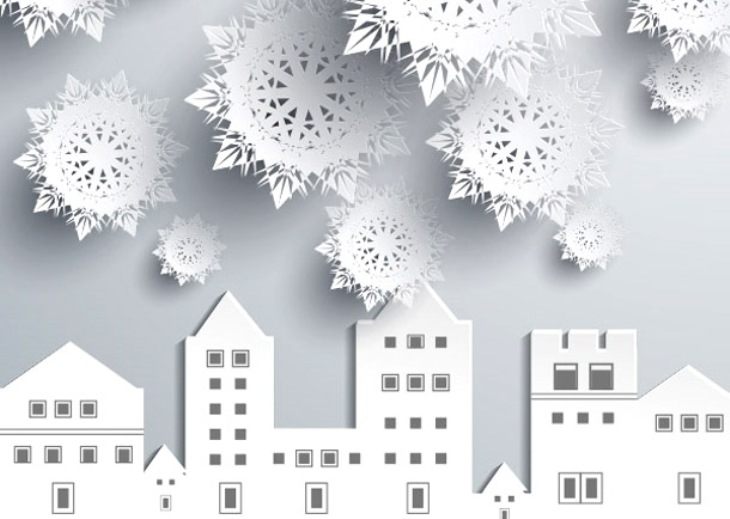
Idea number 6: Fairy-tale houses
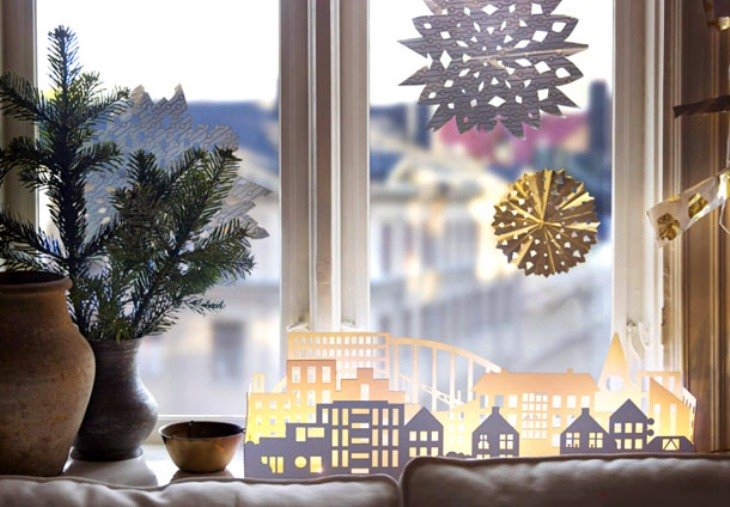
Paper town with a fabulous backlight from the garland What can emphasize the spirit of the New Year better than the fairy-tale town on your windowsill? An uncomplicated hand-craft will bring to your home an atmosphere of real magic and, undoubtedly, will attract the gaze of all guests and domestic. To make such a panoramic composition you will need:
- scissors;
- stationery knife;
- cardboard or paper;
- glue; small candles or
- a garland with light bulbs.
Procedure
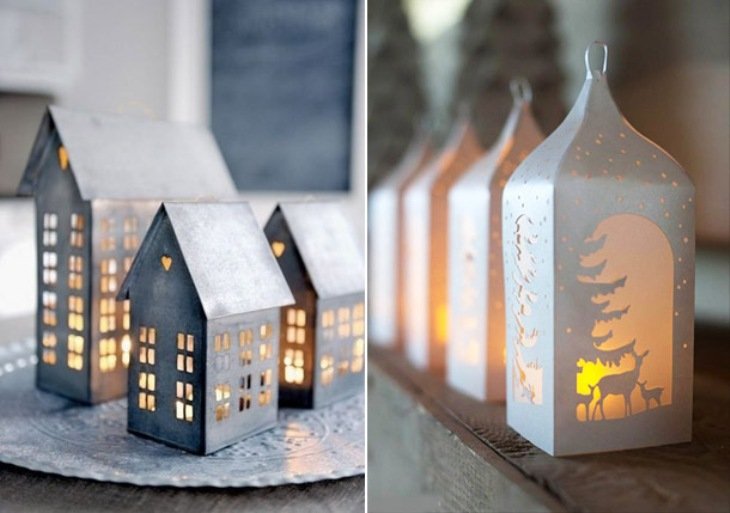
Instead of a large craft, you can make several “single” houses
- Find in the network schematic images of houses – it can be both cute huts, and a template of a real megalopolis with high-rise buildings. Print out the houses on paper. You can transfer the templates to a denser cardboard sheet.
- Cut large parts with a knife, and small ones with scissors. To begin with, it’s better to take layouts with simple geometric shapes. Particularly attentive to the windows of buildings – this is the most important part of the craft.
- Glue the house so that an elongated rectangle is formed. In the foreground is to place more low buildings, and on the back – high-rise buildings. So the craft will receive volume and perspective.
- Place the hand-crafted item on the window, and inside put small candles or LED garland (so safer). On dark winter evenings the town will delight you with the comfort of lighted windows.
An unusual town can be made from gingerbread houses – they can be bought at New Year’s fairs of masters or baked on their own, decorating with multicolored glaze. Such compositions can be supplemented with garlands, snowflakes or stickers-stars suspended from the cornice.
Idea # 7: Napkin

Decor Snowflakes from napkins can be pasted over the entire surface of the window Ornaments made from office paper or napkins are the simplest and most budgetary version of the New Year’s window decoration. The first thing that comes to mind when it comes to cutting out jewelry from paper is snowflakes, because they are still glued to the windows of houses, offices, kindergartens and schools.
You can make the decoration more interesting, having scissors, paper and twine under your hands. To do this, you need to download the snowflake templates, print out and cut out the decor elements, string them on a string or a fishing line, and then attach to the cornice. With every breeze blowing in the room there will be a real snowfall! Also, snowflakes can be attached to a garland, glued to the wires with a double-sided adhesive tape. So they will be beautifully highlighted in the evenings.
Paper snowflakes on the window can be supplemented with houses and figurines of people By the way, in addition to snowflakes, you can cut a lot of other figures, so that you have in your house appeared soaring deer, Santa, Christmas balls and other thematic figures, creating a New Year mood. Do not want to hang the figurines on the line? Then just glue them to the glass with a soap solution! Do not miss the creative ideas of New Year napkins yourself.
Idea # 8: Fire in the forest

A garland of bulbs, fixed on the branches, will create a magical effect LED garland – an integral attribute of any winter celebration. The soft light of bulbs fills the house with comfort, forcing the heart to beat in joyful anticipation of the holiday. Of course, garlands are good in themselves – they are enough to hang on a Christmas tree or cornice to complement the decoration of the house with a bright decor. But you can show a little imagination and come up with a completely unusual decoration, which will be made quite easily. For an improved garland of mini-bulbs you will need:
- garland;
- twigs with a large number of branches;
- board;
- thermo gun.
Procedure
- Take a flat board with a width of 10-20 centimeters. If desired, zadekoriruyte her artificial snow. The length of the board should be approximately equal to your window sill. Mark the places for attaching the branches. If there is a suitable tool such as a drill or at least a chisel, make small holes.
- Apply mass from the adhesive gun and attach the sticks to the board.
- Wind the garland on the branches and admire the lights in the forest!
You can use garlands and when creating thematic installations. For example, if you have a decoration with star lamps, you can create a Christmas scene on the windowsill by putting a nursery with the baby Jesus, Virgin Mary, Joseph, animals and magicians, and above them hang bright stars. Or make a starry sky over a small village of cardboard. See also other ideas of New Year’s garlands .
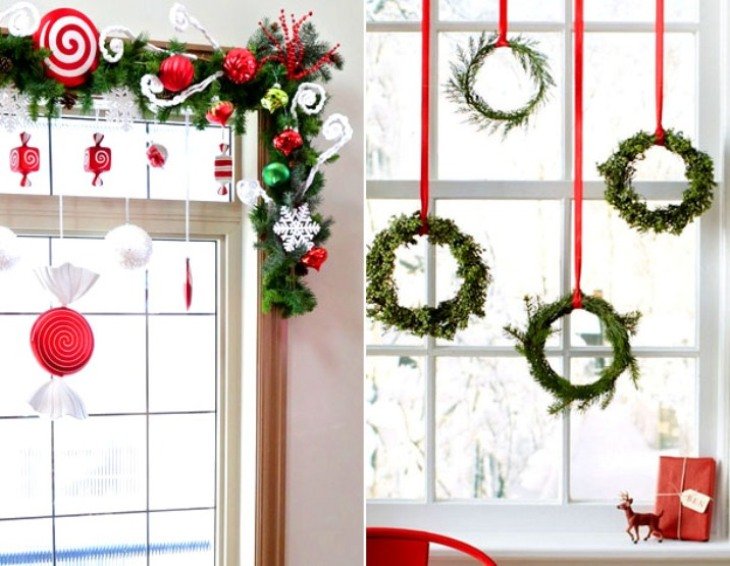
Idea No. 9: Compositions of pine needles

New-year wreaths can be made from a variety of natural materials! Traditional decor can not do without the compositions of fragrant pine needles, filling the house with an incredible aroma. The easiest option is to make small wreaths and hang them on the windows using bright satin ribbons. To make this decoration, you need to prepare: spruce twigs (you can supplement them with branches of thuja or juniper); thermo-gun; wire (thick and thin); twigs of the viburnum; New Year’s balls; beads.
Procedure
An example of minimal appearance of windows with the help of twigs of needles
- Take two pieces of thick wire and bend them so that there are rings of different diameters (the difference should be about 3-4 centimeters)
- Rewind the rings diagonally with a thin wire to make the framework of the future wreath. Make a fastening from a long piece of tape.
- Disassemble the twigs into bundles and attach them to the wreath, overlapping each other.
- Add small cones, balls, beads, rosehips or viburnum, attaching the decor with a thermo-pistol.
- Cut a piece of ribbon and tie a lush bow, attach it to the top of the wreath.
By the way, spruce wreaths can not only be hung on the cornice, but simply placed on the windowsill, and inside this decoration it is worth placing a thick candle.
Idea 10: Garlands of cotton wool

Step-by-step instruction for making garlands of pieces of cotton wool Decor for window openings can be made from the simplest items that are in every house. For example, from cotton wool. To make a garland you need to prepare a large number of cotton balls, roll them to make denser and thread on a long line, hung in the window openings. Alternate snowballs with snowflakes from napkins – so your craft will become airy, and the apartment will have the illusion of falling snow flakes.
Idea # 11: Garlands-plafones from glasses
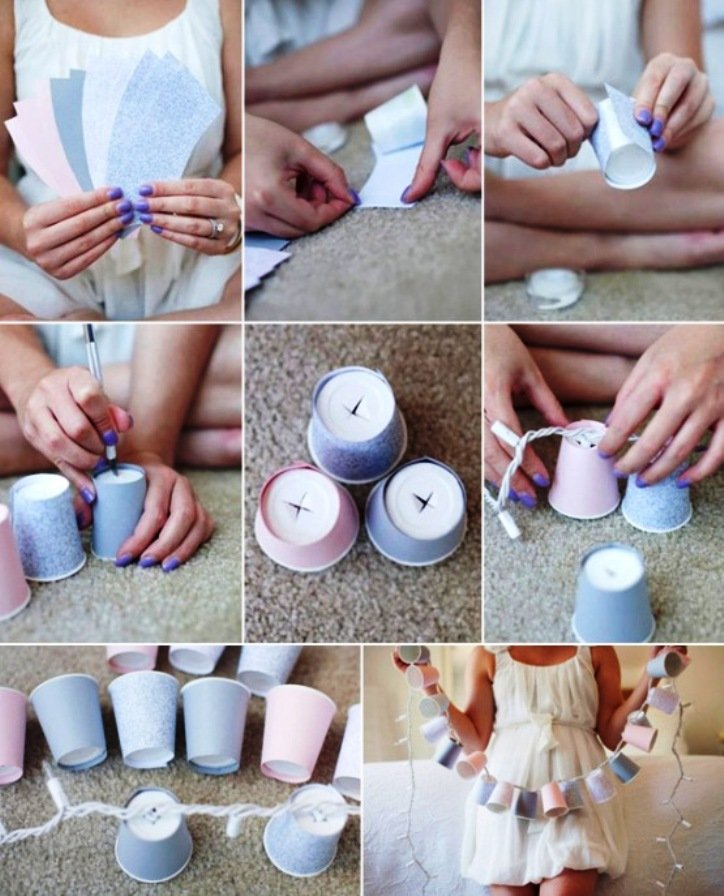
Master class on the creation of a decorative glowing garland You can also make unusual decorations from paper cups, making cross cuts (criss-cross) in the bottom with a stationery knife. Then insert the light bulbs into the holes and attach the garland to get the original plafonds. If you do not have suitable cups of paper, you can do the same manipulation with plastic cups. In this case, you will need to decorate them with an unusual decor – these can be strips of colored paper or ordinary napkins with a pattern, set on the glue.
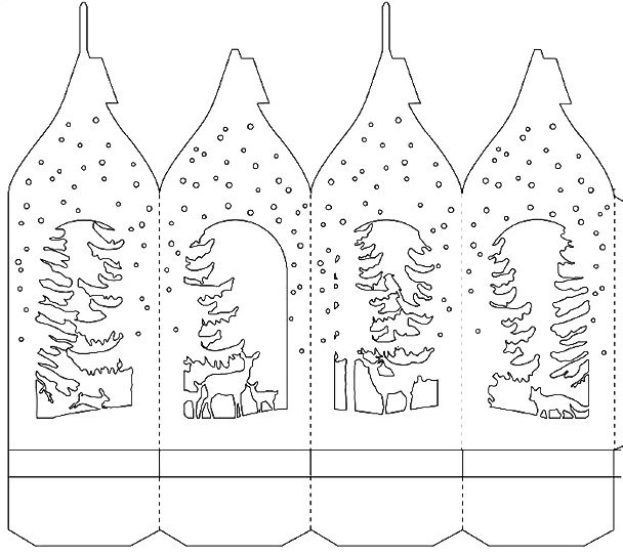
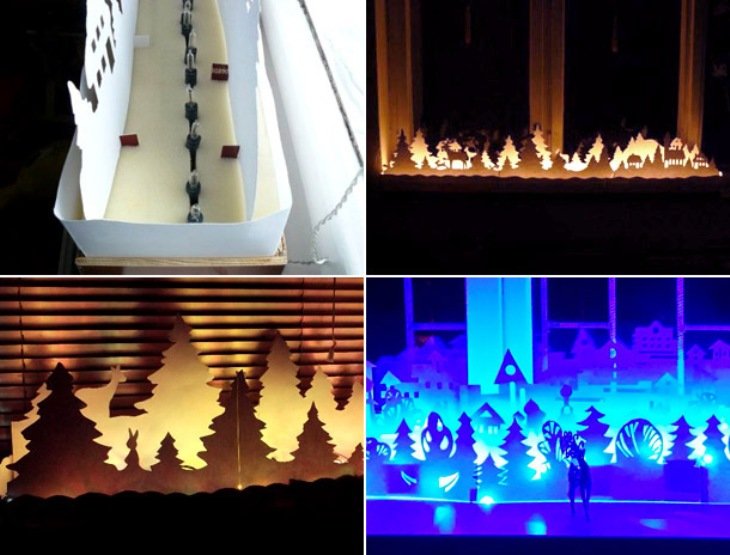
Idea # 12: Panorama with a winter forest and animals
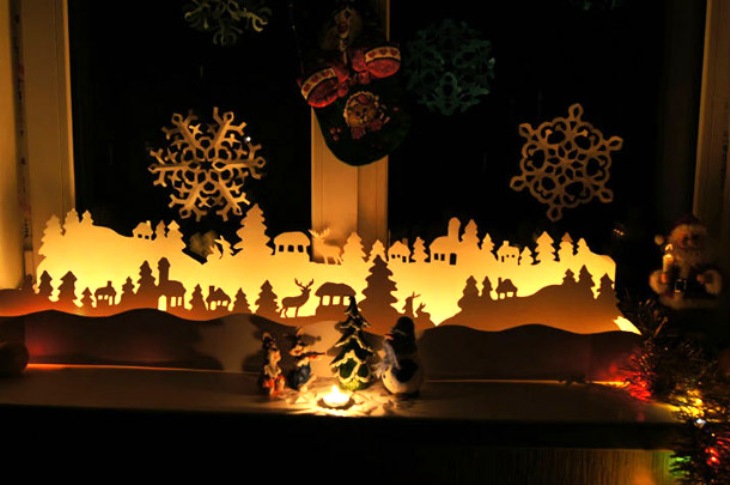 Multidimensional paper panorama for Christmas and New Year We have already told you how it is possible to make a fairy-tale village or a city sparkling with lights on the window-sill, but this does not end with panoramic articles. On the window you can arrange a magical glade-panorama with Christmas trees and little animals. For work you will need:
- paper;
- scissors;
- pencil;
- a garland of LED bulbs.
Procedure
Manufacturing of paper installation with LED garland:
- Glue several sheets of office paper so that their total length is equal to the length of the window sill. Do 2-3 such blanks, so that the panorama had several layers.
- Find and download pictures on the New Year theme – Christmas trees, bunnies, bears, penguins, snowmen or deer are perfect for this purpose.
- Cut out the stencils and transfer them to the paper strip, placing the drawings continuously for each other. Before drawing, step back from the bottom edge of 5-6 centimeters and bend the sheet so that the panorama can then be placed on the windowsill.
- Arrange the panoramas on the window so that the figures are higher (for example, trees), located near the window, and lower – stood on the edge of the windowsill.
- Lay between the layers an LED ribbon or a garland with lights and light it to get a real fairy tale on the window.
DIY Step by step Christmas Tree Crafts for Kids to Make

Read More
- How to make a homemade pendent Lamp
- Reuse old pants convert it into jacket (Tutorial)
- Printed designer kurtis and tunics
- 11 Step by step puff hairstyle tutorials
- How to make bag from old jeans