Ready to add gorgeous, braided texture to your knitting? The Cable Plait is your next must-learn stitch. It looks complex but I promise, it’s just a series of simple crosses. Don’t be intimidated!
The Key Concept: You’re temporarily holding stitches to the front or back to change the order you knit them in, creating that classic twist.
Abbreviations: C4B (Cable 4 Back), C4F (Cable 4 Front)
Simple 8-Stitch Plait Tutorial:
Row 1 (Right Side): Purl 2, Knit 4, Purl 2.
Row 2 (Wrong Side): Knit 2, Purl 4, Knit 2.
Row 3 (Cable Row!): P2, C4B (slip next 2 sts to cable needle & hold at BACK, k2, then k2 from cable needle), p2.
Rows 4, 5, 6: Repeat Rows 2, 1, and 2.
Row 7 (Cable Row #2): P2, C4F (slip next 2 sts to cable needle & hold at FRONT, k2, then k2 from cable needle), p2.
Repeat these 8 rows. See? The twist happens every few rows, and the rest is just simple knits and purls. Now go grab some yarn and make a swatch
Cable Plait Stitch Tutorial
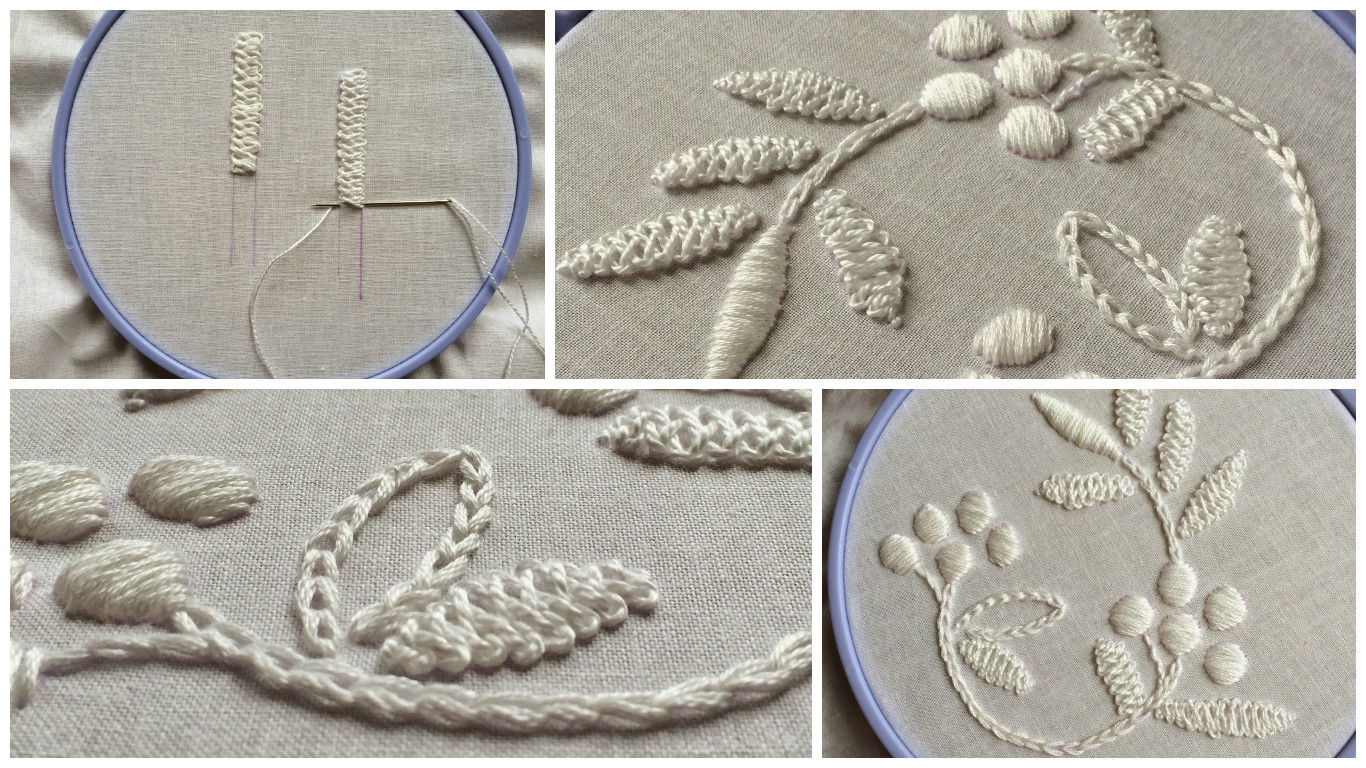
embroidery is the Cable Plait Stitch (aka Braid Stitch).
I drew two lines to help guide my stitching and practiced with two types of floss.
DMC floss on the left and #5 pearl cotton the right.
I really like this stitch. It isn’t too difficult to learn and I think it has great texture.
Stitches Included: Cable Plait, Chain and Satin Stitch.
The leaves are pearl cotton and everything else is stitched with DMC floss.