
In this case, the product without a belt, on the obtuse on top. If with a belt, we do all the same, but the upper section of the slope does not hone. So, on the left in the center there is a crook. I have it cut off, the outer edge of it is swept. On the right of the slope, it is double, it has an internal edge trimmed, on top and bottom it stands.

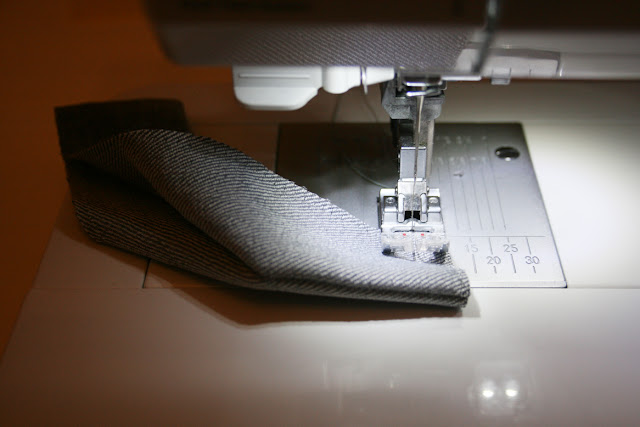
Slope double with fold, shorts cuts and bottom to stitch from the inside, turn and iron. The remaining untreated section should be swept.
On the slope we impose a zipper in the edge of the edge, the corner of the braid-zipper is bent inward, then it will hide.

Because the product is with us with a clasp on the female side, the middle section of the left shorts bend at the width of the marking and iron, we put under it our slope with a customized clasp, pins perpendicularly with pins.

We spend it in the edge.

Codpiece is sharpened to the right side

We disable the allowances

And we squeeze the inside out, forming a margin of 0.2 cm from the main part

We outline the alignment line, which is equal to the width of the allowance along the seam of the seat ie 1cm.

We attach and pin the upper part of the fastener to it.

We turn the whole thing to the opposite side and pin the free side of the tape of the lightning to the gulphic (the main part under the bouffant is not pinned)
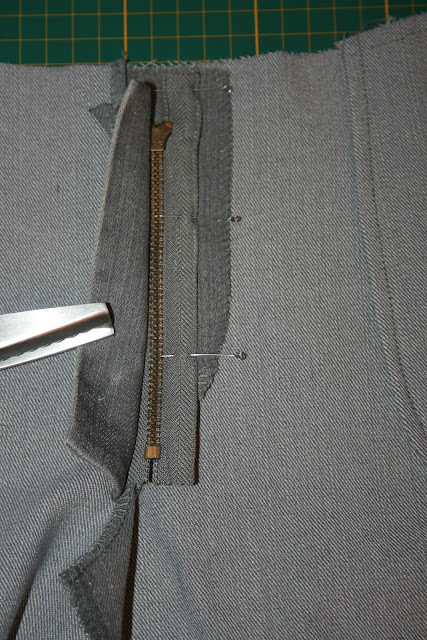
We bend and pour the lightning on the edge of the tape.

At the top of the slab we cut out the buttonhole,

preferably in advance.
Further, we have not left the cuts of the middle seam underneath the clasp.

Stitching with a centimeter suture

Leading a line on the joint of the one that is located above.

We grind and otstrachivaem (if conceived on the model) rear seat seam, in the same direction as the front closure.

In front, the middle seam is also otstrachivaem, if provided by the model.

We grind the step seams, combining the lines.
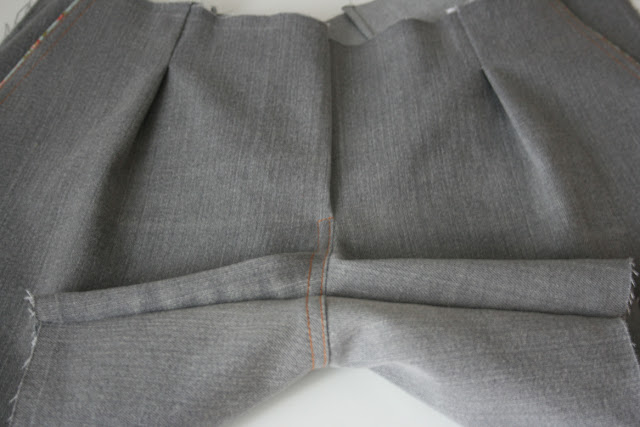
Prepared waist obtilation is pinned perpendicularly with needles and pritachivaem.

We bend upwards and impose on the front side both allowances for obtachku on 0.2 cm

Then we cut to the line the allowance of the top cut of the product itself, i.e. the detail from which it is necessary to form the edge.

Priutyuzhivaem upper cut, I recommend preliminarily sweep the allowance.
A short section of the side facing is sewn with secret stitches to the allowance of the cup.
Sew the button.

We lay on the front side of the finishing line at 3-3.5 cm. It is better to do this in two stages: first straight parallel to the bottom up with the clasp open, then rounded down with the zipper closed.

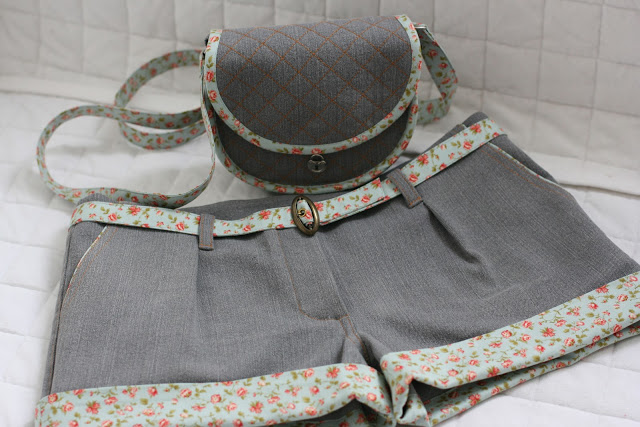
Done. General view from the inside.

And the general photo
DIY Sewing Tutorial :Guide on How To Make A Weighted Blanket
![]()
- How To Make Pillow Cover Without Sewing?
- How to make small sewing basket at home
- How to make round shaped Handbag at Home / Cutting And Sewing
- How to Make Sewing Machine Cover from Cardboard
- How to Make Sewing Machine Cover


