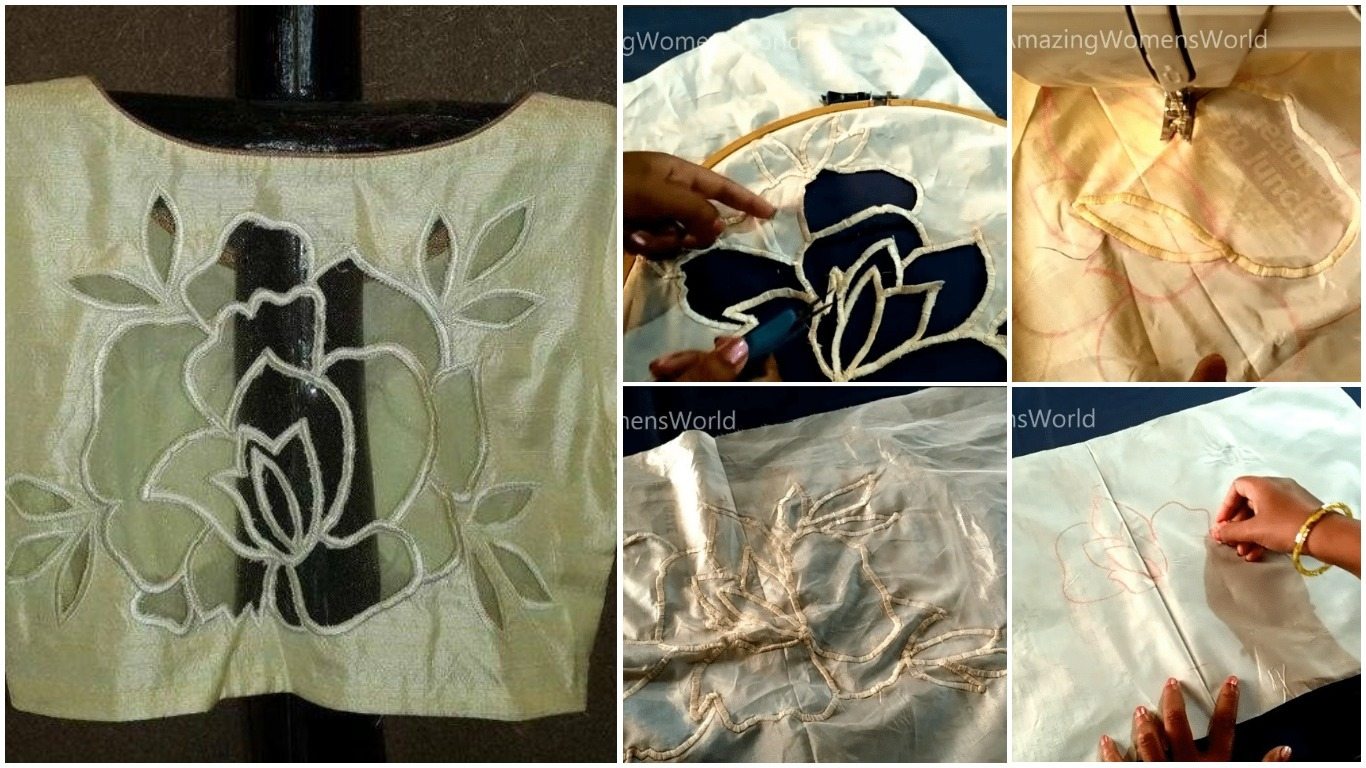
How to Do Rose Cut Work for a Blouse
Rose cut work is that gorgeous, dimensional floral appliqué you see on high-end blouses. It’s easier than it looks, but it requires a patient hand. I remember a client brought in a plain net blouse, desperate for a “wow factor.” We chose a deep wine-colored fabric for the roses, and the result was stunning.
The Basic Process:
Design & Trace: First, sketch your rose design (start with a simple, spiraled circle) onto the right side of your appliqué fabric (think satin, chiffon, or velvet).
The “Cut Work” Part: Here’s the key: you don’t just cut it out. Using a small, sharp pair of embroidery scissors, carefully cut around the traced design, leaving a 2-3 mm margin of fabric. Then, you gently fray this margin inward toward your traced line. This creates a soft, petal-like edge that’s integral to the technique.
Attach It: Position your prepared rose onto your blouse fabric. Using a matching thread and a fine needle, use a nearly invisible slip stitch or a very tight blanket stitch to secure the frayed edge down. Don’t pull too tight, or you’ll lose the dimension!
Pro Tip: Layer different sizes and colors of roses for a truly luxurious, garden-inspired effect. It’s a timeless technique that instantly elevates any ensemble.
Rose cut work for blouse