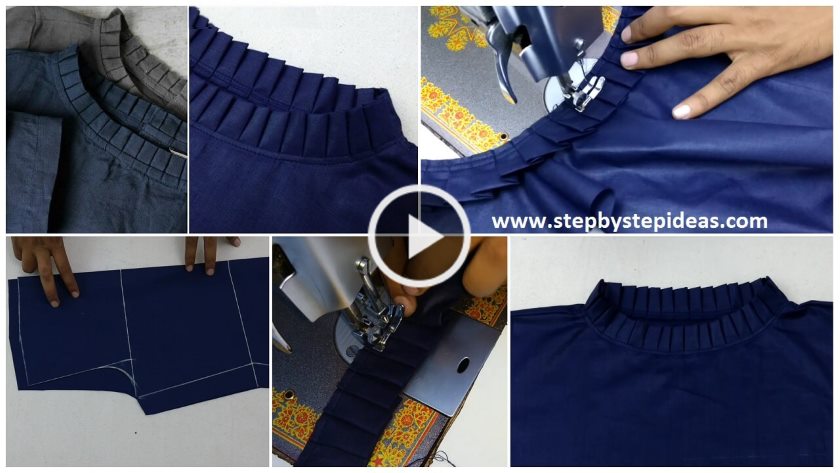
Beautiful Neck Design (Boat Neck) Cutting and Stitching:
That sleek, wide neckline that graces the shoulders is called a boat neck, and it’s my absolute favorite for creating an instantly elegant silhouette. It looks complex, but I promise, it’s one of the simplest necklines to draft and sew! The key is all in the finishing.
Why It Works: A boat neckline widens the shoulders, creating a balanced, poised look. It’s incredibly flattering and perfect for showing off a statement necklace or pair of earrings.
The Simple Drafting Trick:
Modify Your Pattern: Take your basic front and back kurti pattern pieces. On the front, measure down about 1 inch from the original neckline at the center front. At the shoulder point, measure in 2-3 inches.
Draw the Curve: Connect these two points with a gentle, smooth curve. This is your new cutting line! Repeat for the back pattern piece, though you can keep the back neckline slightly higher for a better fit.
The Pro Finishing Touch: Do not just fold and stitch the raw edge! This will look homemade. For a clean, professional finish that lies perfectly flat, you must use bias binding.
Cut a strip of bias tape (store-bought or self-made).
Pin it to the right side of the neckline, sew along the seam line, fold it over to the inside, and understitch or edge-stitch to secure.
This method gives you that crisp, ready-to-wear look every time. It’s a game-changer!
Read More
- Different types of kurtis design cutting and stitching
- Beautiful Beads Neck Design For Kurtis ( Cutting And Stitching )
- How to Make Long Rambo Skirt From Wasted Cloth Tutorial
- Stylish And Unique Neck Design Cutting And Stitching
- Latest and unique neck design cutting and stitching