Fuel your child’s imagination with this captivating cardboard roll and paper rocket craft tutorial. Blast off on a stellar DIY adventure that ignites their creativity and wonder about the cosmos.
Embark on an out-of-this-world adventure with this captivating cardboard roll and paper rocket craft tutorial for kids. Unleash their inner astronaut and fuel their imagination with this engaging DIY project.
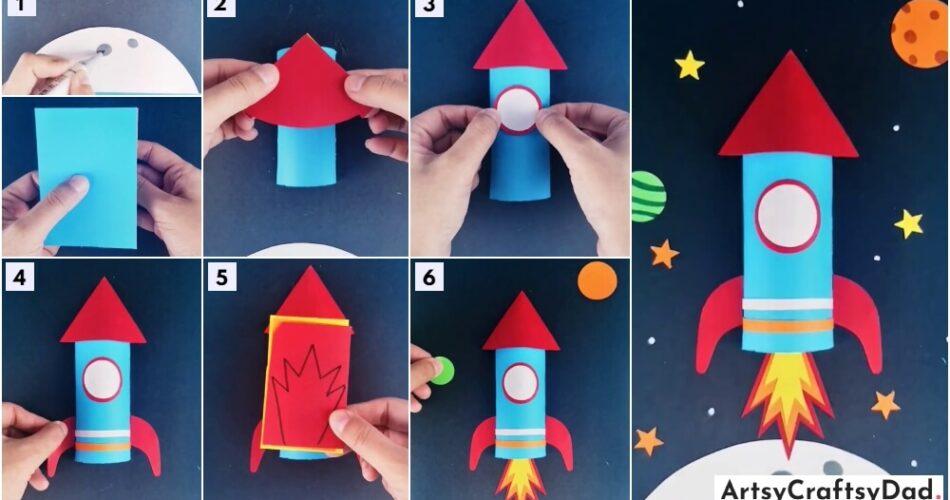
Paper Rocket Craft Tutorial For Kids

Must Read: How to make thread stand using cardboard roll and nails reusing
Supplies & Tools
- Sheets( Blue, Red, Green, Yellow, Orange, White)
- Glue
- Scissor
- Pencil
- Grey highlighter
- Orange highlighter
- Green highlighter
- Cardboard
Cardboard Roll & Paper Rocket Craft Instructions
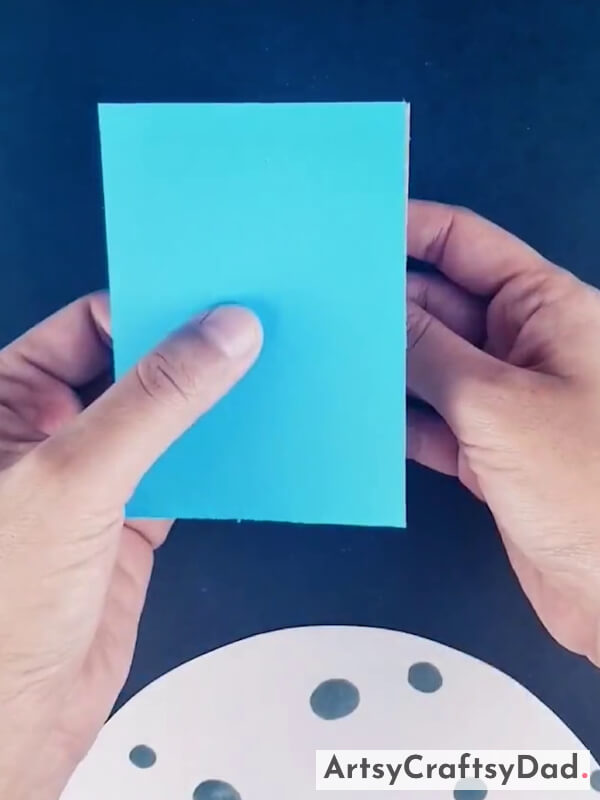
Step #1: Begin With The Base

First, take a dark blue sheet and then use a white sheet cut it into a semi-circle, and paste it at the bottom of the blue sheets.
Step #2: Make Dot To The White Sheet

Now, make dots on the white sheet with the help of a grey marker.
Step #3: Take A Cardboard Roll

Now, take a cardboard roll and use a scissor.
Step #4: Cut It From The Middle

Then, cut the cardboard roll from the middle.
Step #5: Use A Blue Sheet
Now, use a blue sheet to cover one part of the cardboard roll.
Step #6: Roll The Sheet
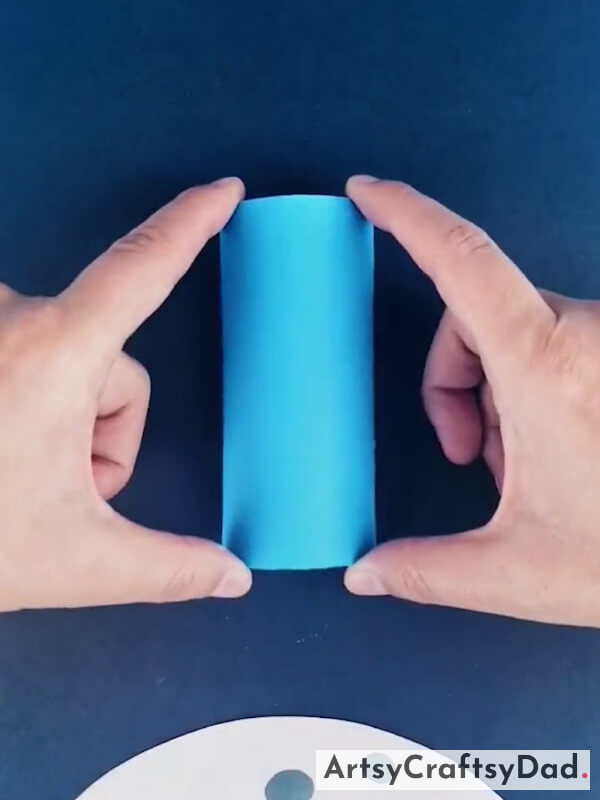
Now, paste the cardboard roll on the base sheet.
Step #7: Use A Red Sheet

Now, use a red sheet and cut a cone shape with it.
Step #8: Paste On The Blue Roll
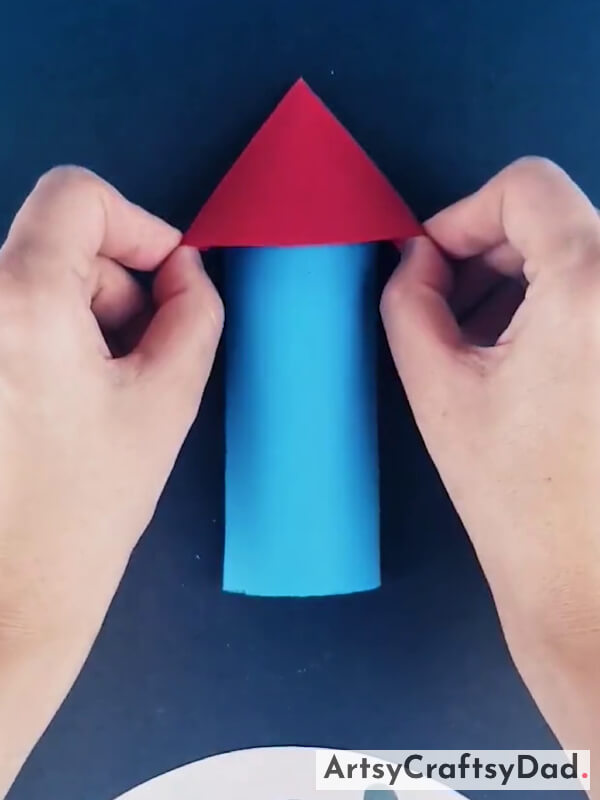
Then, paste the cone shape sheet at the top of blue roll.
Step #9: Paste Another Design

Then, use a red sheet cut a circle then use a white sheet cut a circle but smaller than the red one, and then paste the white circle above the red circle and both that design on the blue roll in the middle.
Step #10: Add Strips On The Roll

Then, add strips on the roll, add a white and an orange strip at the bottom of the roll.
Step #11: Add The Landing Wheels
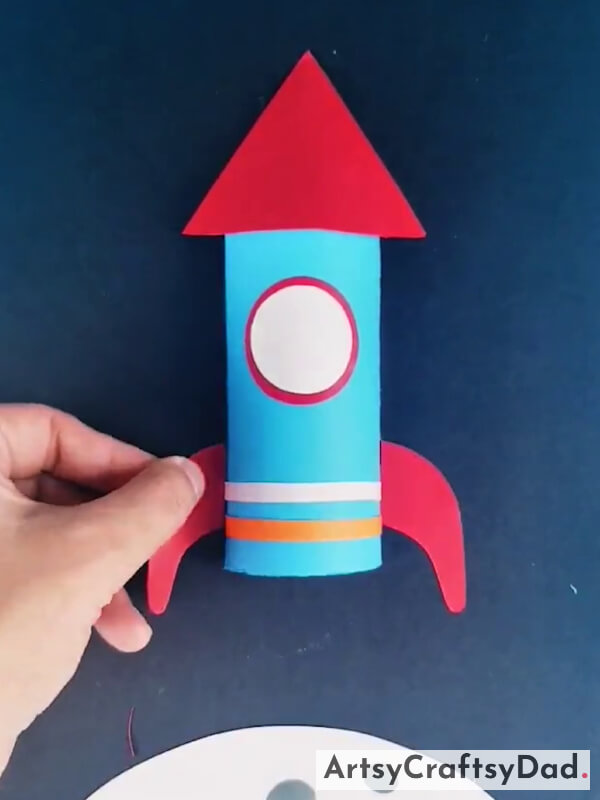
Now, use a red sheet and make two landing wheels and paste the wheels on both sides.
Step #12: Use A Yellow, Orange, And Red Sheet
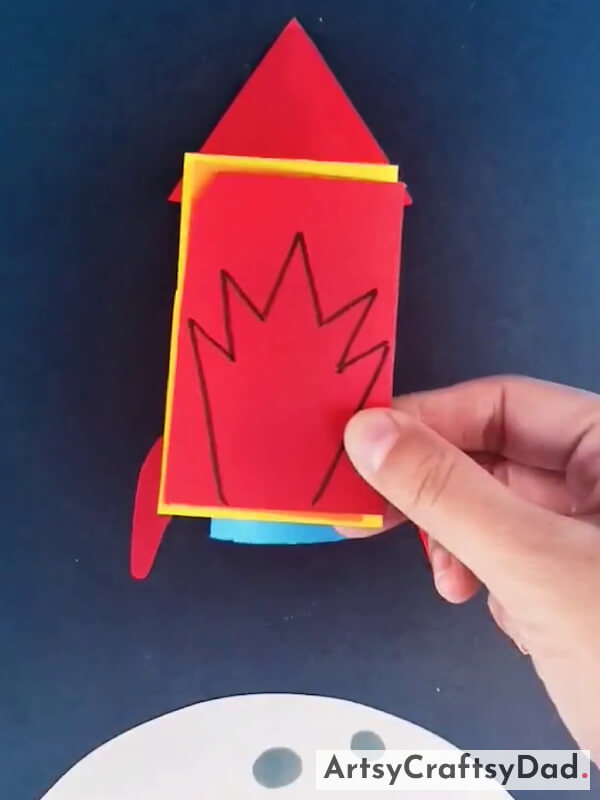
Now use a yellow, orange, and red sheet, in the red sheet make a design of fire.
Step #13: Cut And Paste The Design
Now, cut the design with the help of scissors and paste it at the bottom of the blue roll.
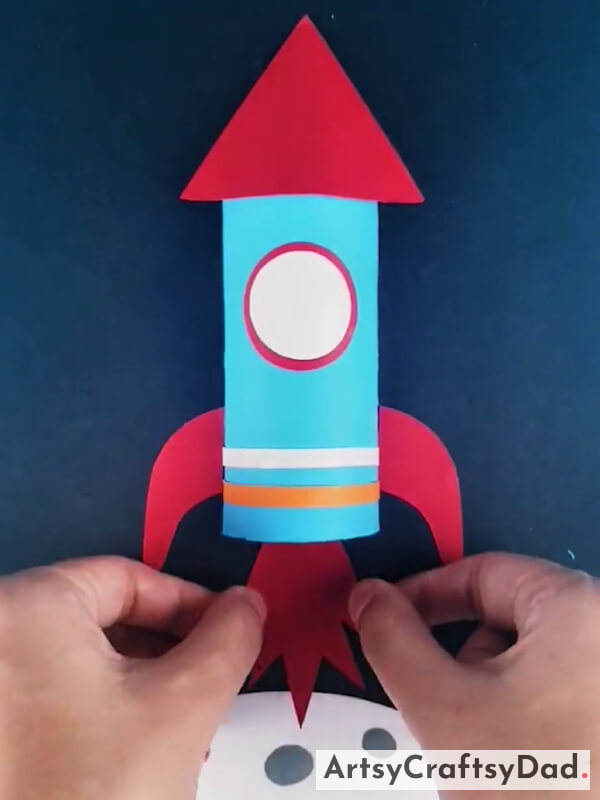
Step #14: Complete The Fire Design
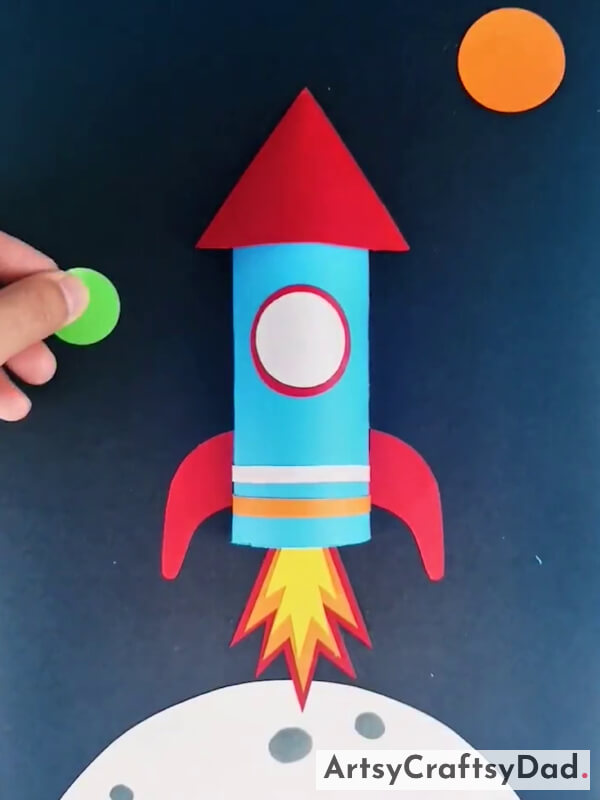
Now, for completing the fire design I am adding yellow and orange sheets cut out as same as the red one but smaller than the other, and paste one above the other. The sequence would be red, orange, and yellow. Later take the two sheets green and orange cut the circle shape and paste the green circle on the left side and the orange circle on the right side.
Congratulations! Your Awesome Cardboard Roll & Paper Rocket Craft Is Ready

At the end, add some stars which are made of the yellow and the orange sheets. put some white dots on the blue sheet use an orange highlighter to put some dots on the orange circle and use a green highlighter to draw green lines on the green circle as shown in the above picture.
Finally! Your craft is ready.
This cardboard roll and paper rocket craft is a stellar way to spark your child’s creativity and curiosity about the cosmos. Blast off on an unforgettable crafting journey with this step-by-step tutorial.
You Might Also Like This
- Learn To Make Rocket Toys for Kids
- 3D Cardboard Pacman Craft Tutorial For Kids
- Awesome Origami Paper Craft Projects For Kids
- Awesome 3D Lily Paper Flower Craft Tutorial For Beginners
- Adorable Fish Plate Art & Craft Tutorial Using Cardboard For Kids


