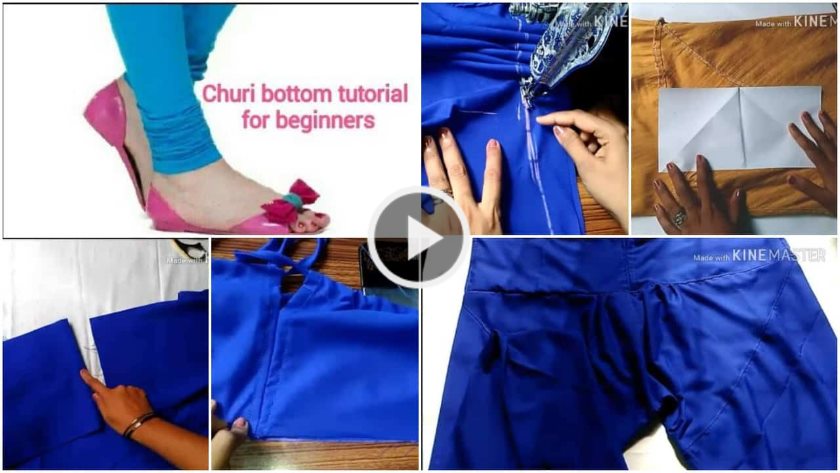
Churi bottom cutting and stitching for beginners – step by step (Tutorial)
That perfectly gathered, ankle-hugging finish on a churidar can seem mysterious, but I promise, it’s one of the easiest alterations you can do. The key is all in the cutting and a simple running stitch.
First, the cutting (it’s not just straight across!):
Try On & Mark: Put on the churidar and have a friend pin the excess fabric at your ankle, so it fits snugly. Take it off and turn it inside out.
The Diagonal Cut: This is the secret! Instead of cutting straight, place your scissors at the pinned point on the inner seam and cut on a slight diagonal upwards towards the outer seam, about 4-5 inches up. This diagonal cut prevents the bottom from being too tight and allows for comfortable movement.
Leave a Hem Allowance: Don’t cut right at the pin line. Leave at least a 1-inch allowance for your hem.
Now, for the stitching:
Fold & Press: Fold the raw edge inward by ¼ inch, press, then fold again by ¾ inch to encase the raw edge. Press well.
The Gathering Stitch: Thread a hand-sewing needle with strong thread (double it up). Starting from the inner seam, take a small running stitch (in-and-out) all the way around the new hemline, about ¼ inch from the fold. Do not backstitch; leave long thread tails.
Pull & Secure: Gently pull both thread tails to gather the fabric until it’s the tightness you want. Tie the threads together in a super secure knot. Stitch the hem down by hand for an invisible finish. And you’re done!
Different types of pant cutting and stitching

Read More
- Trending palazzo pant’s bottom designs cutting and stitching
- Beautiful and trending palazzo pant’s bottom designs
- Beautiful and trending plazzo pant cutting and stitching
- Beautiful and trending plazzo pant’s bottom designs
- How to make floor mat recycling old pant