How to Make a Jewellery Box from a Recycled Ice Cream Cup
Don’t throw away those empty plastic ice cream cups! With a little creativity, they can be transformed into the most charming little jewellery boxes. I made one for my niece to store her tiny trinkets, and she adored the personal touch.
You’ll need: A clean plastic ice cream cup (the kind with a lid), fabric or decorative paper, mod podge, a paintbrush, and any embellishments you like (buttons, rhinestones, lace).
Let’s decorate:
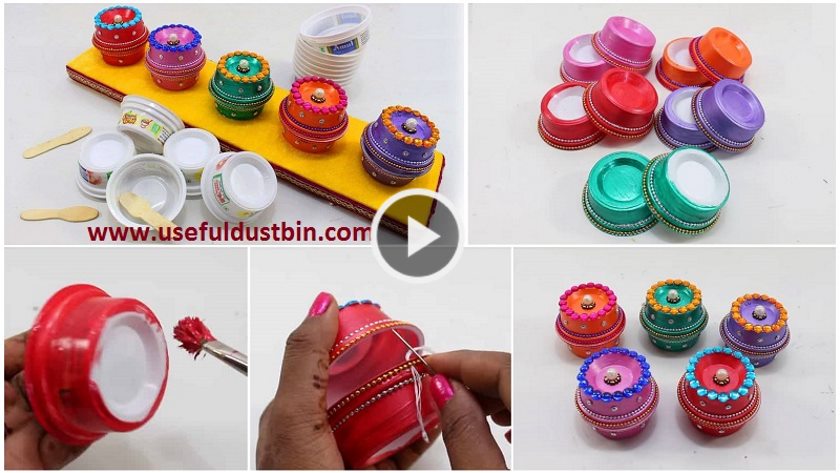
Base Coat: If your cup has logos, paint the outside with a base coat of acrylic paint and let it dry. This prevents the print from showing through your paper.
Measure & Cover: Measure the height and circumference of your cup and lid. Cut your chosen fabric or paper to size. Use mod podge to adhere it to the outside of the cup and lid, smoothing out any air bubbles.
Seal & Embellish: Once the glue is dry, apply a top coat of mod podge over the paper to seal and protect it. This gives it a nice finish. Now, glue on your embellishments! A ribbon around the rim, a pretty button on the top, or a layer of lace can make it look vintage and beautiful.
It’s a sustainable, cute, and incredibly satisfying way to organize your small treasures.
Jewelry Box is essential for every woman to keep her jewelry safe and free of any harm. Apart from this, it saves large quantities in the form of solving jewelry and we can easily find them. Many people have a habit of separating their jewelry into different boxes, while others just leave behind them. Here we will make a jewelry box using recycled ice cream cups. Are you surprised to hear this? Well, this is true and easy to make but definitely will fulfill your purpose. In addition, it is easy to handle and can be stored and adjusted at any place without any difficulty. Wherever you travel, you can also take it along with the box.
Learn To Make DIY Jewellery Organizers
You’ll also like:
- How to make desk organizer – Easy tutorial
- Handmade Patchwork for designer kurti
- How to make peacock lamp using clay for home decor
- How to make fairy water fountain – Easy tutorial
- How to make decorative flowers made of felt for brooches

