I remember making these for my mom years ago, and it’s still one of her favorite decorations. This project is surprisingly easy and creates a lasting keepsake.
You’ll Need: Colored craft paper (or old book pages!), scissors, glue, a small photo frame (remove the glass).
Steps:
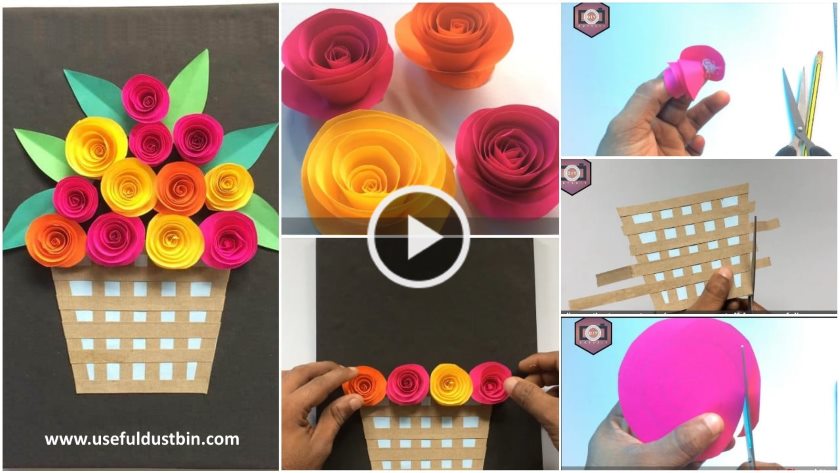
Cut Petals: Cut a series of petal shapes in graduating sizes—from small to large. Don’t strive for perfection; irregular petals look more natural!
Shape Them: Use a pencil or your fingers to curl the edges of each petal outward. This gives them dimension.
Build the Bloom: Start with the smallest petal, rolling it tightly to form the center. Gradually glue larger petals around this center, layering them and slightly overlapping as you go.
Secure & Display: Once your rose is complete, glue it directly to the frame’s backing board. You can add leaves or even a stem. Pop it back into the frame, and you have a gorgeous, 3D piece of art that will never wilt!
How To make Rose Flower with Frame | Home Decor | Best idea | DIY Paper Craft | wall decor -Dots DIY

Required Material:
- Craft paper
- Scissor
- Scale
- Fevicol
- Pen
- Thermocol
- Cardboard
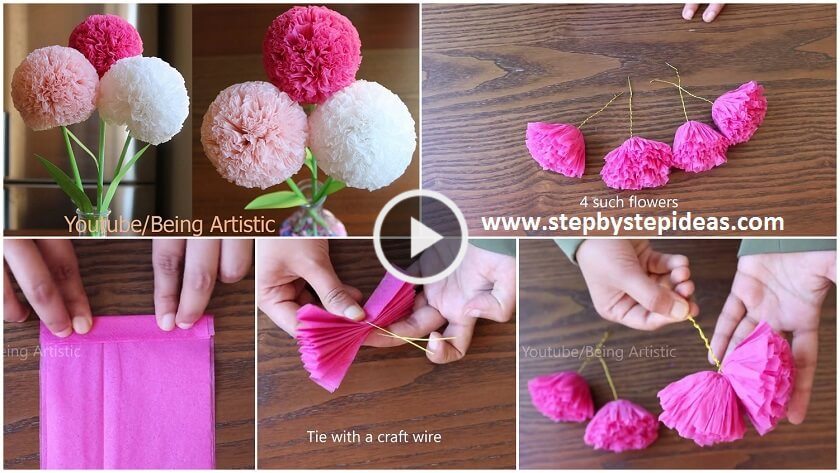
How To Make Round Tissue Paper Flower – Tutorial
Read More
- Amazing Diy Using Newspaper And Rice Make A Flower Vase
- Daisies of twine – Flower Craft Tutorials
- How to make a Paper Flower Vase – Paper Craft Tutorial
- How to make a Bouquet Flower Pop-up Card
- How to Make Beautiful Earrings of Glass Flower


