How to Make a Wall Hanging Paper Flower
Paper flowers are my secret weapon for adding a permanent pop of color to any room. I made a large, dramatic hibiscus for my living room wall, and its vibrant petals never wilt! They’re surprisingly easy to make and look incredibly realistic.
You’ll need: Colored cardstock or crepe paper, scissors, a hot glue gun, and a button or bead for the center.
Let’s create a bloom:
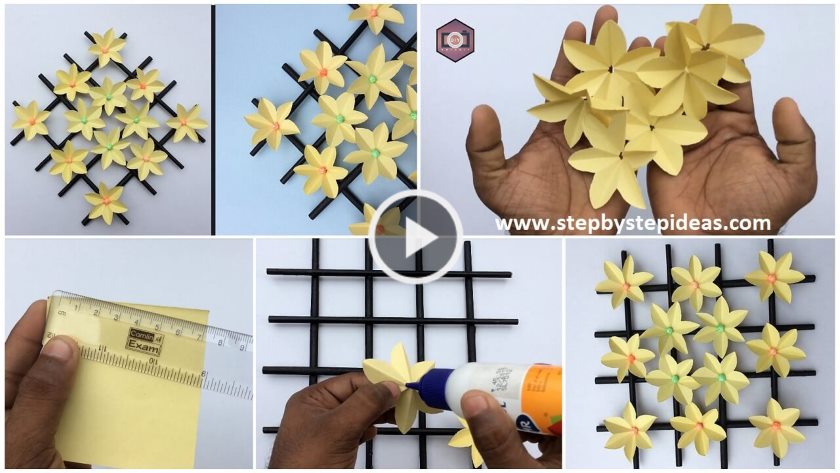
Cut Petals: Draw and cut out 5-6 identical petal shapes from your paper. For realism, gently curl the edges of each petal over a pencil.
Shape the Flower: Take one petal and put a dot of glue at its narrow base. Overlap the next petal slightly and press it on. Continue until all petals are glued in a circle.
Add the Center: Glue a button, a cluster of beads, or a small pom-pom in the middle of the flower. For extra detail, cut out a few small leaf shapes and glue them to the back.
Hang It: Glue a loop of string to the back of the flower for hanging.
Group several flowers of different sizes and colors together on a wall for a stunning, low-cost botanical statement.
How to make Wall Hanging Paper Flower | DIY Hanging Flower | Home decor | Wall Decoration ideas By Dots DIY. When you order paper flowers from PaperFlora each flower is attached to a sturdy backing. To hang the flowers, I suggest using Command Strips. They are sturdy, long wearing and won’t damage your walls just follow the product directions.
How To Make Wall Hanging Paper Flower
DIY Beautiful Flower Bouquets – Step by step
Read More
- Christmas Tree Ornament – Button Felt Snowman (Tutorial)
- Christmas Crochet Stars Appliques And Shamrocks (Tutorial)
- Christmas decorations with paper molds for cupcakes
- How to Paint Mug for Christmas like Festival
- DIY Origami Flower for Christmas Decoration

