Don’t throw out those bland biscuit tins! With a little creativity, they become gorgeous, personalized storage solutions. I’ve made dozens for my craft room, and they’re not only functional but also beautiful decor pieces. Here’s my simple, step-by-step process.
Gorgeous Storage Tins Ideas
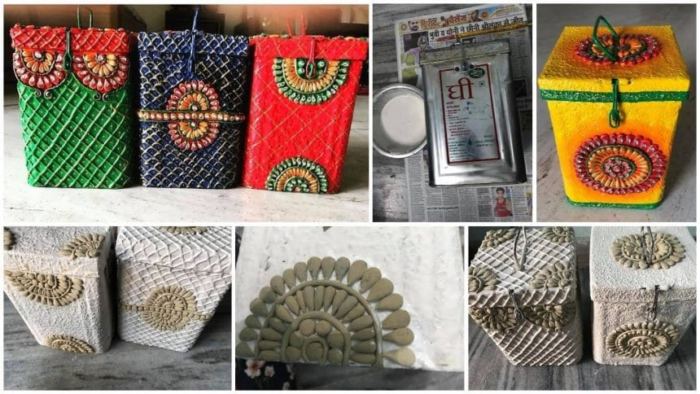
hing and drying your tin. Remove any labels and residue. I then give it a light sanding and a coat of gesso or white acrylic paint primer. This helps your materials adhere better.
Choose Your Decor: This is where you get creative! My go-to materials are:
Decoupage: Use pretty napkins or patterned tissue paper. Separate the layers and use just the top printed one.
Fabric Wrap: Cut fabric to size and use Mod Podge to glue it on smoothly.
Paint: Use acrylic paints for a solid color base. Add patterns with stencils or washi tape for clean lines.
Adhere & Seal: Apply a thin layer of decoupage glue to the tin, carefully smooth your chosen material on top, and remove any air bubbles. Once dry, seal everything with 2-3 coats of Mod Podge, letting it dry between layers. This protects your artwork and gives a professional, finished look.
The Final Touch: For a truly elegant touch, I love hot-gluing a ribbon around the lid’s edge or adding a small knob to the top for easy opening.
The detailed procedure of making these gorgeous storage tins is here now.
Read More
- Designer sleeve pattern with pin tucks and dori gathers
- Innovative Rangoli Designs for special occasion – Step By Step (Tutorial)
- How to make neck embroidery design with tassels
- Pani work designer neckline for kurti
- How to make cool stools from old tires
- Neckline Embroidery for Dress


