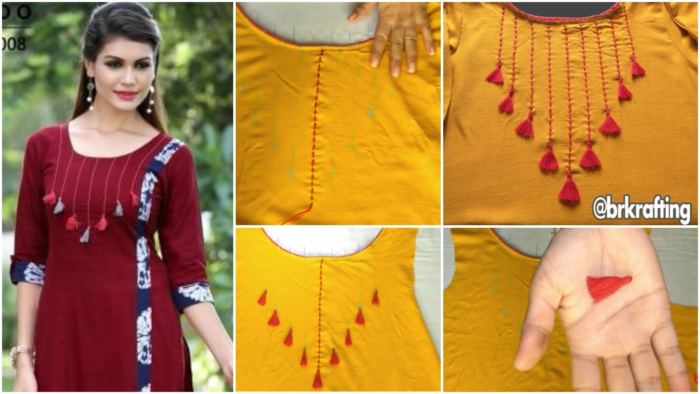
Kurti Neck Design: Cutting, Stitching & Embroidering
A beautiful neckline can transform a simple kurti into a statement piece. In my experience, the foundation is a clean cut and precise stitching—the embroidery is the icing on the cake.
The Process Simplified:
Cutting: Always draft your neckline pattern on paper first. Pin it to your folded fabric and cut carefully. For beginners, a simple round neck or V-neck is easiest to master. Remember to add a seam allowance!
Stitching: After joining the shoulders, finish the raw edge of the neckline with a serger or zigzag stitch. The cleanest method is to attach bias binding or a facing. A facing is a piece of fabric cut to match the neckline that is sewn on, turned inward, and pressed flat for an invisible finish.
Embroidering: This is the golden rule: Always complete your embroidery before you assemble the kurti. Hoop just the front panel where the neckline is. This prevents stitching through the back layer and keeps everything smooth. For a cohesive look, mirror a small part of the design on the cuffs.
How to make kurti neck cutting stitching and embroideries designs
Read More:
- How to make neck embroidery design with tassels
- Pani work designer neckline for kurti
- How to make cool stools from old tires
- Neckline Embroidery for Dress
- How to make organizer from plastic bottle