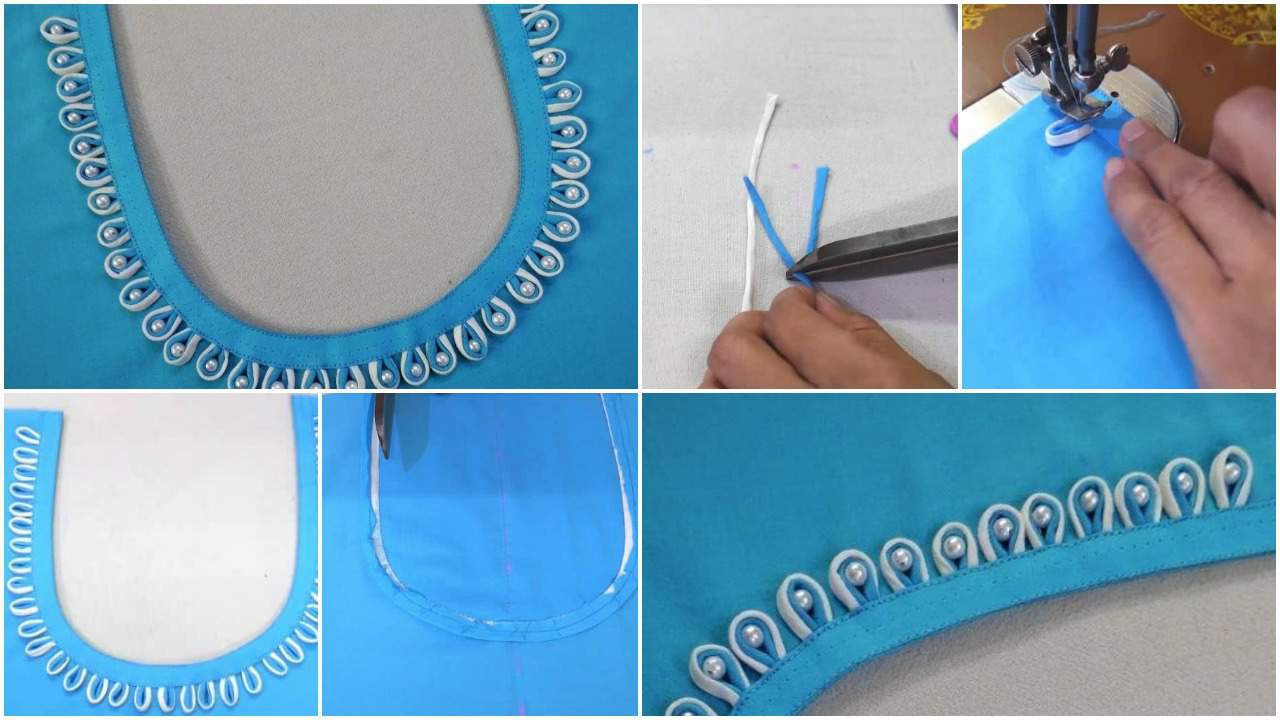
A Very Unique & Easy Neck Design: The Twist Front
You don’t need to be a master tailor to create a unique neckline. One of the easiest ways to add a designer touch is with a twisted detail.
The Easy Twisted Halter:
Cut the Front: For the front neckline, cut a deep V or a sweetheart shape.
Create the Twisted Straps: Instead of standard straps, cut two long, wide strips of fabric. Twist each strip tightly and pin them to the front of the bodice at the apex of the neckline.
Attach: Bring the straps around your neck and attach them to the back bodice. You can tie them or sew them for a fixed look.
This simple technique creates an intricate-looking detail that is surprisingly easy to achieve and adds instant high-fashion appeal to any blouse or dress.
Want a neckline that looks complex but is secretly simple? Let’s talk about the Twist Front design. I used this on a plain black jersey knit top, and it instantly became the most complimented piece in my wardrobe. The best part? It involves minimal cutting and relies on clever stitching.
Here’s the incredibly easy way to do it:
Cutting: First, cut your front bodice piece as a single, wide rectangle—don’t cut a neckline at all! For a standard size, cut this piece about 24-26 inches wide (instead of the usual 18-20). The extra width is what creates the twist.
Creating the Twist: With the fabric right-side up, grab the top-left and top-right corners. Simply cross them over each other once, as if you’re starting to tie a knot. Adjust the twist until it lies flat against your chest—this becomes your new, unique neckline.
Stitching: Pin the twisted section securely in place. Then, stitch along the armholes and shoulders as you normally would, catching the twisted layers in the seams. The center will naturally form a beautiful, cascing cowl.
It’s a zero-waste technique that works brilliantly with stretchy fabrics like jersey or knit, so you don’t even need a zipper!
In this post I will show you very unique neck design cutting and stitching in easy way.