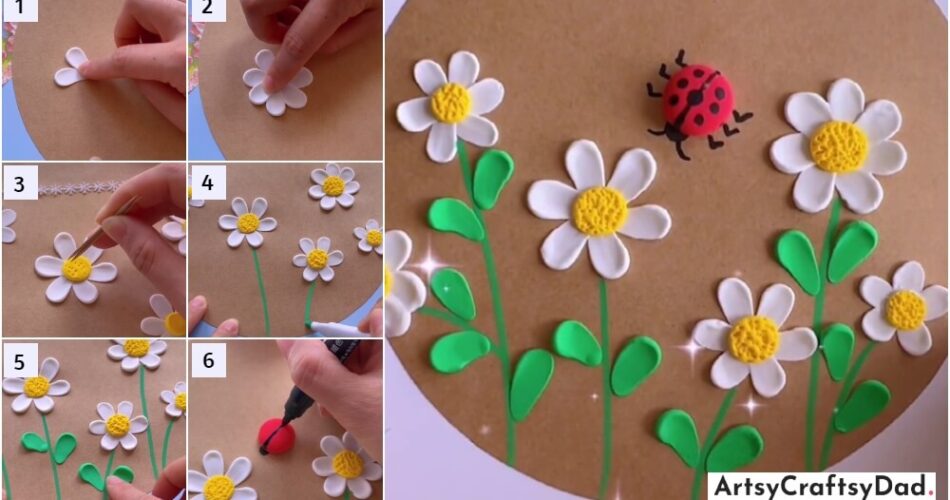
Learn how to create adorable daisy flowers with a cute ladybug using this easy clay craft tutorial. This is an easy craft Perfect for beginners, this fun project will add a touch of whimsy to your home decor or make a unique gift for a loved one.
Clay crafts are a fun and creative way to express your artistic side, and this tutorial on making daisy flowers with a ladybug is the perfect project to do. In this step-by-step guide, we will show you how to mold and shape clay to create adorable daisy flowers and a cute little ladybug to adorn them. This is an easy flower tutorial. Whether you are a beginner or an experienced crafter, this easy clay craft tutorial brings a smile to your face and brightens up any space in your home. Let’s get crafting!
Easy Daisy Flowers With Ladybug Clay Craft

Must Read: Heart Flowers Bouquet: Clay & Tissue Craft Tutorial
Supplies & Tools
- Brown Drawing Sheet
- Colored Clay(White, Yellow, Green, Red)
- Markers (Black, Green)
- Sticks
- Transparent Acrylic Sheet
Daisy Flowers Instructions
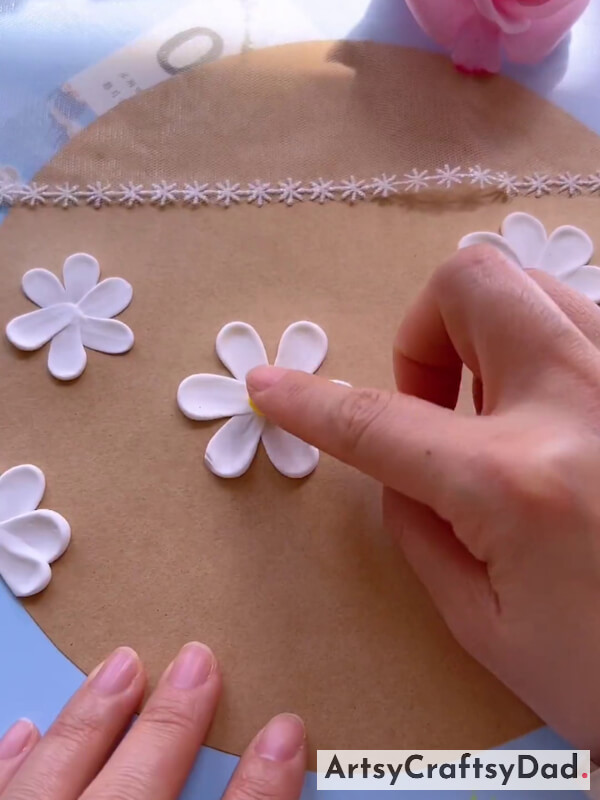
Step #1: Making Flower Petals

Firstly, we take a brown drawing sheet and cut it out into a round shape & use it as a craft base. Then we take white clay and make two little balls from it & put them in contact with each other on the craft base & press them with your index finger one by one to form a petal shape.
Step #2: Making Complete Flower

Now, complete the flower by making more petals.
Step #3: Making Disk Floret
In this step, we make more flowers using the same clay and the process. Then take a yellow clay & make a small ball from it & put it in the center of the flower as the disk florets (disc florets are found in the center of the daisy) & press it using your index finger.
Step #4: Making Seeds
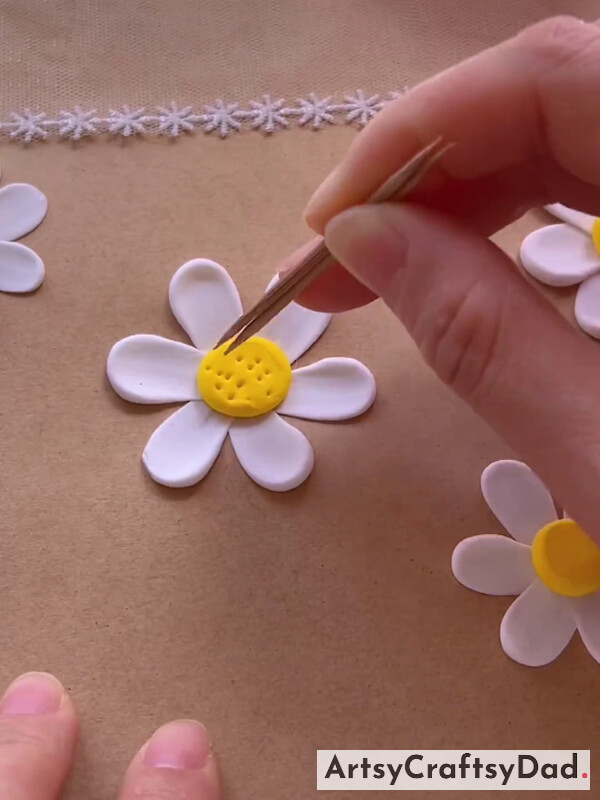
Make some more disc florets using the same process. Now, take two sticks & press them into the disk floret to make tiny holes representing flower seeds.
Step #5: Drawing Flowers Stems
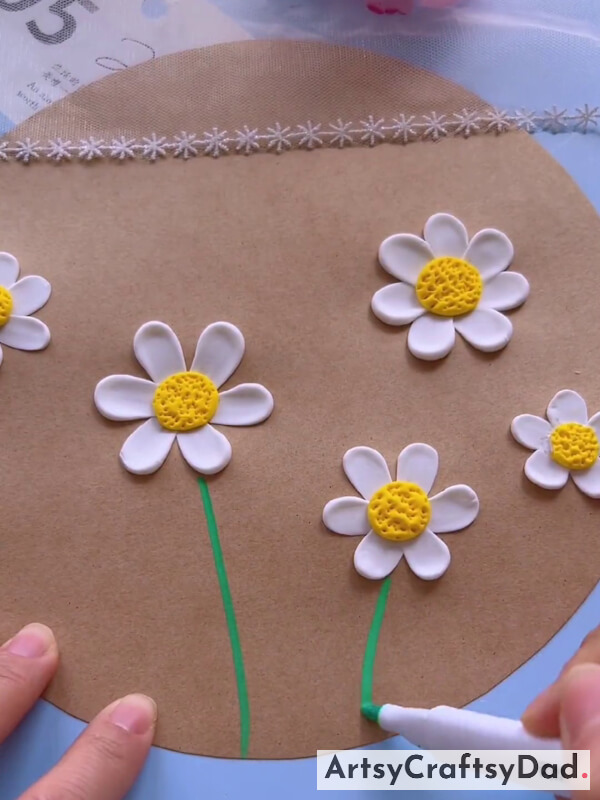
In this step, we draw flower stems using the green color marker.
Step #6: Making Leaves
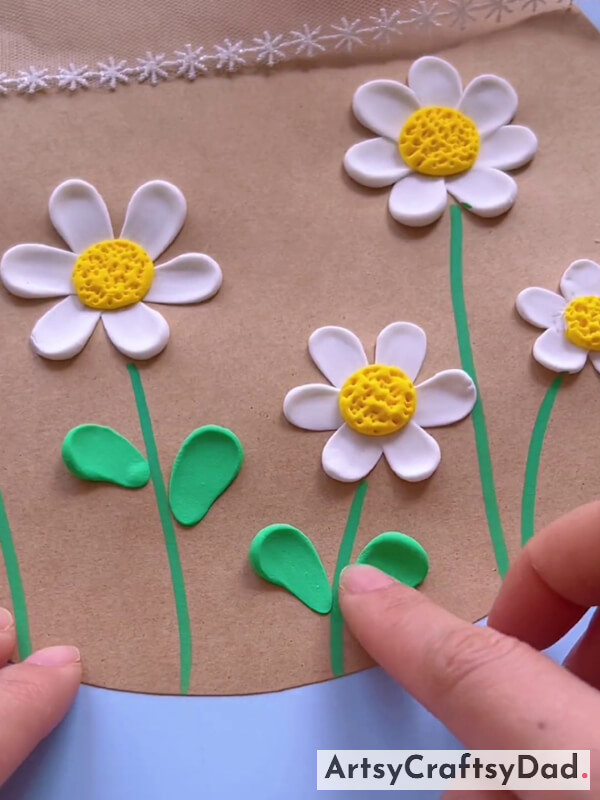
Now, after completing drawing stems, take a green clay & make some little balls from it & paste them on the stem & press them with your index finger to make leaves. Repeat the same process to make other leaves.
Step #7: Start Making Ladybug
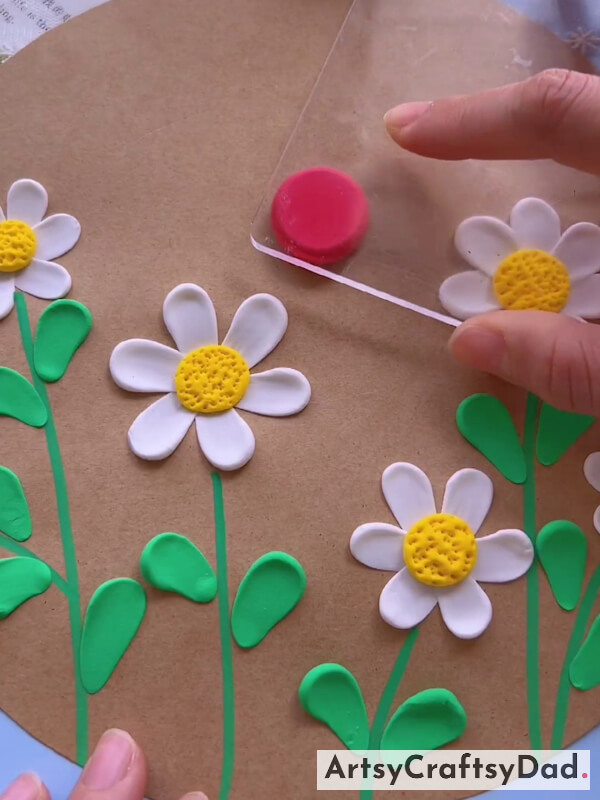
In this step, we take red clay & make a little ball from it & put it on the top of the craft base then press it with the transparent acrylic sheet.
Step #8: Drawing Ladybug’s Design

Take a black marker & start drawing designs on the body by drawing a line & ladybug’s head.
Step #9: Drawing Legs

Now, we need to draw the antenna, legs, & small dots on the body.
Our Daisy Flowers With Ladybug Clay Craft Is Achieved!

Finally, our daisy flowers craft is ready it is amazing and simple creativity for kids and school projects.
We have completed our ladybug clay DIY craft here. You could customize this craft by adding your ideas. You could make other flowers using clay here that will give a different look & unique look to our craft. Share your comment in the comment section because we love to hear from you & also if you want to share any ideas then don’t hesitate to share them with us.
Thanks for visiting us! Keep creating & keep shining!
You Might Also Like This
- Clay Flower Pot Model Craft Tutorial For Kids
- How To Make Fringed Daisy
- Designer Chicks: Tissue And Clay Craft Tutorial
- Wool Thread Pom-Pom Flowers Craft Tutorial
- Clay Flower Vase Model Craft Tutorial For Kids

