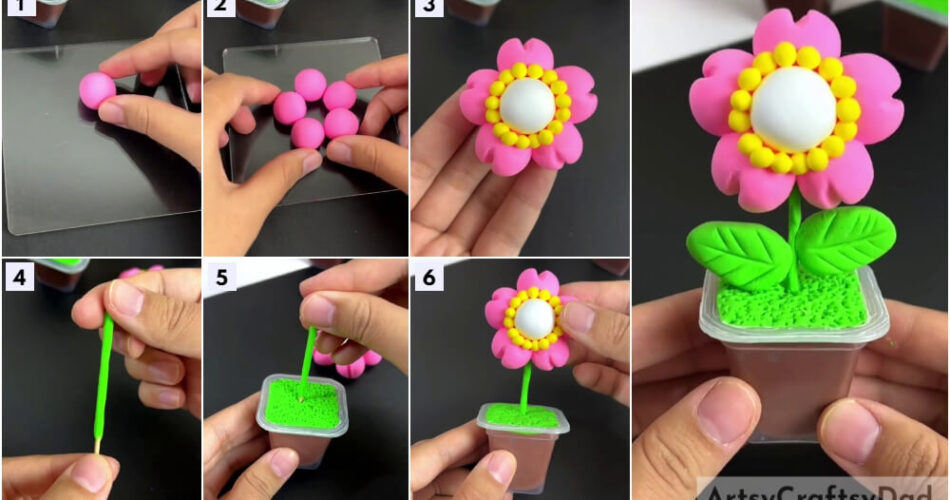
If you love cute tiny stuff, then this craft is for you! This tutorial will guide you on making a tiny flower pot using super clay!
Hello and welcome to this step-by-step tutorial on making a tiny craft using super clay! Super clay crafts are surely fun, We all love to dough and mold the clay into making something, and then when it dries it becomes like a soft toy! This cute and tiny flower pot will surely be a hit addition! You will love the procedure to make it without getting baffled about what to do next as we will guide you on everything! Grab the listed materials and begin to make it!
Flower Pot Clay Model Craft For Kids

Must Read: Simple Paper Tearing Flowers Craft Tutorial
Supplies & Tools
- Colored Clay (Brown, Green, Pink, White, And Yellow)
- Toothpick
- Small Plastic Container
- Scissors
- Polymer Clay Pressing Tool
Flower Pot Instructions
Step #1: Taking A Plastic Container

Begin this craft by taking a tiny plastic container as the base of your flower pot.
Step #2: Taking A Piece Of Brown Clay

Take brown clay, and stretch it to take out a piece from the whole.
Step #3: Putting Brown Clay Ball In The Container

Dough the brown clay into a ball and put it inside the plastic container base and make it even in the container by pressing it. This will be the soil in your flower pot.
Step #4: Making The Soil With Grass

Dough a green clay roll and place it over the soil and press it evenly over it to cover the soil. This will be the grass on your soil.
Step #5: Texturing The Grass

Using a toothpick, carve dots in the grass randomly to texture it wholely.
Step #6: Cutting Out Clay Pieces

Now, take pink clay dough it to make a thick and long roll of it. Using scissors, cutout small and equal bits from the pink roll as shown in the image.
Step #7: Making A Clay Ball

Dough the clay piece into a clay ball.
Step #8: Making The Flower Petals

Dough all the other 4 clay pieces into balls and stick them together in a circle to form the flower petals.
Step #9: Making The Center Of The Flower

Dough a clay ball form white clay and place it in the middle to make the center of the flower.
Step #10: Shaping The Petals

Press the toothpick against the top of the petals to carve lines over them and shape the petals.
Step #11: Detailing The Flower

Dough tiny yellow clay balls and stick them one by one around the center of the flower to detail the flower even more.
Step #12: Completing Sticking The Yellow Clay Balls

Completely stick the yellow clay balls over the flower and around the center to obtain the results as shown in the image.
Step #13: Making The Flower Stem

Now, take a toothpick and by leaving some space at its tip, dough the green clay into a roll over it to make the stem of the flower.
Step #14: Placing The Flower In Its Pot

Stick the flower over the top of the clay roll stem from behind and push in the toothpick tip inside the flower pot in the center to place it in its pot.
Step #15: Adding Leaves To The Stem

Dough 2 small clay balls from the green clay, press to flatten them using the polymer clay pressing tool and shape them into leaves. Now, using the toothpick, carve the leaf veins over the leaves. Stick these leaves to the stem on both sides below the flower.
This Is the Final Look Of Your Clay Flower Pot!

Woohoo! You finally made your adorable little flower pot!
You can now decorate it on the window side it will surely look pretty there! You can also make it as a school craft project or use it as a gift for your loved one! It will definitely thrive everywhere! This flower pot can be decorated even more if you use your imagination and creativity! Make it as unique as you are! Show off the results to everyone and let them be proud of your skills and creativity!
We are hoping you liked the article! Share it with your friends and family to keep unmotivated in bringing more such crafts for you! Also, don’t forget to give your feedback in the comments section below!
You May Also Like
- Easy Craft Ideas from clay/Plasticine for Easter
- Clay Heart Leaf Tree Craft Tutorial For Kids
- Clay-Paper Sunflower Garden Craft Tutorial
- Clay Chicks In Garden Craft Tutorial
- Polymer Clay Mushroom Tutorial For Kids


