Gift a bouquet full of love to your loved one! This step-by-step tutorial will guide you to make a heart flower bouquet using clay & tissue!
Hello and welcome to the wonderful world of crafting! Today, we will guide you to make a flower bouquet with heart flowers! This might be the best flower bouquet of all time as you show love by gifting a bouquet and what if the bouquet shows love itself!? We always try to get on with some amazing and fascinating ideas to craft for you and here we find this one and we hope you like it! Read the article to make a heart flower bouquet clay and tissue paper craft! Let’s begin!
Beautiful Heart-Shaped Flowers Bouquet Craft
Must Read: How to make a bouquet of spring flowers
Supplies & Tools
- Circular Cardboard
- Glue
- Red Clay
- Black Marker
- Brown Ribbon
- Tissue Paper
Flowers Bouquet Instructions
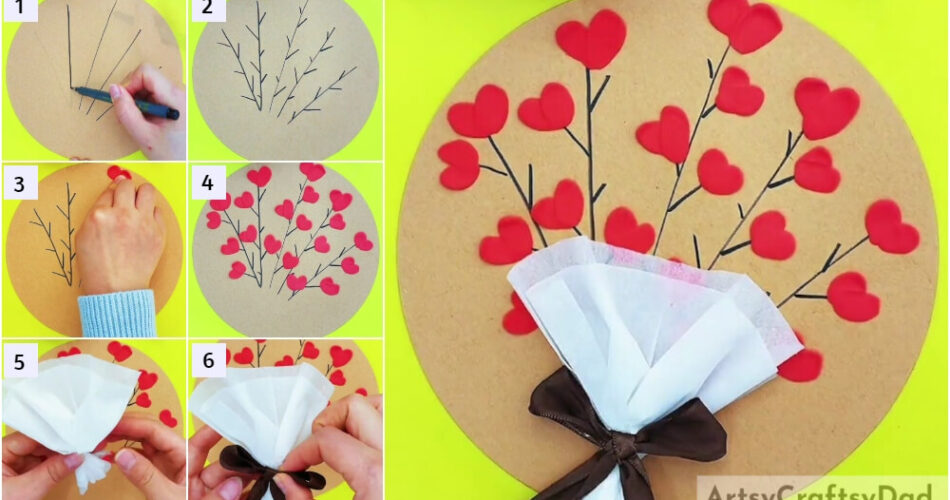
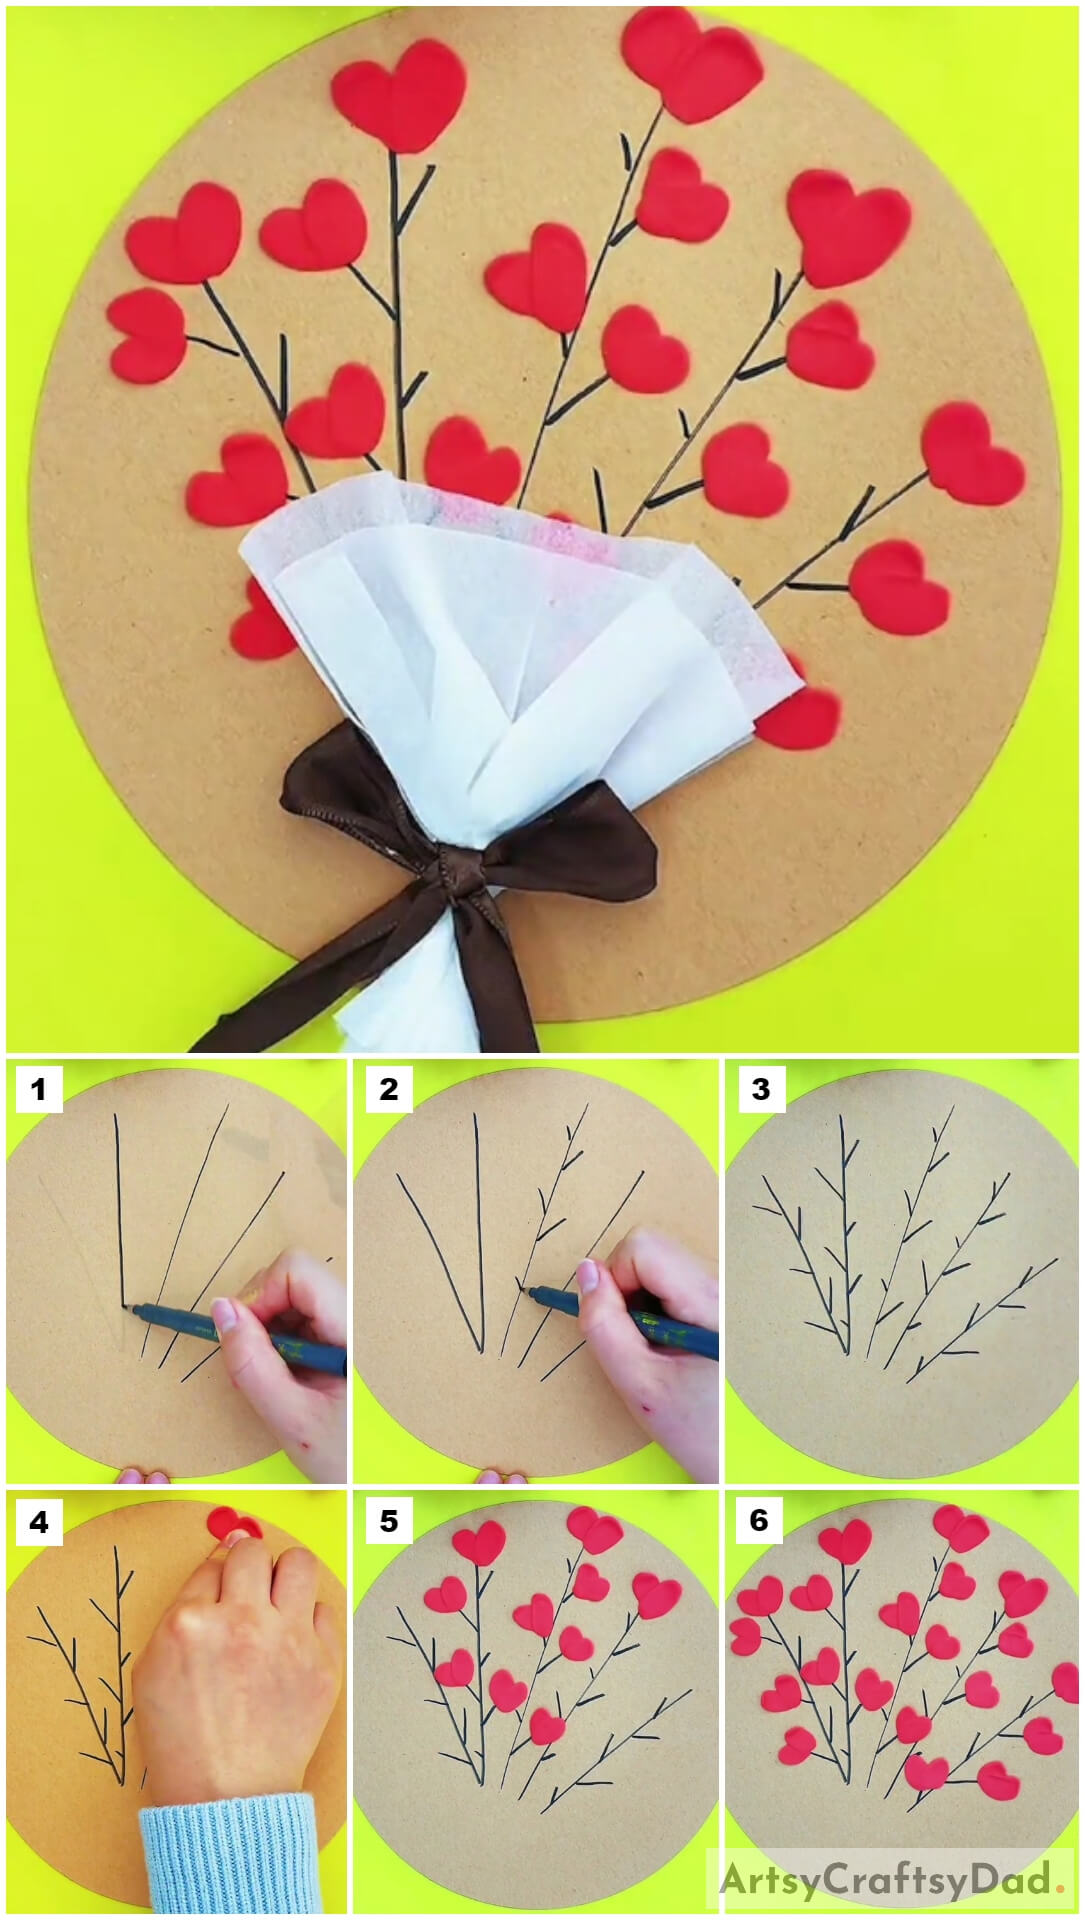
Step #1: Drawing The Stems Of The Flowers
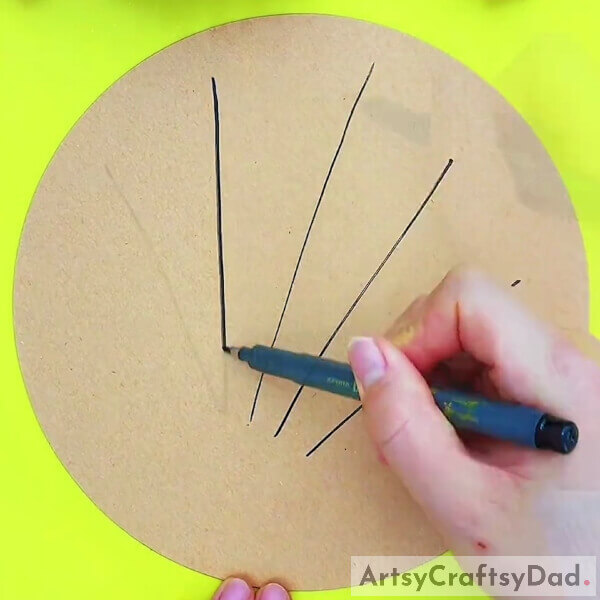
Begin this craft by taking a circular cardboard as the base for the craftwork and a black marker. Using the black marker, draw the tilted lines over the base as the stems of the flowers. See the image for reference.
Step #2: Drawing The Branches To the Stems

Using the marker, draw tiny branches on both sides of the stems tilted upwards.
Step #3: Completing Drawing The Branches To The Stems
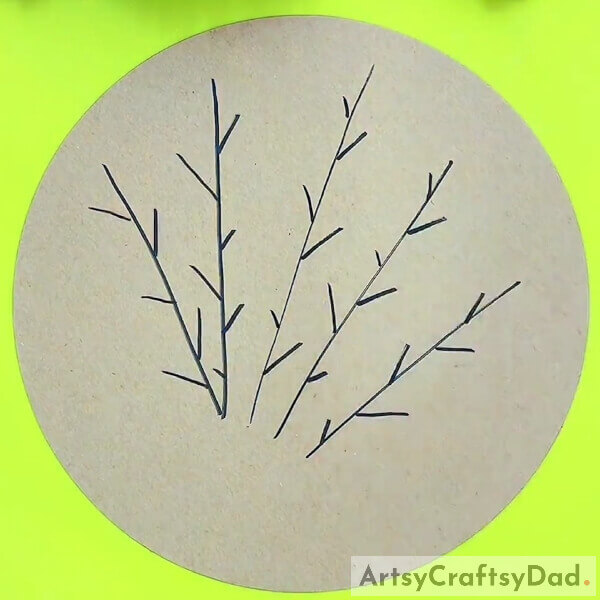
Make the tiny tilted branches on all the stems of the heart flowers as shown in the image.
Step #4: Making A Heart Flower
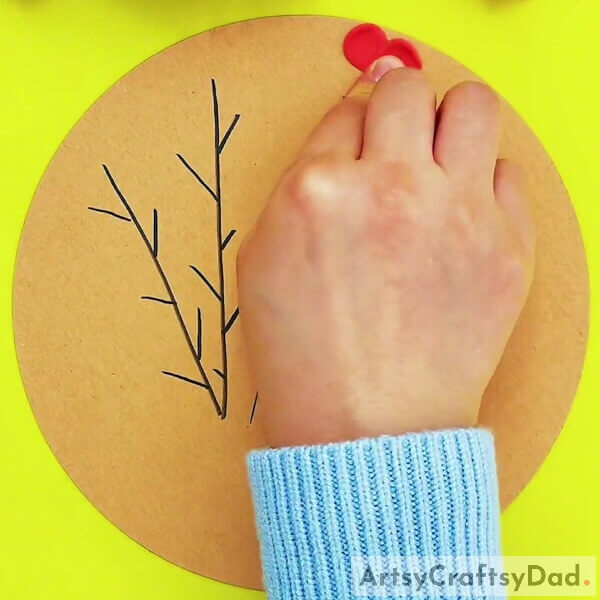
Take red-colored clay and dough 2 tiny balls of it. Now, place these clay balls over the tip of the branch on the sides by leaving a little gap in between them. Press the left clay ball and drag it to the bottom of the right one. Again, press the right clay ball and drag it to the end of the dragged left one to have a single end of both and form a heart. This will be the heart shaped flower of the craft.
Step #5: Making More Heart Flowers

As you made the heart flower previously, make more heart flowers at the tip of the branches of the stems.
Step #6: Completing Making The Heart Flowers

Completely cover each and every branch of the stems with the clay heart flowers.
Step #7: Taking A Tissue Paper
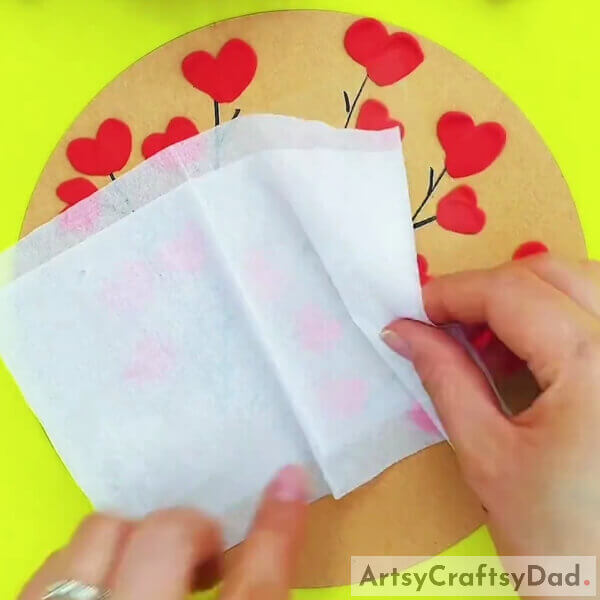
Take a tissue paper and fold it in half.
Step #8: Making Bouquet Sleeve
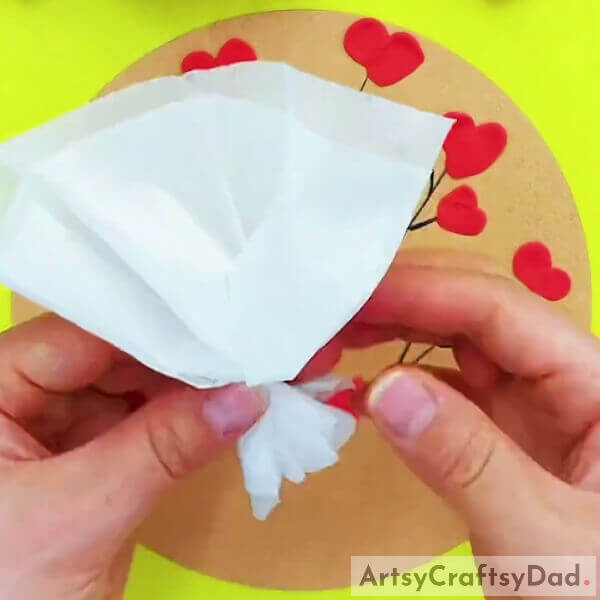
Gather the tissue from one longer side of it leaving the other longer side wide open. This will be the bouquet sleeve of your bouquet.
Step #9: Securing The Bouquet Sleeve With A Bow
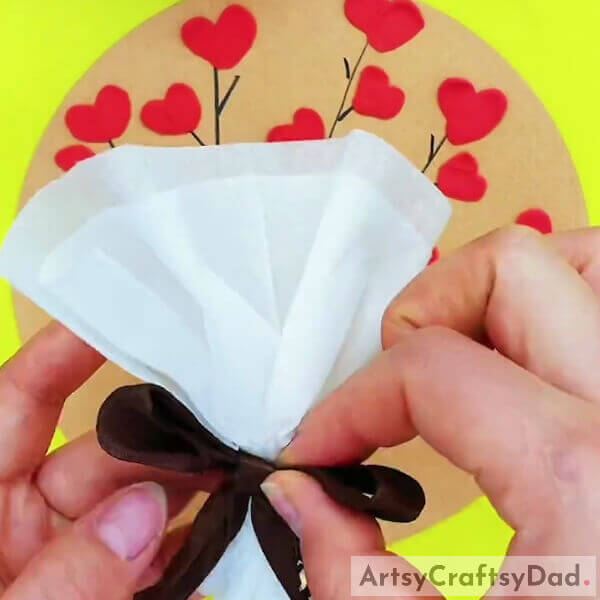
Tie a brown ribbon on the gathered part of the bouquet sleeve to secure it and make a bow.
This Is The Final Look Of Your Heart Flower Bouquet!
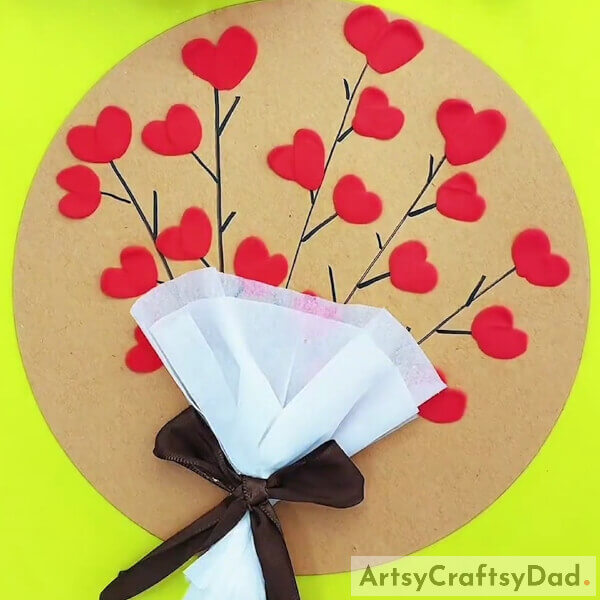
For the last step, paste the bouquet sleeve over the base below the heart flower using glue. Make sure to stick it in a way that all the branches’ ends are covered inside the bouquet sleeve.
Damn! I turned out so pretty, right?! Well, your lovable heart flower bouquet is ready!
You can now gift it to your best friend or your loved one! I’m sure they will love the concept and this gift which you have made on your own! Gifting handmade gifts makes them extra special! You can also customize this craft any way you like or if your loved one likes it, change the color of your heart flower or the base according to the color that your loved one likes! You can also make it to gift it to yourself and decorate it in your room, well, you are special to yourself!
Hope you had fun making this craft and liked the article! Share it with your friends to see who can make the prettiest of all! Also, drop your feedback in the comments section!
You May Also Like
- Clay Heart Leaf Tree Craft Tutorial For Kids
- Clay Snails On Leaves Craft Tutorial For Kids
- Create a cascading bouquet of artificial flowers (Tutorial)
- Simple Paper Tearing Flowers Craft Tutorial
- How to make a charming bouquet of flowers from felt (Tutorial)


