Looking for a fun and creative craft project for kids? Learn how to make DIY paper trees step by step with this easy tutorial.
Are you looking for a fun and creative craft project with your kids? Look no further than DIY paper trees! This simple and easy-to-follow guide will walk you through the steps to create your paper trees using just a few materials. You could do this in the school projects or in your free time. Not only is this craft a great way to keep your kids entertained, but it also helps to develop their fine motor skills and creativity. Let’s get started on this fun and educational craft project together!
Simple Paper Trees Craft Idea For Kids

Must Read: Clay Tomato Step-By-Step Craft Tutorial For Kids
Supplies & Tools
- Drawing Paper(Sky Blue, Black)
- Glue
- Scissors
- Black Marker
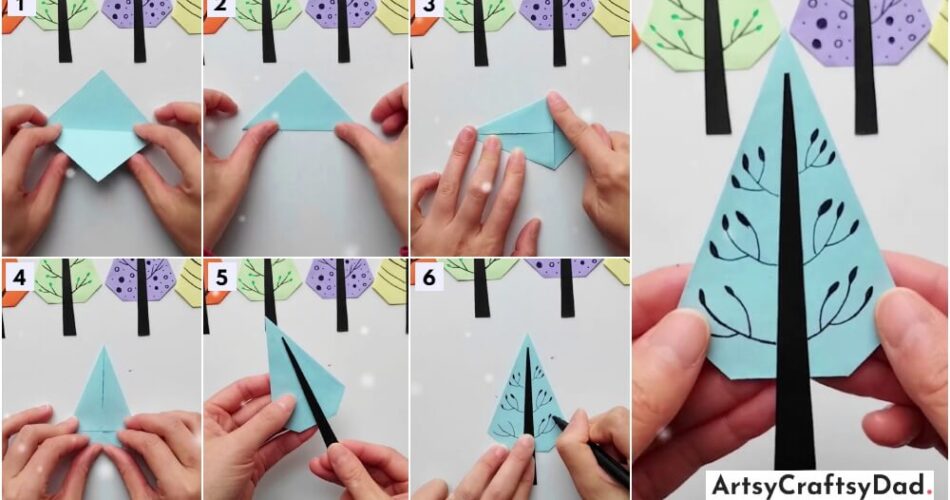
DIY Paper Trees Craft Instructions
Step #1: Working With Sky Blue Paper

Firstly, we cut a piece of sky blue paper into a small square shape using scissors. After cutting we fold the square shape in horizontally half to make creases from the middle. Then unfold the paper.
Step #2: Folding The Paper
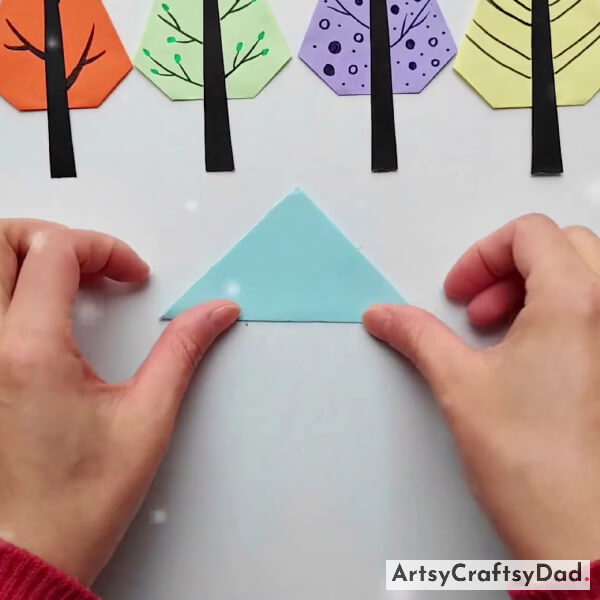
In this step, again fold the paper in half and make a triangle shape with the help of your index fingers.
Step #3: Making A Kite Like Shape

Now, again unfold the triangle. Now, fold the upper corner & lower corners of the square towards the center to make a kite-like shape.
Step #4: Folding Unfolded Corner

In this step, first, turn the paper so that the unfolded corner comes at the bottom side. Then fold the bottom side unfolded corner to make a triangle shown in the above image.
Step #5: Making A Trunk
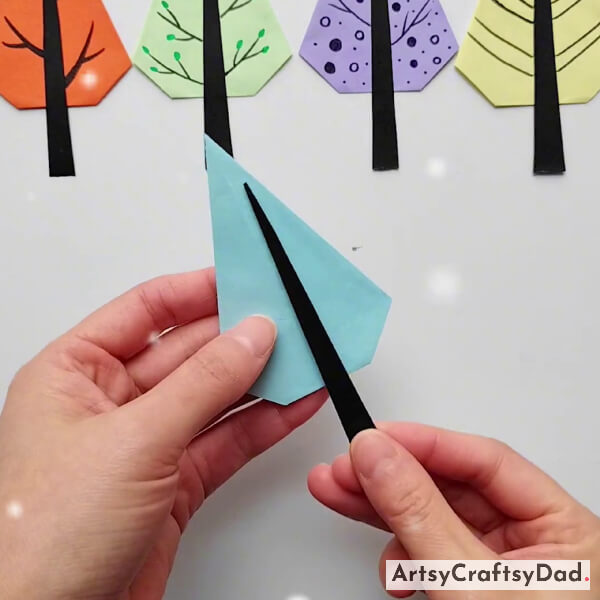
Now, We draw a tree trunk in black paper and cut out its outline with the scissors. and paste the tree trunk on the shape using glue.
Step #6: Drawing The Stems

After pasting the trunk, we draw a stem using a black marker.
Step #7: Drawing The Leaves

Repeat the process & make draw more stems. Now, We draw leaves on each of the stems.
Final Look Of DIY Paper Trees Craft Is Ready!

Now, the Paper Trees Craft is ready.
We have achieved our DIY paper tree craft here. Hope you have also created this craft & made a beautiful paper tree. Show your creation to your friends & family. This DIY paper tree is a fun and educational craft activity for kids that allows them to express their creativity and learn about nature. You could make a paper Christmas tree or all four seasons trees using tissue paper, or crepe paper. If you want to try some more crafts similar to this then please visit our other websites. Don’t miss to share your feedback in the comment section because we are excited to know your opinion about our craft.
Thanks for visiting us!
You Might Also Like This
- Leaf Fox Craft Step-by-Step Tutorial For Kids
- Clay Autumn Circle Trees Craft Tutorial
- Paper Flower Bouquet Artwork Craft Tutorial For Kids
- Easy To Make Paper Mushroom Craft Tutorial For Kids
- Handmade Paper Chinese Lantern Craft Tutorial For Kids


