Learn how to make a stunning paper flower bouquet with this easy-to-follow craft tutorial for kids. This step-by-step guide will teach your little ones how to create beautiful paper flowers using simple materials and techniques. Perfect for art projects or gifts, this artwork craft tutorial is sure to inspire creativity and provide hours of fun. Get started today and watch as your child’s artistic skills blossom!
Creating paper flower bouquets can be a fun and engaging craft activity for kids of all ages. Not only does it allow them to explore their creativity and artistic skills, but it also helps develop their fine motor skills and patience. This tutorial will provide step-by-step instructions on how to create beautiful and vibrant paper flower bouquets that can be used as decorations or gifts. Whether it’s a rainy day activity or a project for a themed party, this craft is sure to bring joy and satisfaction to young artists. You will require some basic sketching materials for this artwork. Let’s get started!
Flower Bouquet Artwork Craft Made With Paper
Must Read: Flower Bouquet: Clay & Tissue Craft Tutorial
Supplies & Tools
- Colored Papers
- Scissors
- Acrylic Paints (Yellow, Red, Green)
- Glue
- Printed Red Ribbon
Paper Flower Bouquet Procedure
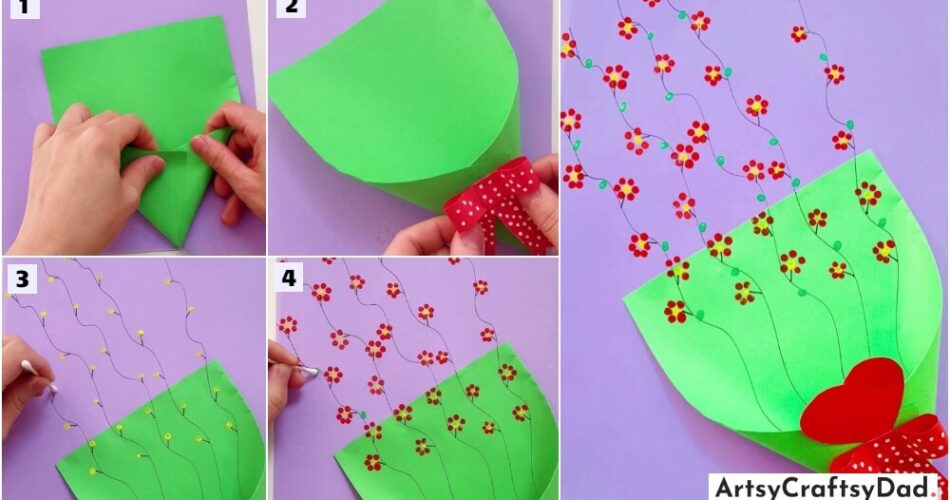
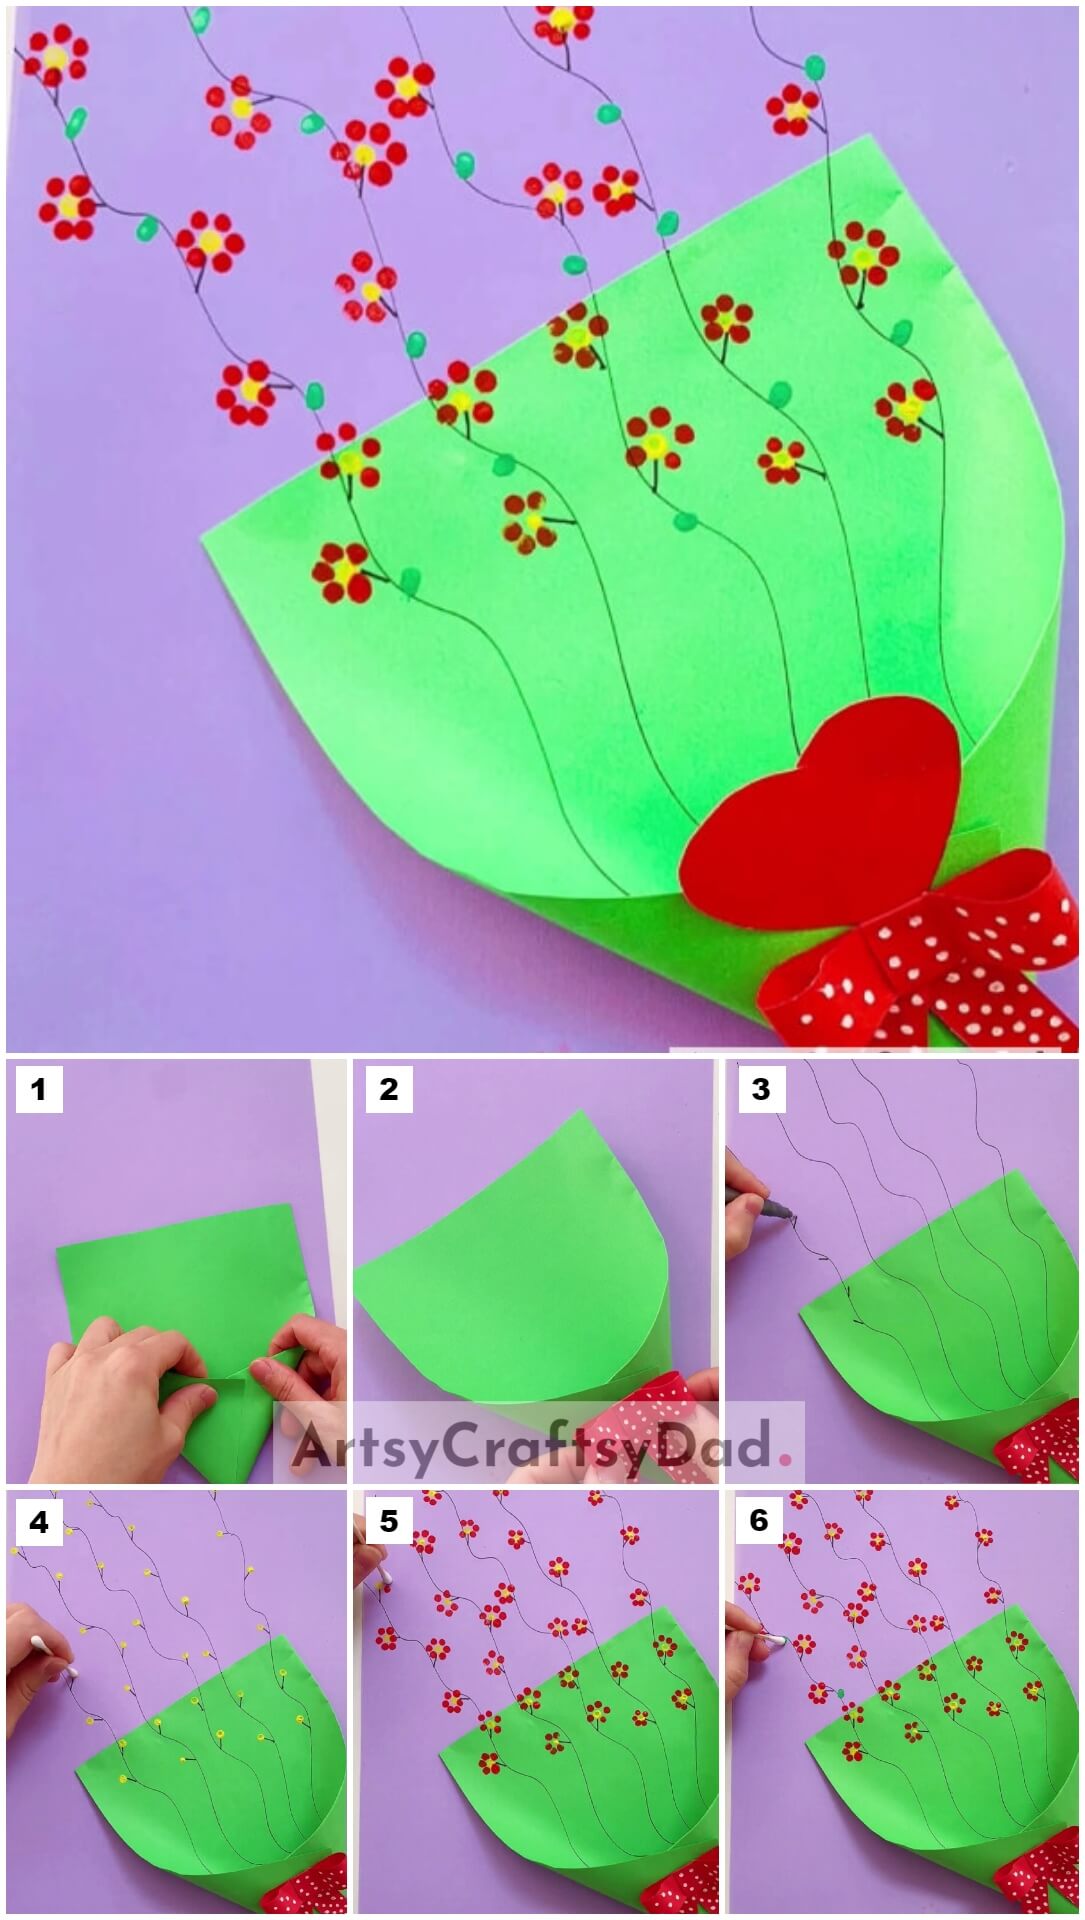
Step #1: Making A Paper Bouquet
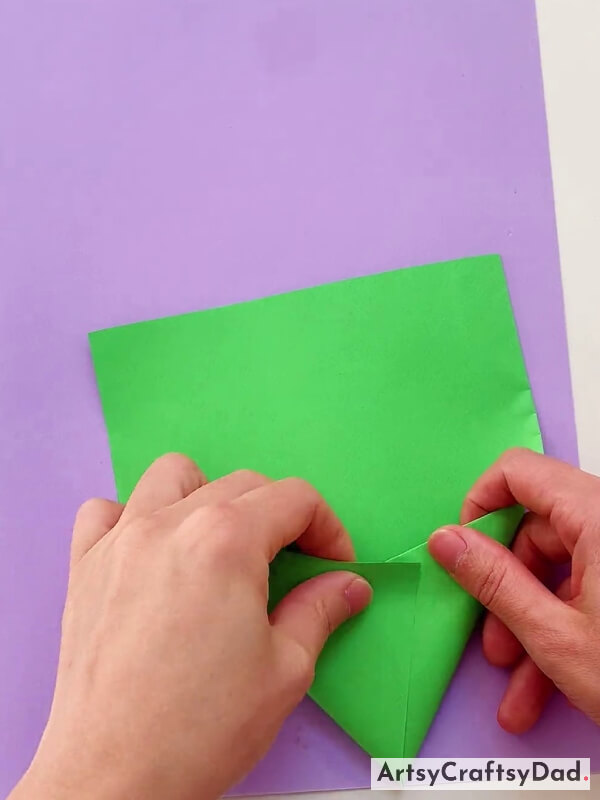
Take purple color paper as a base. Now, take a piece of green paper & fold the lower two corners of the paper for the bouquet shape.
Step #2: Pasting A Red Ribbon On Bouquet
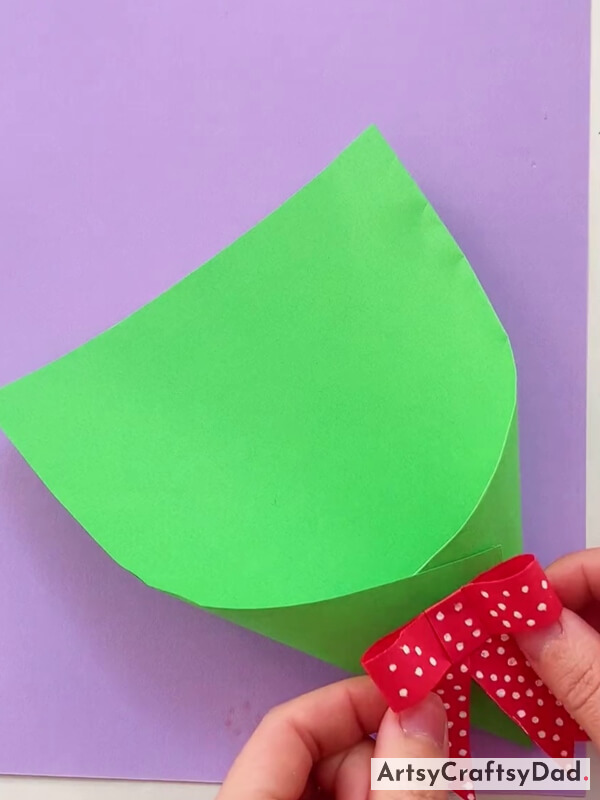
Paste the bouquet on the purple color paper. Now take the red ribbon flower & paste it on the lower side of the Bouquet.
Step #3: Drawing Long Stem Of The Flowers
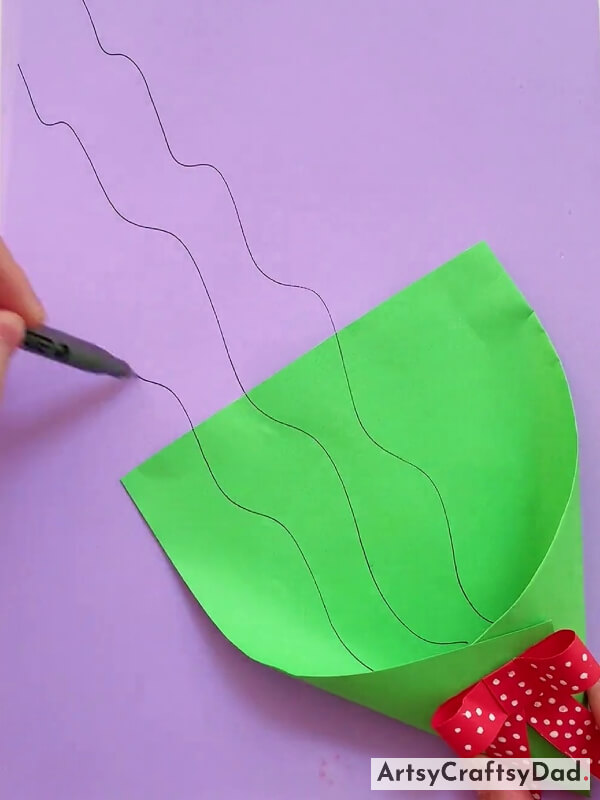
Take a black marker or pen. Draw three curvey lines from the bottom of the bouquet.
Step #4: Drawing Branches Of The Flower
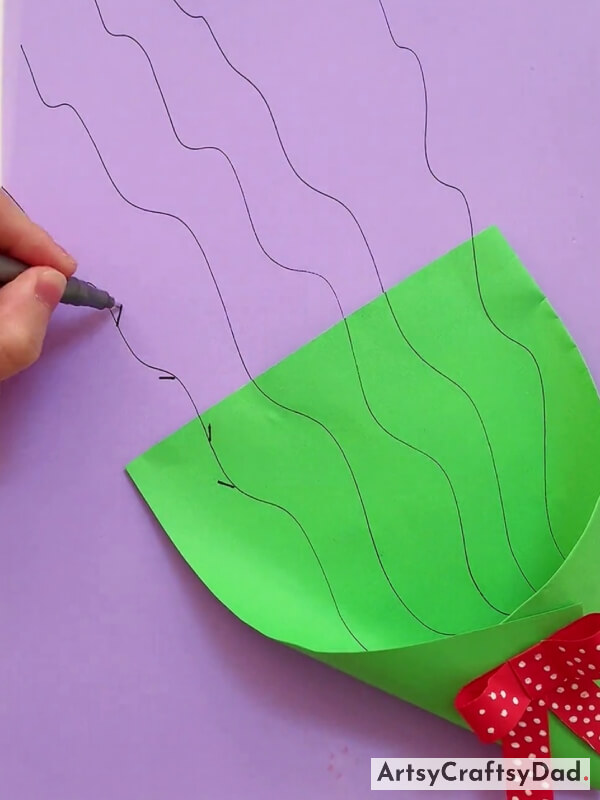
Now, draw branches of the flowers around the stems with the help of a black marker or pen.
Step #5: Drawing The Yellow Color Dots Using Cotton Buds
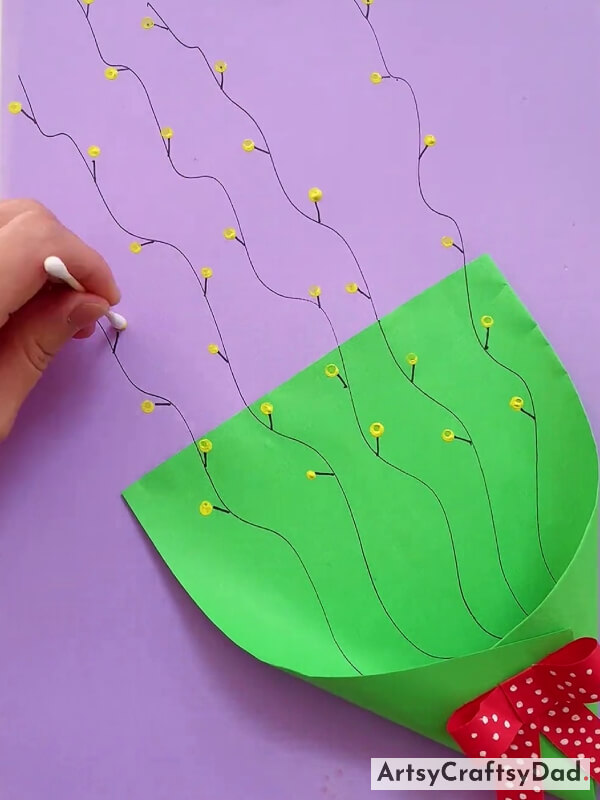
Take cotton buds. Dip the cotton bud in yellow paint and dab it on each of the tiny stems to form the tiny yellow dots just like shown in the above picture.
Step #6: Drawing Flowers Using Cotton Buds
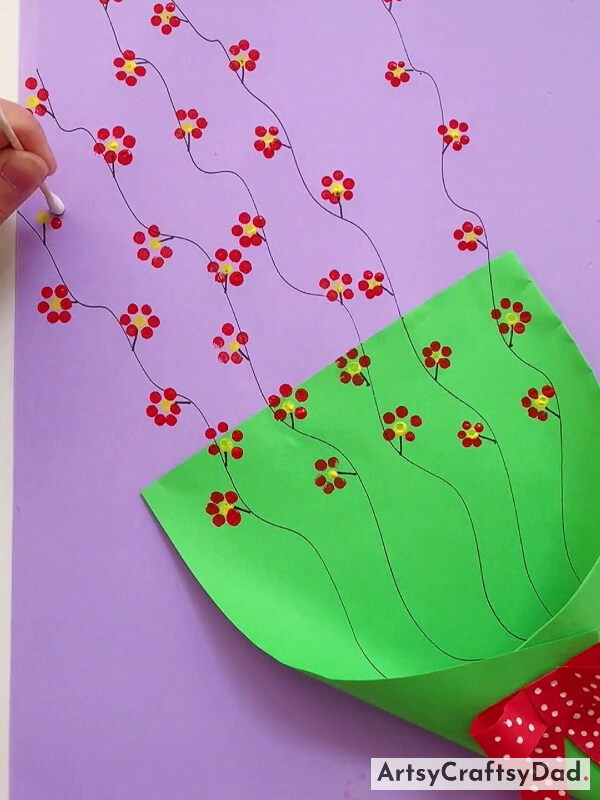
Dip the cotton bud in red paint and dab it around each of the tiny yellow dots in a circular manner to form a flower & again repeat the process and make more flowers.
Step #7: Drawing Leaves
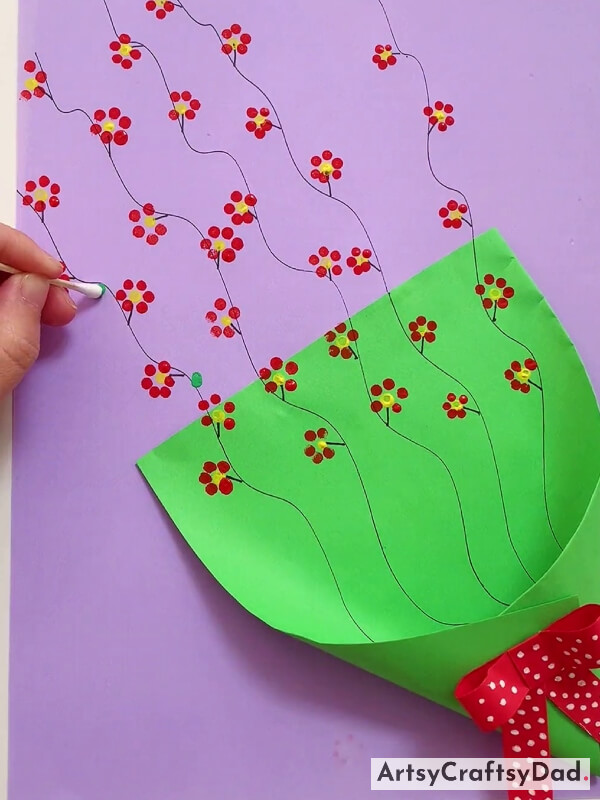
Now, dip cotton buds into the green paint & dap it around the branches of the flowers to show the leaves of the flowers.
This Is The Final Look Of Our Paper Flower Bouquet!
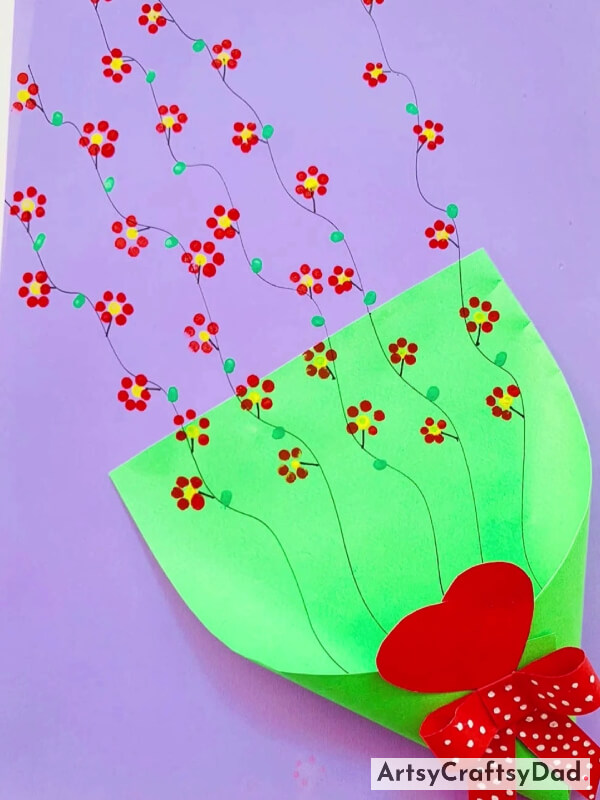
Our paper flower bouquet artwork is ready now!
Hope you like this article on how to make flower bouquet artwork craft. Creating paper flower bouquet artwork is a fun and engaging craft activity for kids. Not only does it allow them to showcase their creativity and imagination, but it also teaches them important skills such as cutting, folding, and arranging. This tutorial provides step-by-step instructions that are easy to follow, making it accessible for children of all ages. Whether it’s for a special occasion or simply to decorate their room, this craft project is a wonderful way for kids to express themselves and create something beautiful. Please don’t forget to share your thoughts in the comment section. We would love to hear your thoughts on this article. Please do visit our website for other such creative and fun art and craft ideas.
Thank you for visiting our website.
You Might Also Like
- Paper Pinwheel Flower Craft Tutorial For Kids
- Paper Flower Garden Craft Tutorial For Kids
- Paper Flower Craft For Kids To Make With Parents
- Clay Ladybugs In Field Artwork Craft Tutorial For Kids
- Dumpling Dragon Boat Paper Craft Step-By-Step Tutorial


