Easy DIY Ideas You Need To Try – Beaded Smocking
If you’ve never tried beaded smocking, you’re in for a treat! It’s a technique that combines simple embroidery with beads to create incredible texture and a high-end designer look. I first tried it on a plain cotton blouse cuff, and the transformation was astounding. It’s much easier than it looks and is perfect for adding a luxe touch to collars, cuffs, or even the bodice of a dress.
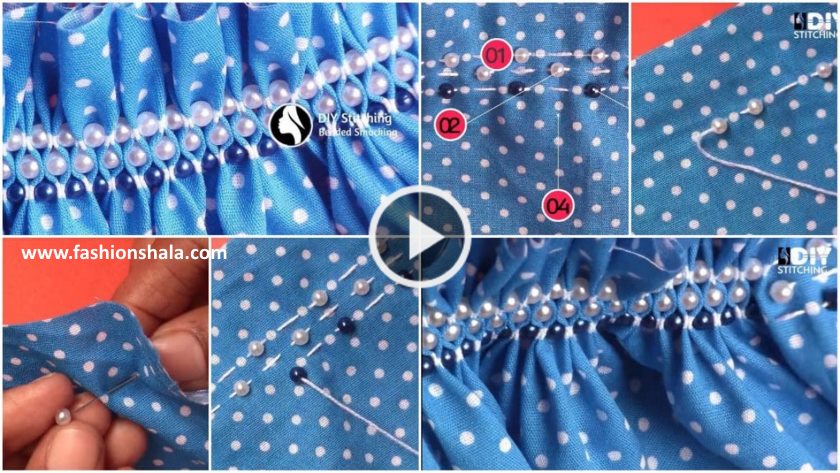
The basic idea: You create a grid of small dots on the wrong side of the fabric. When you pull the threads tight to gather the fabric, beautiful honeycomb-like pockets form on the right side. You then stitch beads into the center of each “pocket.”
Quick Start Guide:
Mark Your Grid: On the fabric’s wrong side, use a water-soluble marker to draw a grid of dots, each about ¼ inch apart.
The Smocking Stitch: Using a strong thread, take a small stitch at each dot, gathering the fabric slightly. This creates the signature honeycomb pattern on the front.
Add the Beads: Once smocked, come up through one of the honeycomb pockets on the right side. String a small seed bead, and take your needle back down right next to where you came up. The bead will sit perfectly in the pocket.
It’s a relaxing, meditative process with a stunning, bespoke result.
Easy DIY Ideas You NEED To Try – Beaded Smocking | DIY Stitching
How to make small sewing basket at home