If you want to create stunning, realistic roses that seem to bloom right from the fabric, the bullion knot is your secret weapon. I’ll be honest, it’s a tricky stitch to master—my first attempts looked more like squashed caterpillars!—but once you get the tension right, it’s pure magic.
The Bullion Knot Rose How-To:
The Center: Start with a few straight stitches in a circle for the base.
The Petals: For each petal, you’ll create a long, wrapped bullion knot that curves around the center. The key is to use a milliner needle (it has a uniform shaft) so your wraps slide off easily.
Build Outward: Keep adding larger, curved bullion knots around the center, layering them to create a full, voluptuous bloom.
Pair your pink roses with green leaves using fishbone or satin stitch. This classic technique is seeing a major comeback on platforms like Instagram, with embroiderers like @threadfolk creating breathtaking, dimensional botanical pieces.
Hand Embroidery – Pink Roses With Bullion Knot Stitch
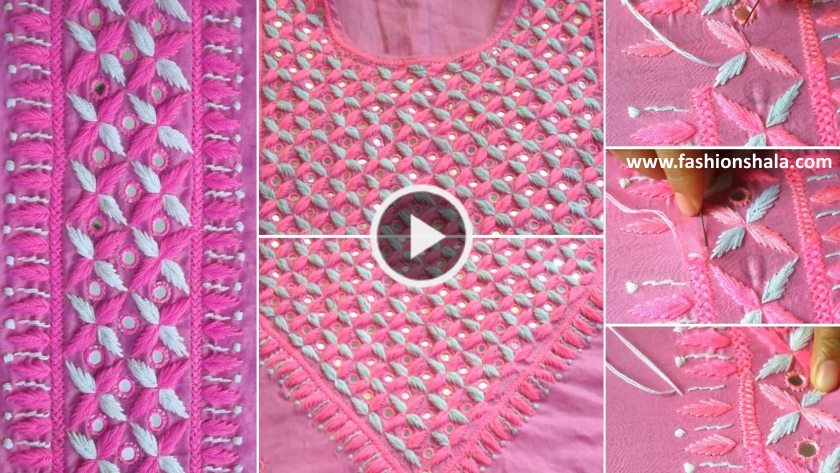
Hand embroidery dress design with mirror work
Read More
- How to do hand embroidery peacock (Tutorial)
- Hand Embroidery: Flower Stitch Tutorial
- Hand Embroidery Net Stitch Design For Cushion Cover
- Hand Embroidery: Neckline Embroidery Design for Kurti
- Satin stitch flower embroidery for boat neck blouse