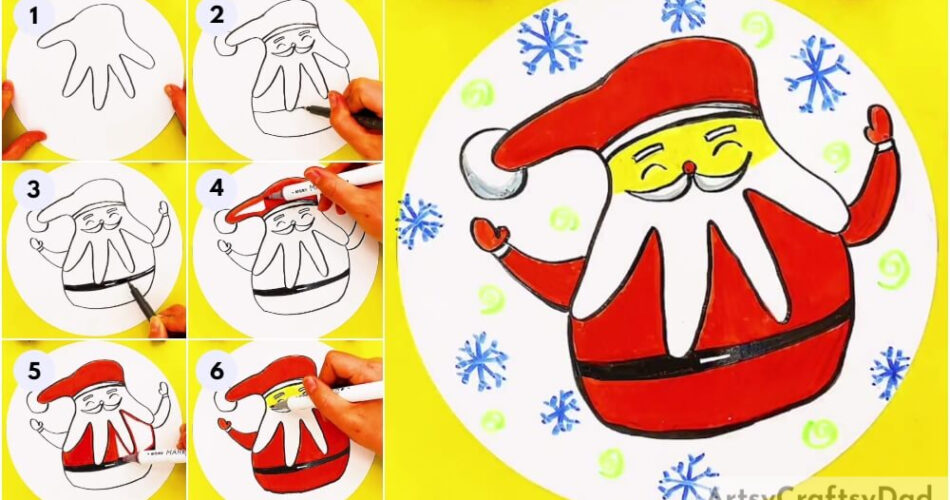
Hohoho! Santa is here! This step-by-step tutorial is a guide for you to make a Santa Claus drawing easily by outlining your palm!
Hello junior artist! We are back again for you this winter to make a Santa Claus! This Santa Claus drawing outcome will look like made by a pro with the help of this step-by-step tutorial which includes a palm outline hack, which will make this drawing much easier! This is a perfect article for the kiddos who face difficulties in drawing without the help of others! The results will be stunning and the kids will be confident in their skills and creativity and eventually be motivated to let out their inner artist!
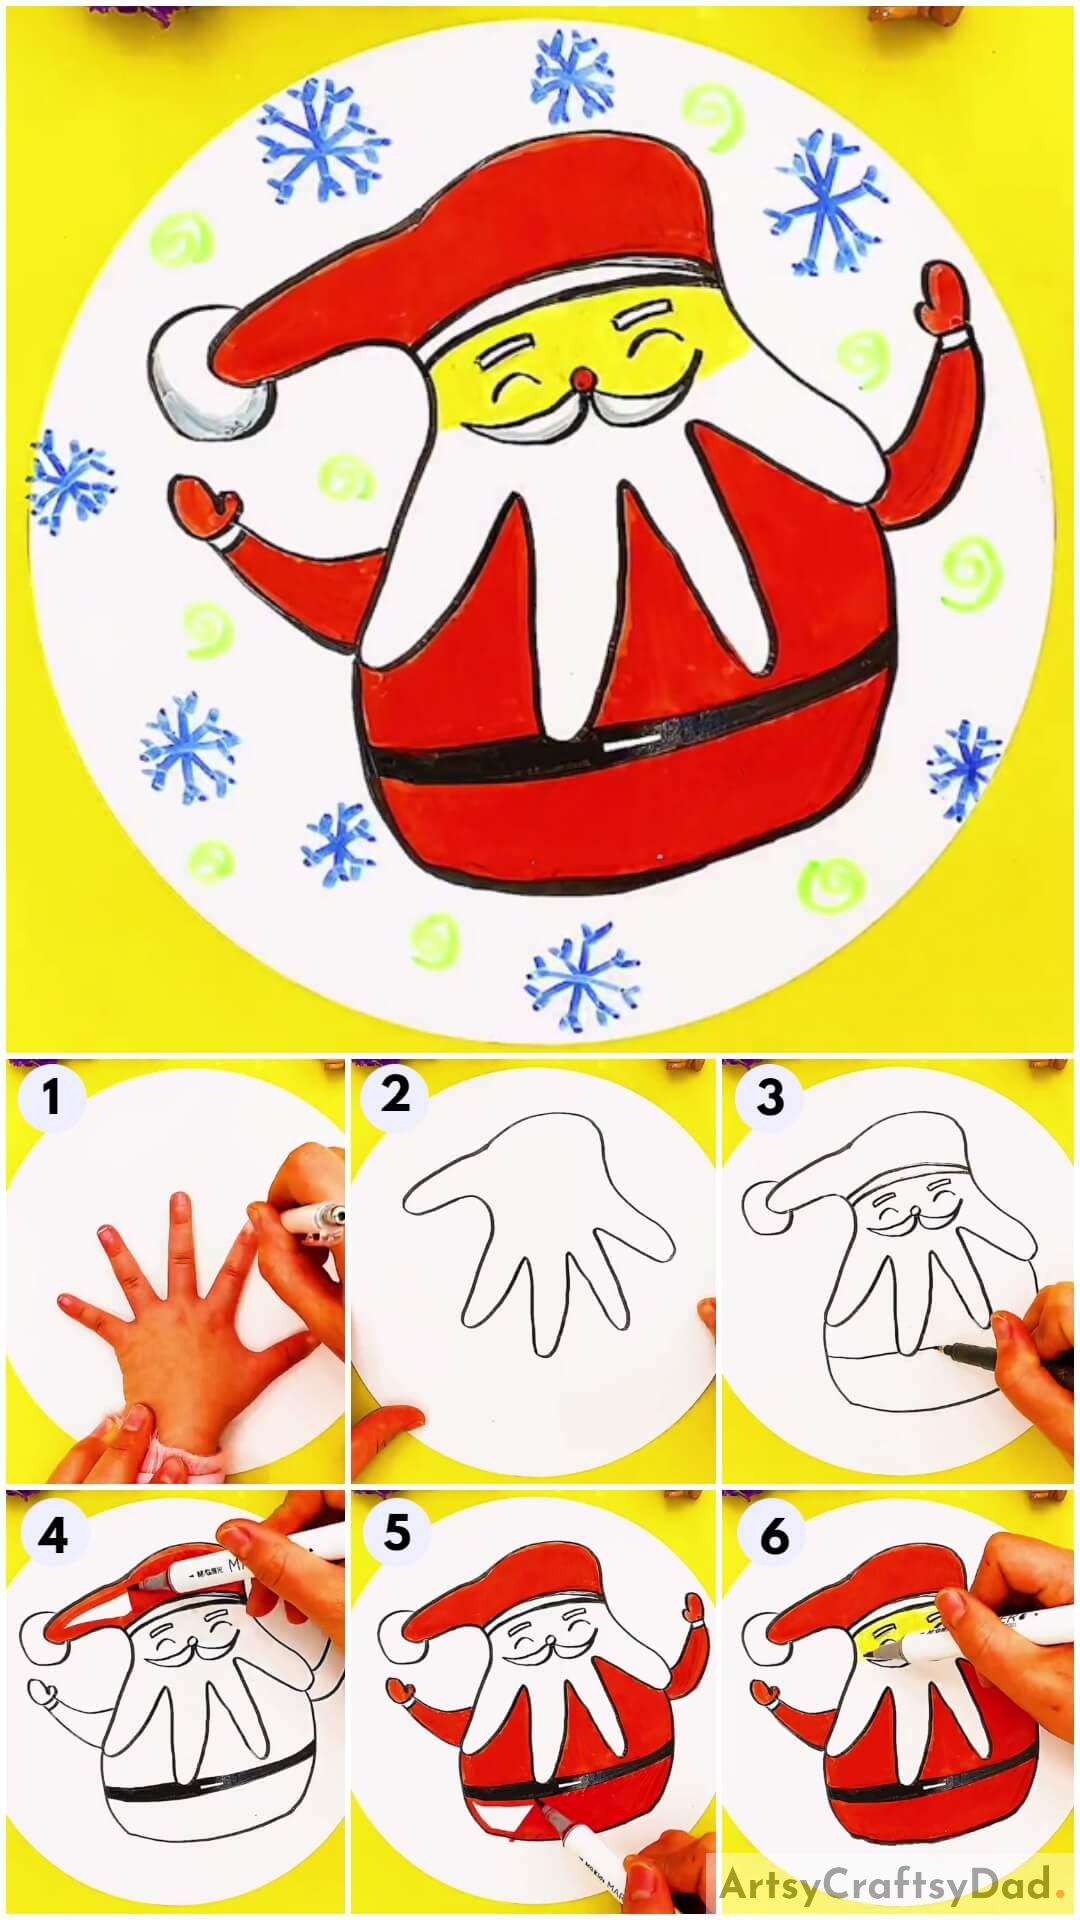
Santa Drawing Art Idea Using Hand
Must Read: Animal Drawing and Coloring Printables for Kids
Supplies & Tools
- White Circular Paper Sheet
- Colored Markers (Black, Blue, Red, Yellow, And Neon Yellow)
Santa Drawing Instructions
Step #1: Outlining Your Hand
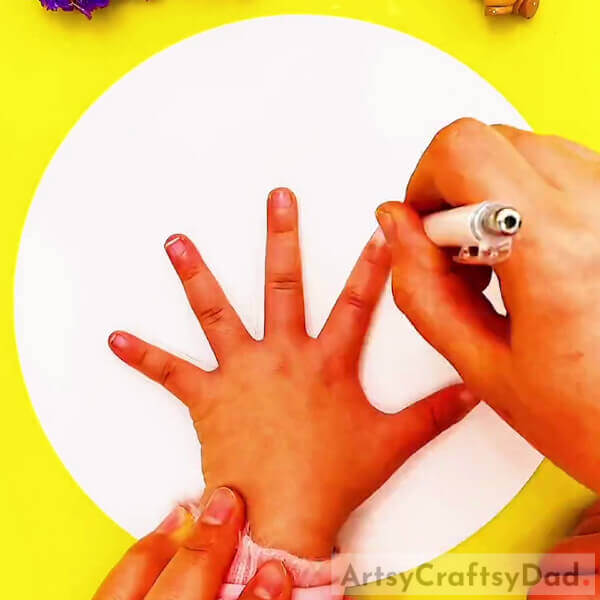
Begin this drawing by taking a white circular paper sheet as the base for your drawing and a black marker. Place your left hand over the base by stretching it open and using the black marker, outline the hand till the end of the palm.
Step #2: Rotating The Drawing 90 Degrees

Next, using the marker, connect the below gap of the palm and then rotate it upside down or 90 degrees.
Step #3: Making A Santa Claus
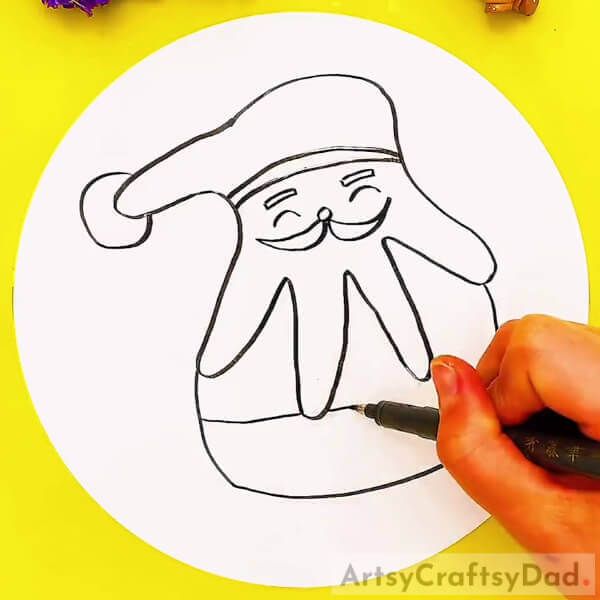
Using the marker, draw 2 parallel curved lines at the top of the palm, beside the thumb outline to make the cap of the Santa Claus. Complete the cap by making a round pom-pom at the tip of your thumb outline. Make sure to not make the circle at the very tip, make it from a little back to make it look behind the thumb outline.
Now, below the cap, make the rectangular eyebrows in the palm outline side by side. Make curved closed eyes below the eyebrows and a small round nose in the middle of the eyes. Beneath the nose, make the curved and pointed mustaches as shown in the image. These finger outlines represent the beard of Santa. This completes Santa’s face.
For the body, make a rounded rectangle base connecting with the sides of the mustache and make a line above the end of the body and parallel to it.
Step #4: Making Hands And Belt Of Santa
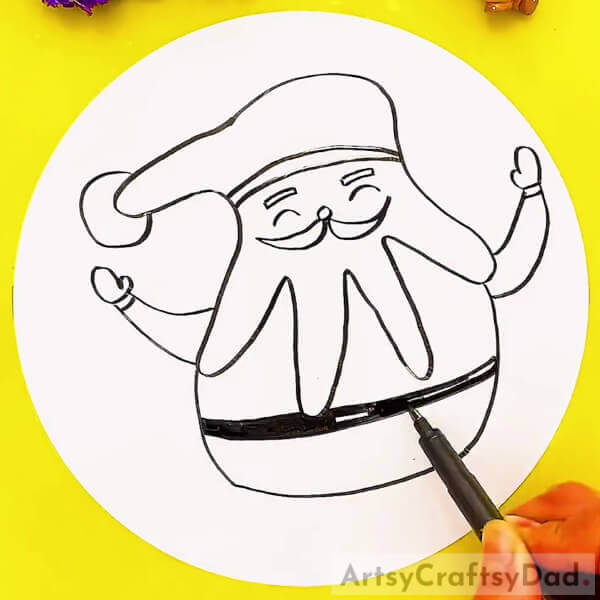
Draw, curved hands on the sides of the body. Make them thicker from the start and thin from the end. Also, instead of hand, make gloves over the tip of the hands.
Make another curved line just below the already made one to make the thin belt of the Santa and color it out from the marker only leaving a small thin rectangle in the middle.
Step #5: Coloring The Santa’s Hat/Cap
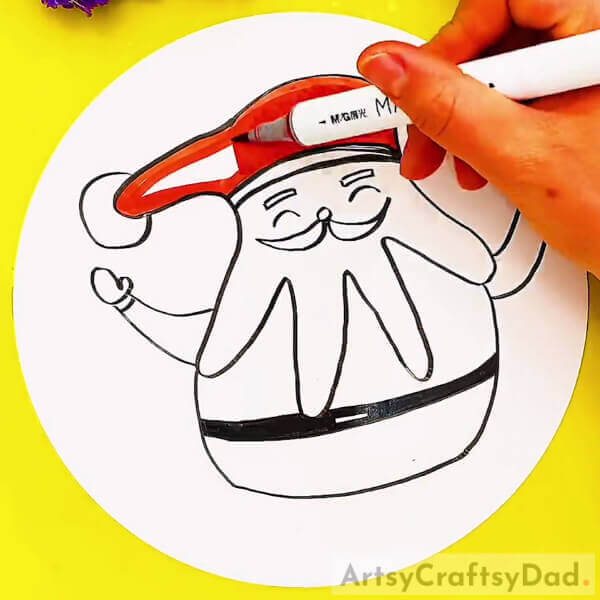
Using a red sketch marker, color the Santa’s hat or cap leaving the pom-pom circle.
Step #6: Coloring The Clothes On Santa’s Body
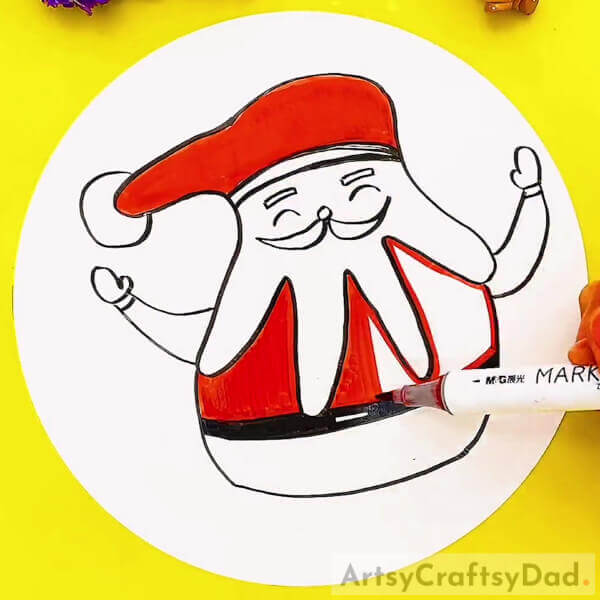
Using the red sketch marker, color the body below the mustache to make the clothes of Santa.
Step #7: Coloring The Whole Outfit Of Santa

Using the marker, color the body below the belt and hands with gloves to color the whole outfit of Santa.
Step #8: Coloring The Face Of Santa
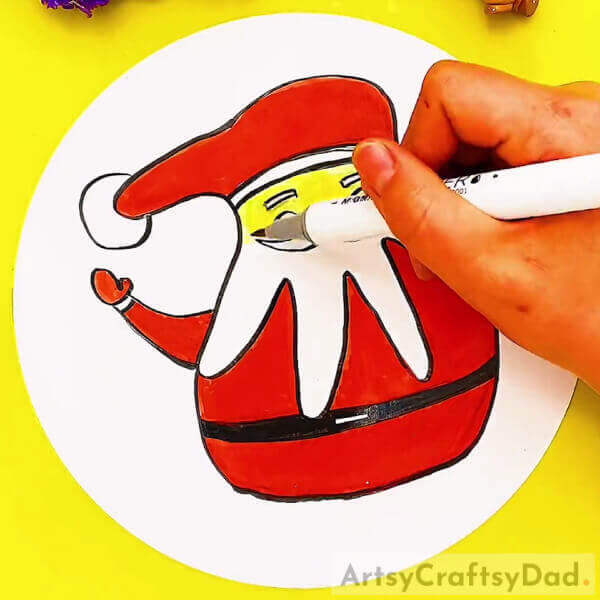
Now, using a yellow sketch marker, color the face of Santa till the mustaches.
Step #9: Making Snowflakes
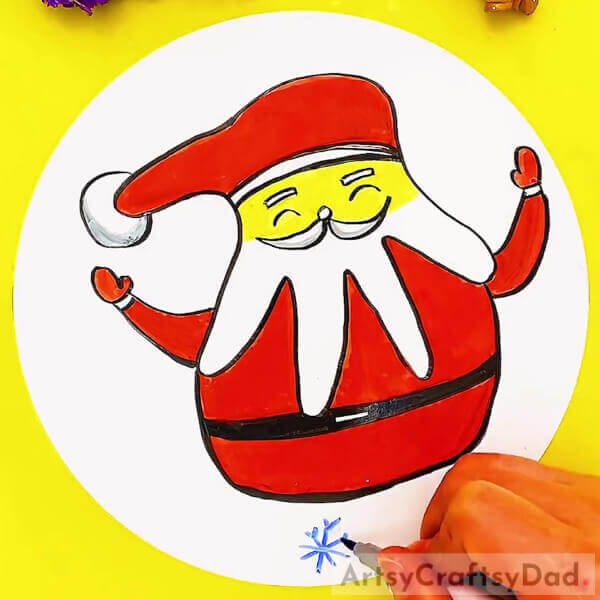
Using a blue sketch marker, make the star-like snowflakes on the base randomly and of various sizes.
Step #10: Drawing Spirals
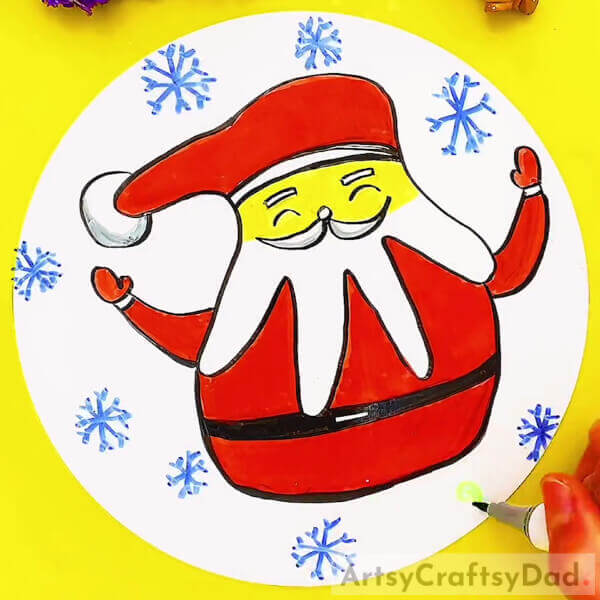
Using a neon yellow sketch marker, make spirals over the base randomly like the snowflakes.
This Is The Final Look Of Your Santa Drawing!

For the last step, color the nose red using the red sketch marker.
Congratulations! You have finally succeeded in making your Santa Claus drawing just in time!
Use it as wall decor at Christmas time! Everybody will definitely admire your creation every time they look at it! Visitors and relatives will also admire your amazing drawing skills! You can also make this drawing for the Christmas postcards! I’m definitely sure everybody would love to receive such a pretty and handmade post envelope by your little hands! Customize it as you like by letting out your creativity!
Hope you loved the article and are happy with the results! We would love to keep bringing such crafts for you just keep motivated by your warm feedback in the comments section!
You May Also Like:
- Easy Town Landscape Drawing Tutorial For Kids
- Santa Claus Craft Ideas for Kids
- Simple Animal Drawing for Kids to Learn at Home
- How to make Santa Claus from plastic bottle
- Kids friendly drawing with numbers as a base (Tutorial)


