Learn how to create colorful sheep in field paper craft by yourself using our tutorial, this craft is an interesting one to try in your free time.
Welcome to this paper craft tutorial! Using this step-by-step tutorial, you can create your own colorful sheep in field paper craft effortlessly. This paper craft is an interesting one to create which is perfect for children of all ages. You will need some colorful craft papers, scissors, googly eyes, black markers, and glue. Let’s get started!
Colorful Paper Sheep Craft Tutorial in the Field
Must Read: Easy Construction Paper Halloween Crafts
Supplies & Tools
- Craft paper (light green, red, blue, green, yellow, orange and pink)
- Scissors
- Glue
- Googly eyes
- Black and red color markers
Paper Sheep Instructions
Step #1: Cutting Green Color Craft Paper To Create Grass

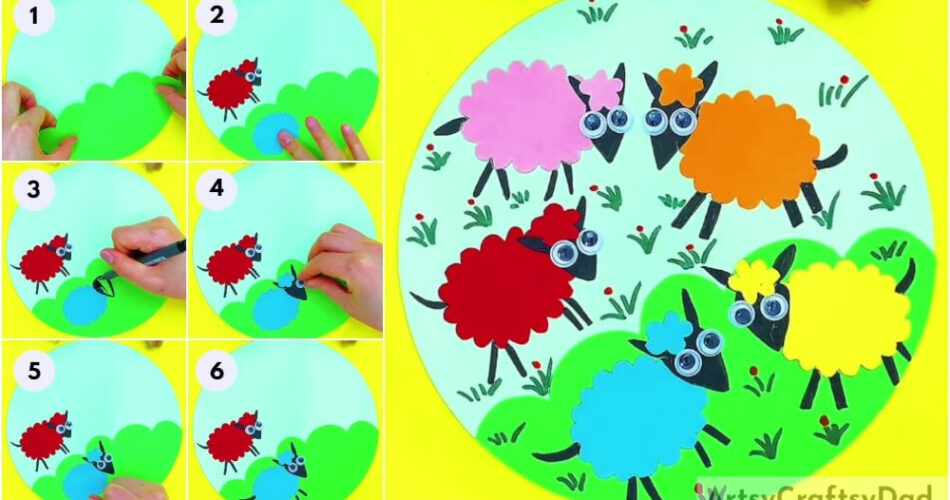
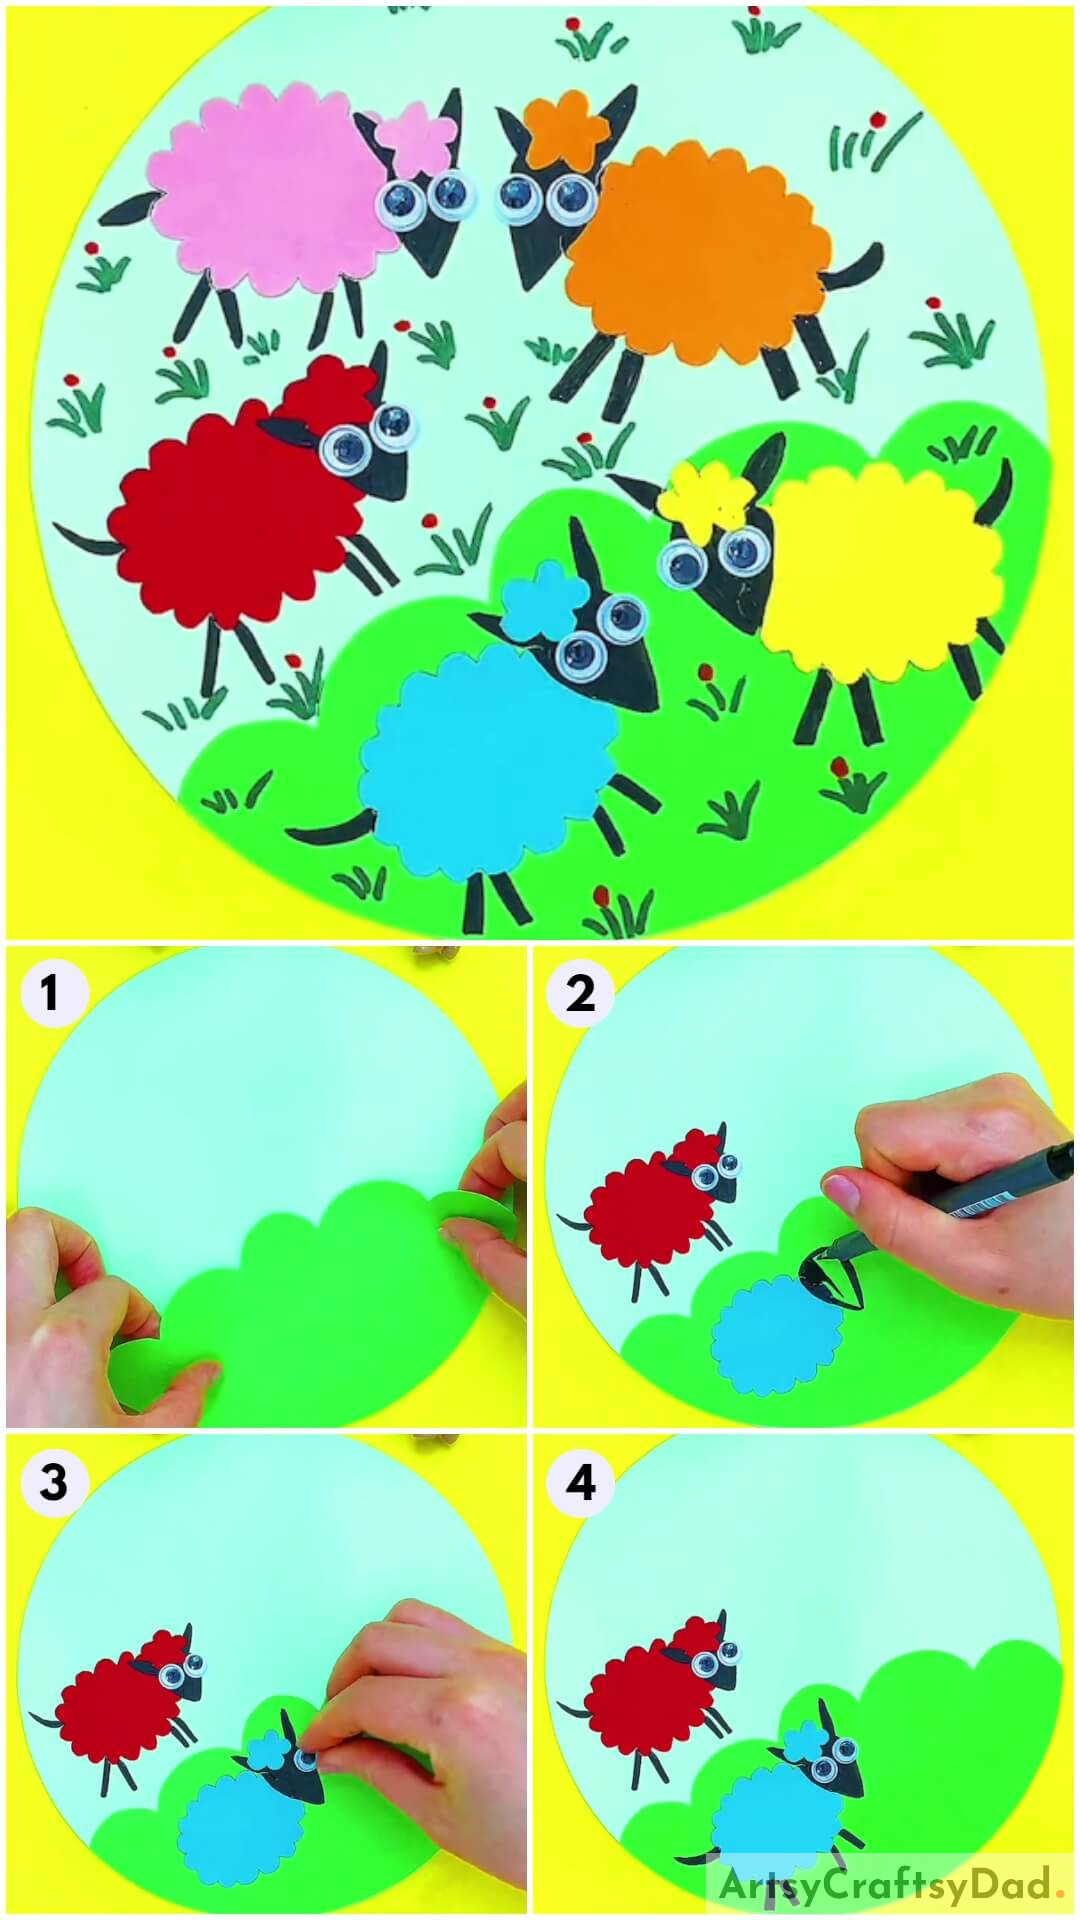
Cut light green and green color craft papers into a circle shape, then cut some big curves from green craft paper and paste them on the bottom of your blue color craft paper using glue.
Step #2: Creating and Pasting Red Color Sheep

Cut an imperfect circle-shaped piece of red craft paper with little curves around it and also cut a very small circle-shaped red piece of craft paper with little curves. Paste a size red piece of paper on the left above the green paper and draw a head with ears, a tail, and 4 legs using a black marker. Then paste 2 googly eyes on the head and paste a small piece of red-colored craft paper above those eyes.
Step #3: Creating Blue Color Sheep From Blue Craft Paper

Like red sheep, cut one big and one small circle from blue craft paper with little curves. Paste a big circle on the left side of on green paper. Also, draw a sheep head with 2 ears using a backmarker.
Step #4: Pasting Small Piece Of Blue Craft Paper

Now, paste a small piece of blue paper that we cut before from blue craft paper in between sheep’s ears.
Step #5: Pasting Googly Eyes For Blue Sheep

Now, take 2 pieces of googly eyes and paste them on a blue sheep’s head under the ears.
Step #6: Drawing Legs For Blue Sheep

With the help of a black marker draw 2 thick parallel straight lines at the right and below the blue sheep. Then under the blue sheep, draw 2 thick parallel straight lines at the left of it.
Step #7: Drawing Tails For Blue Sheep

Draw a thick curvy line at the left side of your blue sheep for the tail.
Step #8: Creating Three More Sheep

Follow the same steps to create another sheep, and use yellow, orange, and pink color craft papers for another sheep.
Step #9: Drawing Few Grasses Around Our Sheep
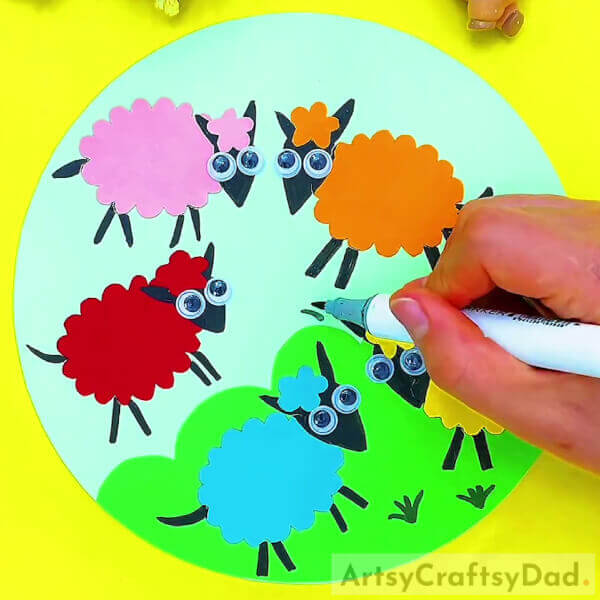
Using a dark green color marker, closely draw 3 to 4 curvy lines as shown in the image around your sheep to draw grasses.
Completing Our Colorful Sheep In Field Papercraft!

Then, put one red dot above any one of the grasses that we drew before. That’s all our easy sheep in the field paper craft is ready!
Hope you like this colorful sheep in field paper craft tutorial. We like to know your thoughts about this tutorial, Share your thoughts in the comment section. Visit our website for more craft and art tutorials.
Thank you for visiting our website.
You May Also Like
- Clay-Paper Sunflower Garden Craft Tutorial
- Simple Paper Tearing Flowers Craft Tutorial
- How to make a Paper Flower Vase – Paper Craft Tutorial
- Sheep Hand Embroidery Design Ideas
- Clay Snails On Leaves Craft Tutorial For Kids


