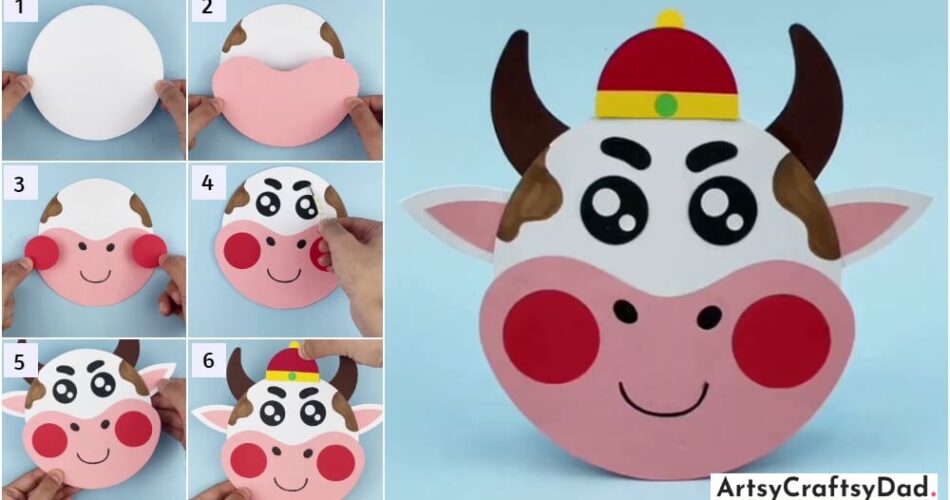
Craft a charming paper cow face with this easy-to-follow tutorial. Ignite your child’s creativity and appreciation for farm animals in this engaging DIY project.
Unlock your child’s inner farmer with this delightful paper cow face craft tutorial. Featuring easy-to-follow steps and a whimsical design, this hands-on project promises hours of engaging fun and a newfound appreciation for the charming bovine.
Paper Cow Face Craft Tutorial For Kids
Must Read: Red Rabbits Paper Craft Step-By-Step Tutorial For Kids
Supplies & Tools
- Sheets( White, Pink, Red, Black, Yellow, Green, Brown)
- Glue
- Scissors
- Black marker
- Brown sketch pen
- Pencil
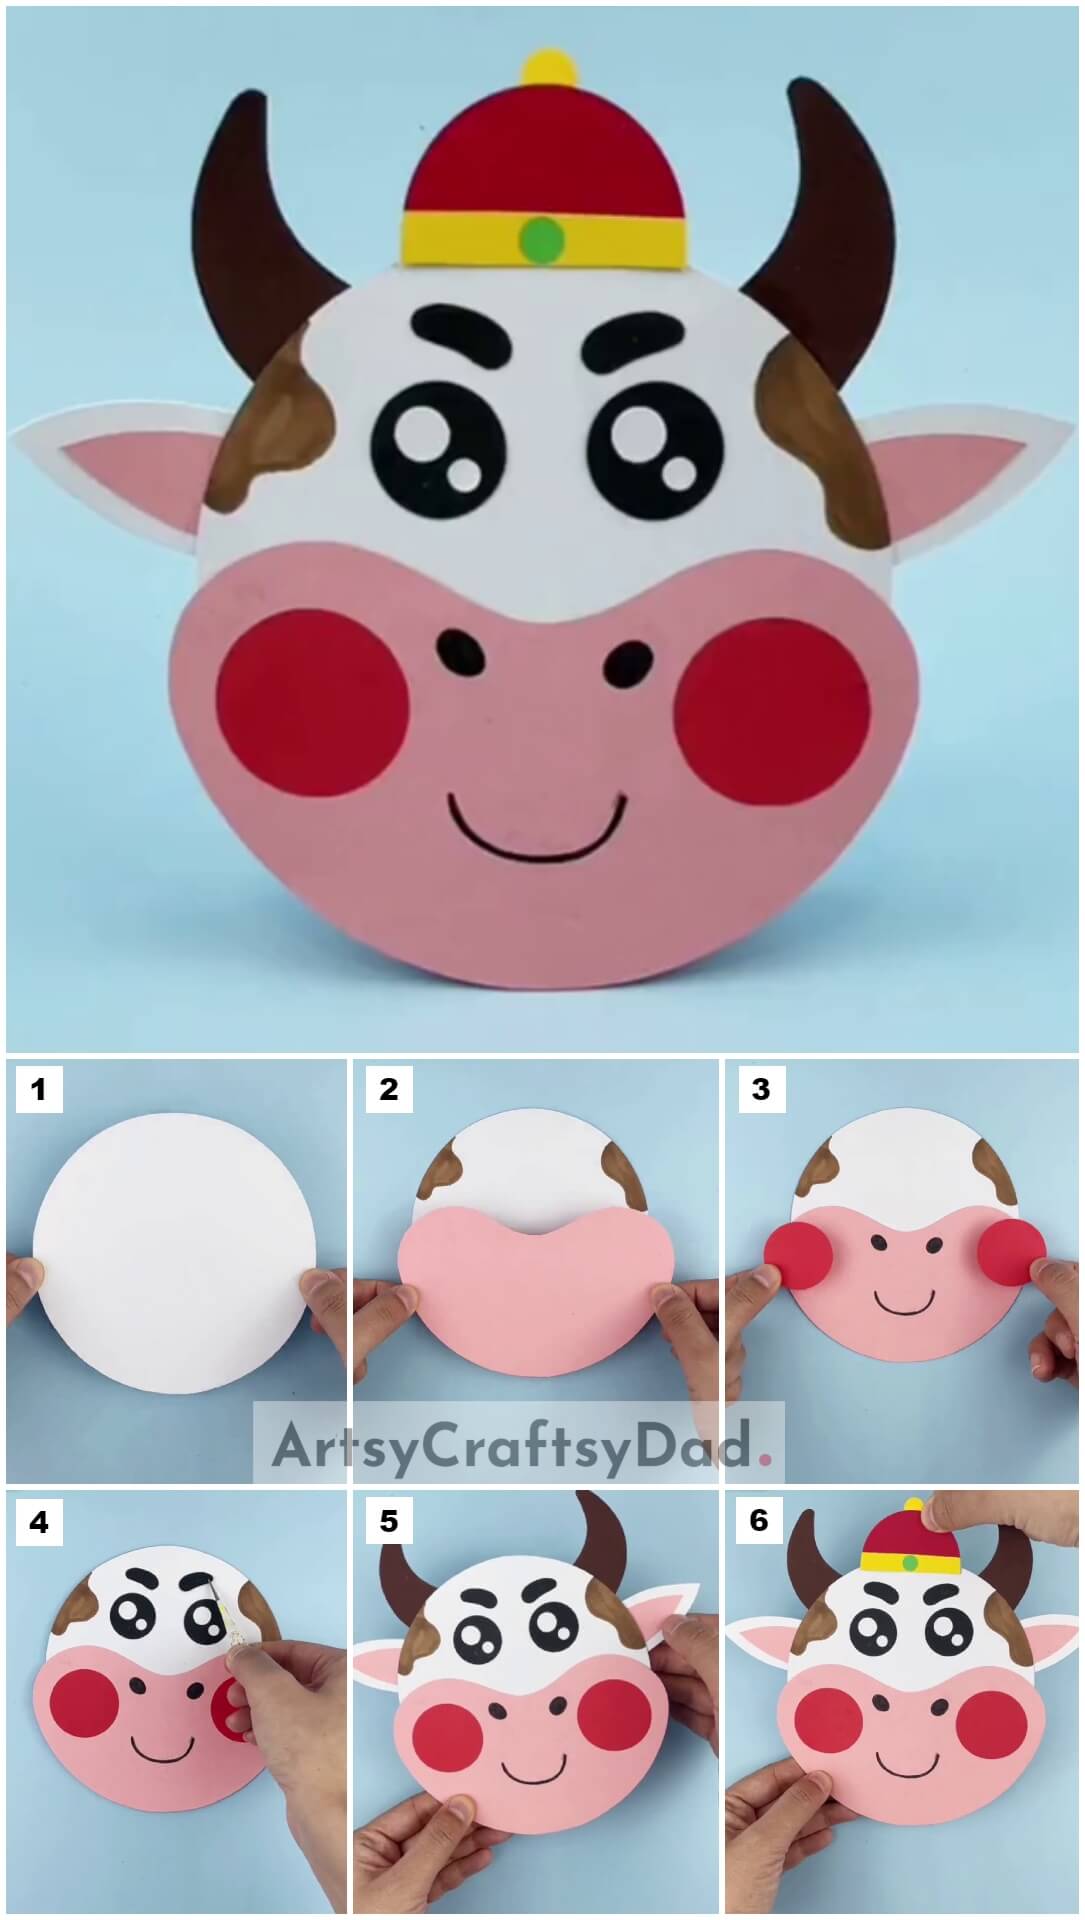
Paper Cow Face Craft Instructions
Step #1: Begin With The Craft
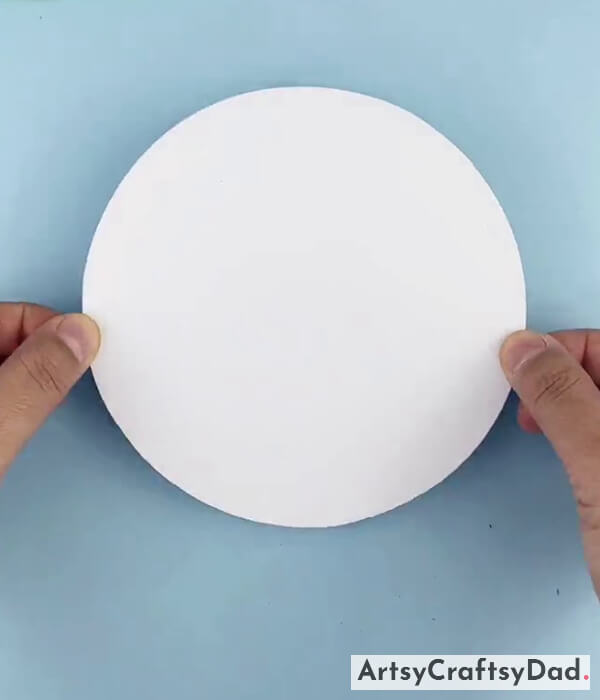
Let’s begin with the craft. Now, first I am taking a white sheet and circularly cutting that sheet.
Step #2: Coloring The Sheet

Make two designs on the upper corners of the sheet and color it with the help of brown sketch color.
Step #3: Make A Face

Now, make a face with the help of a pink sheet draw the design on the sheet with the help of a pencil cut it with the help of scissors, and paste it on the bottom part of the sheet.
Step #4: Make Nose And Mouth On The Design

After pasting the design on the sheet use a black marker to draw nose and a mouth on the sheet.
Step #5: Paste Red Chicks

Use a red sheet cut two similar circles and paste them on both sides of the pink sheet.
Step #6: Paste The Eyes
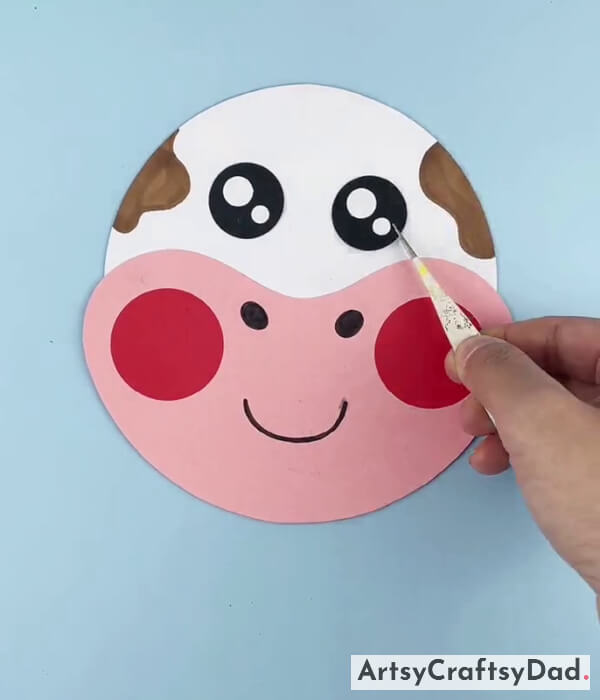
Now, after completing that paste the eyes on the white sheet for that first cut two circles from the black sheet and then paste them on the sheet then cut four circles from the white sheet which are smaller than the black circle. Among four white circles, two must have the same size the other two must have the same size, and the two same size circles are smaller than the other two same size circles. Paste them all according just like the picture shown above.
Step #7: Paste Eyebrows

Now, with the help of a black sheet make two eyebrows and paste them just above the eyes.
Step #8: Add Horns And Ears

Now, after completing the shape make horns with the help of a brown sheet. Cut two horns and then paste them on the head of the cow’s face and add ears too. To prepare the ears you need a white and a pink sheet cut them in different sizes but with the same design paste the pink sheet above the white and then paste it on the left corner of the cow’s face.
Step #9: Repeat The Same Step

Again repeat the step and paste the ear on the right side too.
Step #10: Add The Hat On The Head Of The Cow
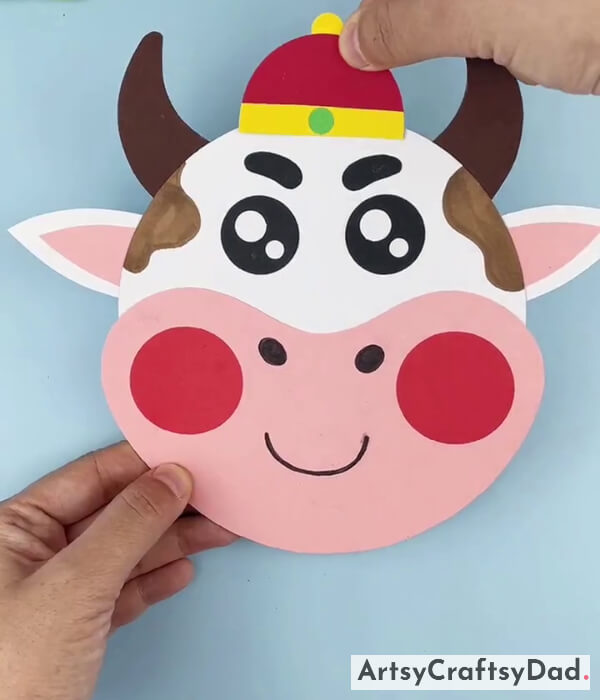
Add the hat on the head of the cow for that use a red sheet and cut it into a “C” shape add a yellow sheet strip at the bottom and a circle shape at the top of the red sheet, at last, cut a small green circle and paste in the middle of the yellow strip and then paste the bell on the head of the cow face.
Congratulations! Your Paper Cow Face Craft Is Ready
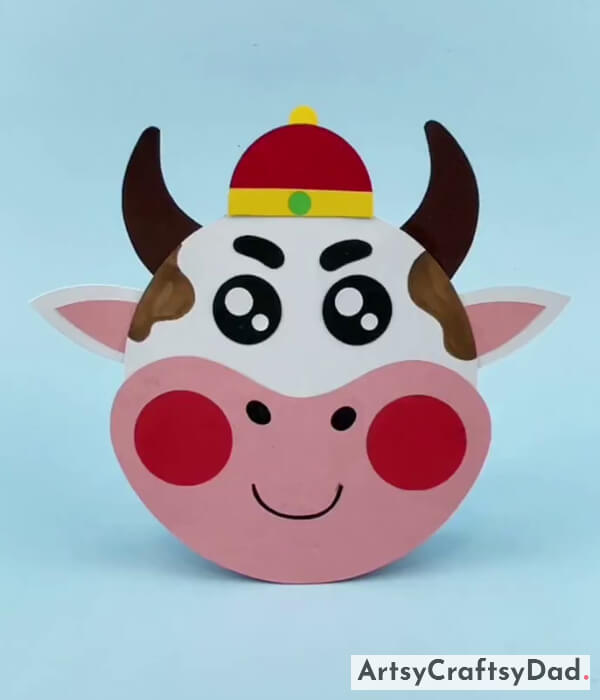
Finally! Your craft is ready.
Congratulations, your paper cow face craft is ready. You will surely have fun doing this.
Craft a cheerful paper cow face with this captivating step-by-step tutorial. This creative DIY project is a wonderful way to nurture your child’s artistic skills and connection to the natural world.
You Might Also Like This
- DIY Paper Bird CraftStep-By-Stepp Tutorial For Kids
- DIY Paper Trees CraftStep-By-Stepp Tutorial For Kids
- Beautiful Paper Cup Sunflower CraftStep-By-Stepp Tutorial For Kids
- Crab Paper CraftStep-By-Stepp Tutorial For Kids
- Paper Strips Tree CraftStep-By-Stepp Tutorial


