“Learn how to create a stunning sunflower craft using paper cups with this step-by-step tutorial for kids. This beginner-friendly DIY project is not only fun and engaging, but it also helps develop fine motor skills and creativity. Get inspired by our detailed instructions and unleash your child’s artistic side today!”
Crafting is a wonderful way for kids to explore their creativity and develop their fine motor skills. One craft that is sure to bring a smile to their faces is the beautiful paper cup sunflower craft. In this step-by-step tutorial, we will guide you through the process of creating this vibrant and cheerful sunflower using simple materials such as paper cups, paint, and glue. Whether you’re a parent, teacher, or caregiver, this craft is perfect for keeping little ones engaged and entertained while also fostering their artistic abilities. So gather your supplies and let’s get started on this fun and educational crafting adventure!
Creative Sunflower Paper Cup Craft Tutorial For Kids
Must Read: Cotton Bud Sunflower Garden Step-By-Step Tutorial For Kids
Supplies & Tools
- Paper Cups (Orange, Yellow)
- Paper Cutter
- Scissors
- Pencil
- Marker (Red, Black )
Paper Cup Sunflower Instructions
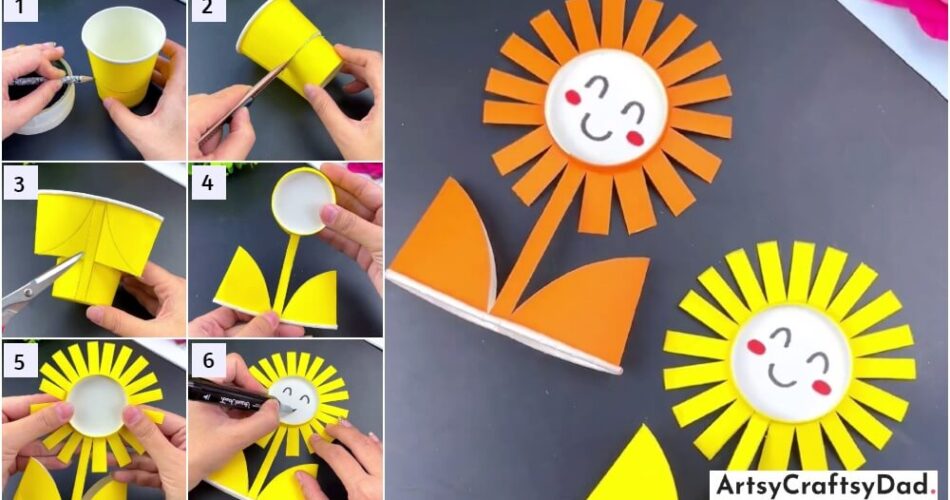
Step #1: Drawing On Cup
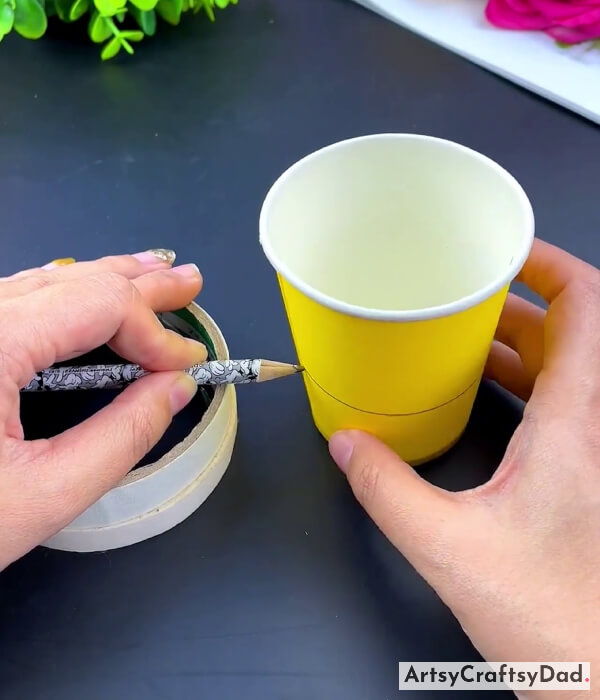
First, take a yellow paper cup & draw a line horizontally around the cup on the lower side by using a pencil.
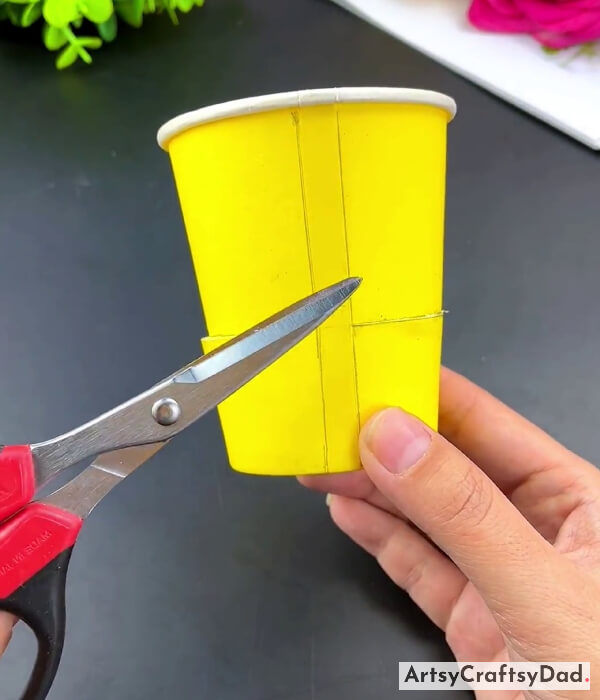
Step #2: Cutting Cup Horizontally
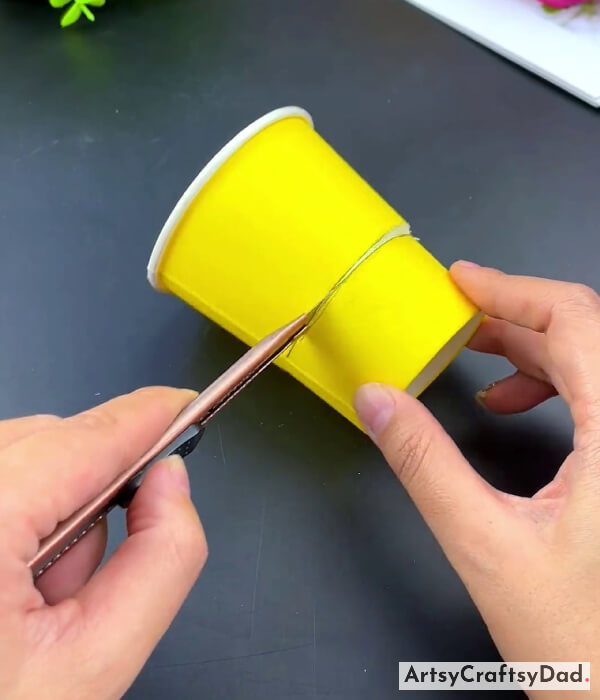
Now, take a paper cutter & cut the paper cup along the horizontal line that we drew in the previous step but not completely.
Step #3: Drawing Two Lines Vertically
Now, draw two lines vertically parallel to each other on the paper cup with a 1/2 cm distance between them using a pencil as you saw in the above image.
Step #4: Pressing Paper Cup Upper Front Edges

Now, press the paper cup’s upper front edges with your fingers.
Step #5: Drawing Two Curvy Lines On a Cup
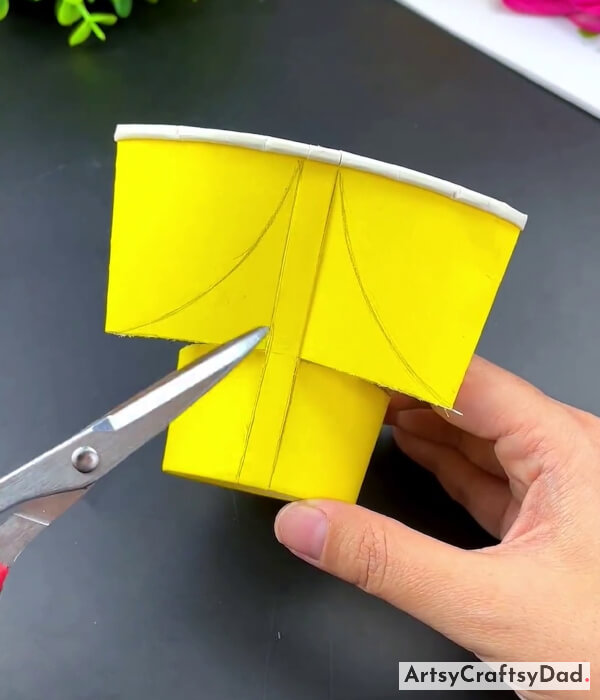
Now, draw two curvy slop lines on the paper cup that will start from the top of the vertical lines.
Step #6: Cutting Drawn Curvy Slop Lines Outline
Cut the drawn curvy slop lines but not completely & cut out the extra paper around the vertical lines still attached to vertical lines.
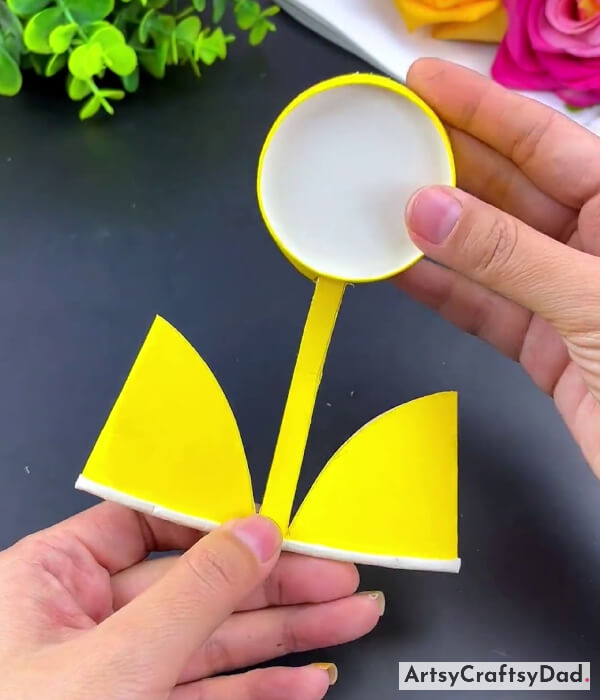
Step #7: Making Flower Petals
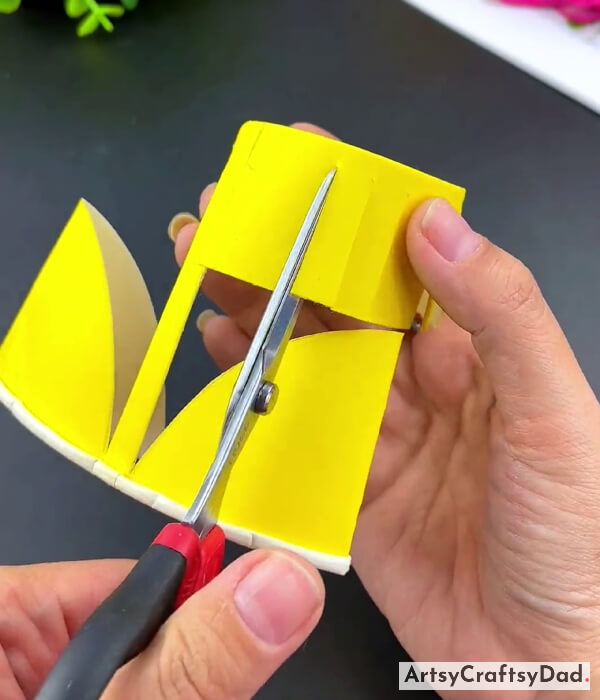
Now, work on the lower base of the paper cup & cut it into little strips but not completely as petals of sunflower.
Step #8: Making Flower
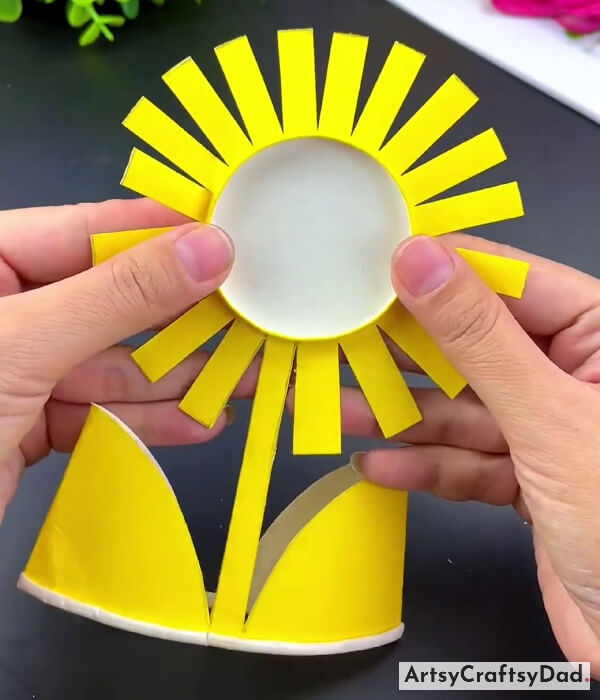
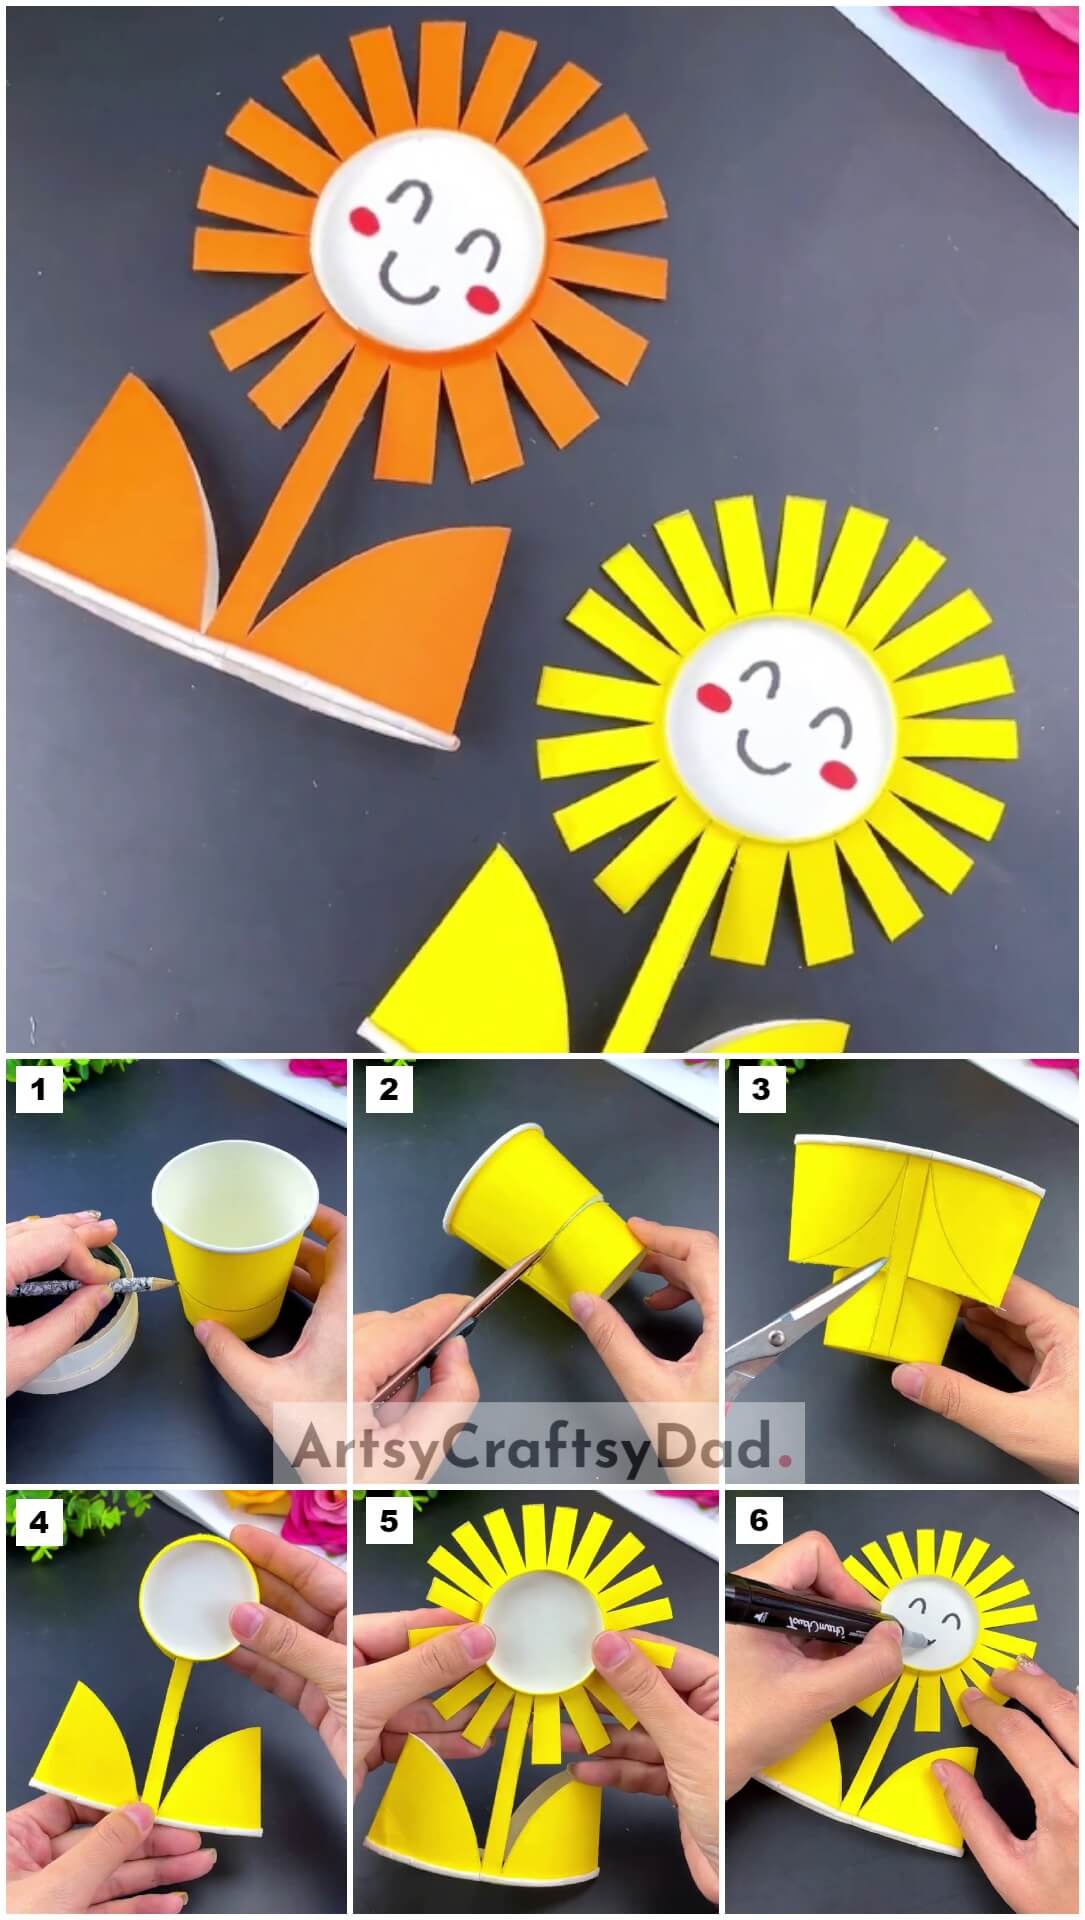
Now, we keep petals on the front side of the paper cup base to make a sunflower as shown in the above image.
Step #9: Drawing Face

Take a black marker and draw eyes & mouth on the sunflower face.
Step #10: Drawing Blushing On Cheeks
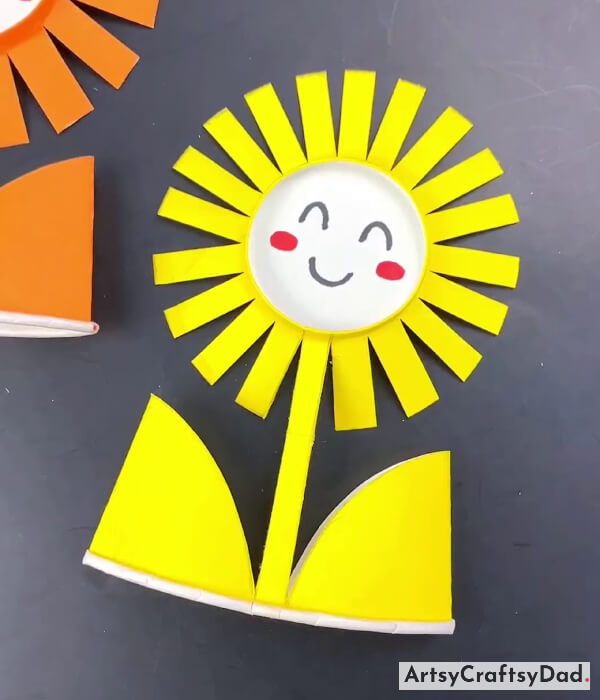
Take a red color marker & draw blushes on the sunflower cheeks.
Final Look Of Our Sunflower Craft!

Now, take an orange color paper cup & make another sunflower by following the same process that we used for making the first sunflower. This is the complete look of our sunflower craft!
Hurry, we have completed our sunflower craft here. If you want you could gift this adorable craft to your friends & family it will bring a smile to their faces. This craft will be a good activity to perform in the school for the preschoolers. This craft not only promotes fine motor skills and hand-eye coordination but also encourages an appreciation for the beauty of flowers. Whether it is done at home or in a classroom setting, this craft is sure to bring joy and smiles to young faces. Please share your response with us in the comment section because we love to hear your thoughts about craft & also if you want to share any ideas then don’t hesitate please share them with us.
Thank you for choosing us!
You Might Also Like This
- Sunny Day Sunflower Field: Paper Craft Tutorial
- Simple To Make Leaf Sunflower Craft Tutorial For Kids
- 20 Beautiful DIY Paper Craft Step-by-Step Tutorials
- Dumpling Dragon Boat Paper Craft Step-By-Step Tutorial
- Amazing Paper Dragon Fruit Craft Step-By-Step Tutorial


