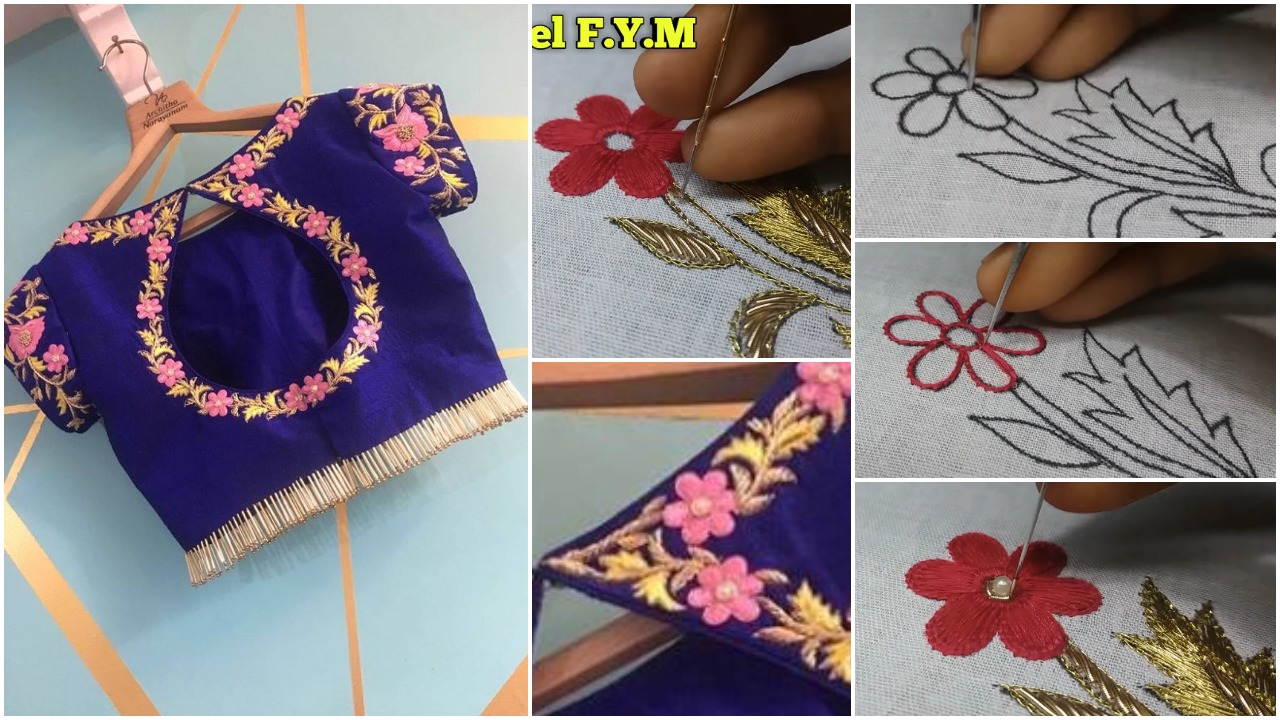
Pretty Blouse Design Tutorial of Aari Work
Aari work adds a touch of royal elegance to any blouse. While professional Aari uses a hook, you can mimic its signature raised, chain-stitch look with a simple cording technique and a regular needle. I used this on a silk blouse for a wedding, and the textured effect was stunning.
You’ll need: Your blouse, a thickish thread (like pearl cotton or crochet thread), a sharp needle, and a thinner thread to match.
The “Faux Aari” Technique:
Trace Your Design: Lightly draw your design (like a floral vine) on the fabric with a water-soluble marker.
Lay the Cord: Place the thick thread along the drawn line. This will be the raised, outline part of your design.
Couch Stitch It Down: Using your thinner matching thread, take tiny, almost invisible stitches over the thick cord, anchoring it to the fabric every 1/4 inch. Don’t pierce the cord; just loop your stitch over it.
Create Details: For fills, use the same couching method but lay the cord in tight, concentric circles for flowers or in a zig-zag for leaves.
The result is a luxurious, dimensional embroidery that looks just like the real thing but is much easier to control for a beginner.
In this post you’ll Learn back side aari work blouse design and also tracing design. Materials i used in this video: white cotton fabric dark pink silk thread golden zari thread, antique zardosi ( french wire ) golden cotton thread a white pearl