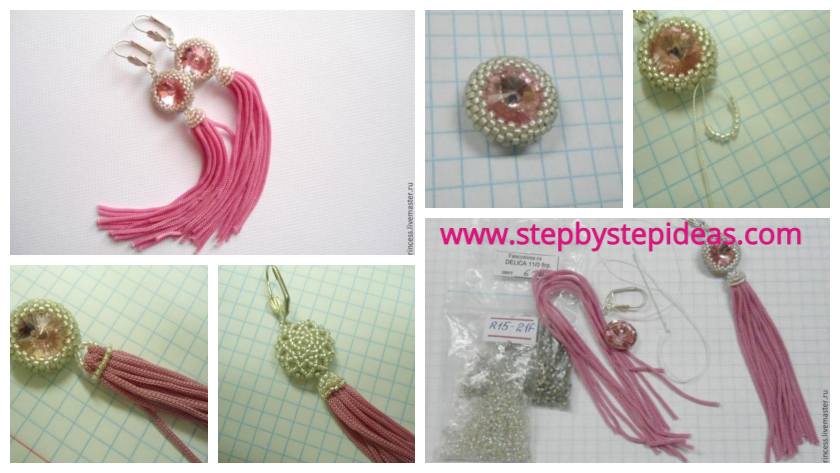
Earrings- bricks with Swarovski crystals look very exquisite, they can be safely dressed for some meaningful celebration. Doing them is easy enough if you are already familiar with the fundamentals of beading. And the materials required are not so much, in general, a little patience and decoration will flaunt on your ears!
We will need:
– round beads number 15;
– beads of delicacy № 11;
– two Swarovski crystals 14 mm (but it is possible and 12 mm);
– schwenzy;
– strong thread;
– a needle for beading;
– a thin cord for fringe.
Step 1
At first the author of the master class plaited the beads with beads. The braid is chosen by each handicraft at its own discretion, since in many respects it will depend on the size of your crystals. But it’s best to braid the crystals and beads with a mosaic weave. You can use this example of braiding crystals and beads.
Step 2
Secure the schwenze. Opposite the loops with the sword, make a loop for the fringe. The number of beads will depend on how you chose the beads, and also on the thickness of the brush itself. So here everything is selected by trial and error. For example, here about seven beads of size # 15 are taken for seven pieces of a cord.
Step 3
Tighten to the end is not necessary, the prepared lengths of the cord pass into the loop and only then tighten properly.
Step 4
Now choose the number of beads for the “girth” of the received brush, tighten it more tightly. By the way, beforehand you can sew up the laces with each other, but with a beaded neck to hide the seam.
Step 5
At this stage, you can already finish the work, but the author of the homemade decided to cover the beads and the tip of the brush. To do this, too, use beads: they are in a pair of rows to sew the tip of the brush. As you know, the second earring is played in a similar way.
Ready-made earrings with Swarovski crystals
Here you are ready to have beautiful earrings, which you need to wear with pride and pleasure! If you want, you can create tassels not from laces, but from beads or felling – the product will get a completely different look, so experiment boldly. We wish you creative success, let your boxes grow from day to day with self-made ornaments!
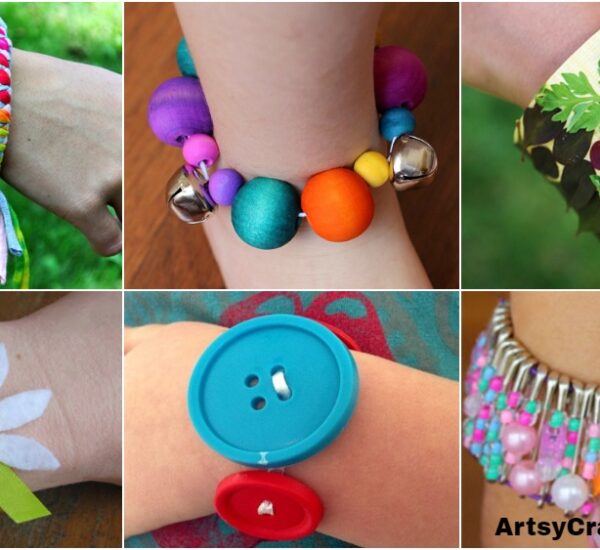
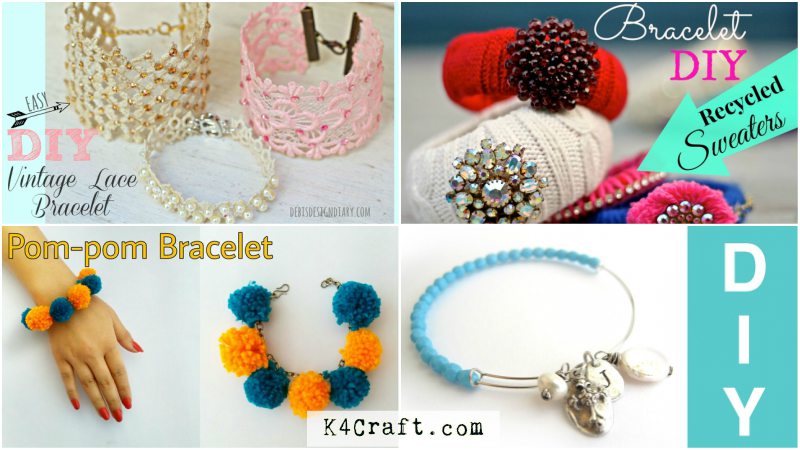
DIY Bracelet Making Ideas for Girls
Read More
- How to make zardosi blouse border
- Stylish off shoulder kurti with back design
- Top beautiful designer kurta For Girls
- How to make garden by recycling plastic bottle
- How to create a Bank (Saving Box) For Kids