Looking for something awesome to do? Well, here is a step-by-step tutorial for making a flower vase out of cardboard. It will be a unique and creative activity.
This is a step-by-step tutorial for a Unique Cardboard Flower Vase Craft Tutorial for Kids ages five and above. It is a very interesting craft activity for kids. They can also use this vase as a house decoration and put some flowers in it. It will look wonderful. They can also paint it to give it some color if they like.
Easy Unique Cardboard Flower Vase Craft For Kids
Must Read: White Cherry Blossom Flower Vase Art Craft Tutorial
Tools & Supplies
- Two Pieces Of Cardboard
- A Cloth Or A Hand Towel
- A Pencil
- A Cutter
- A Glue Gun
- A Jute Rope
Cardboard Flower Instructions
Step #1: Take A Cardboard And Rub A Wet Towel On Its Surface
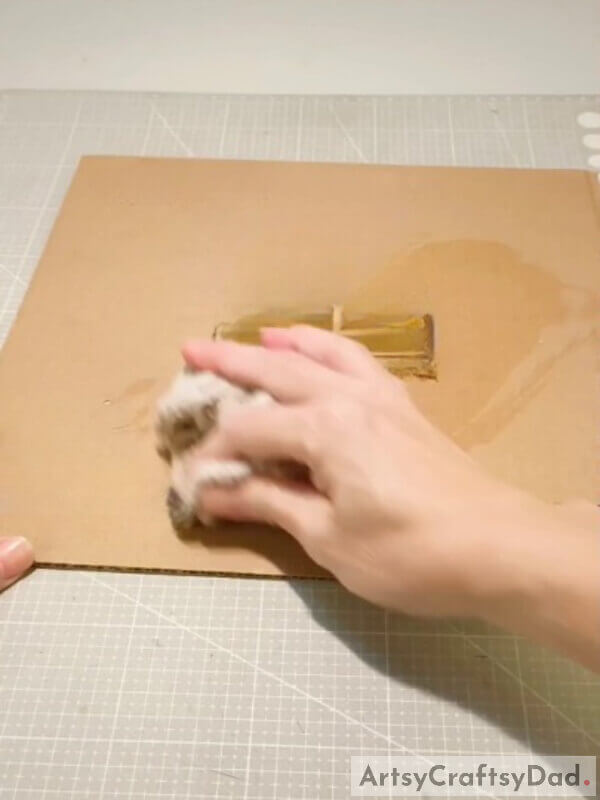
Take a brown-colored rectangular cardboard and a wet hand towel or a cloth. Rub it on the surface of the cardboard. It will make it easy for you to remove the top surface.
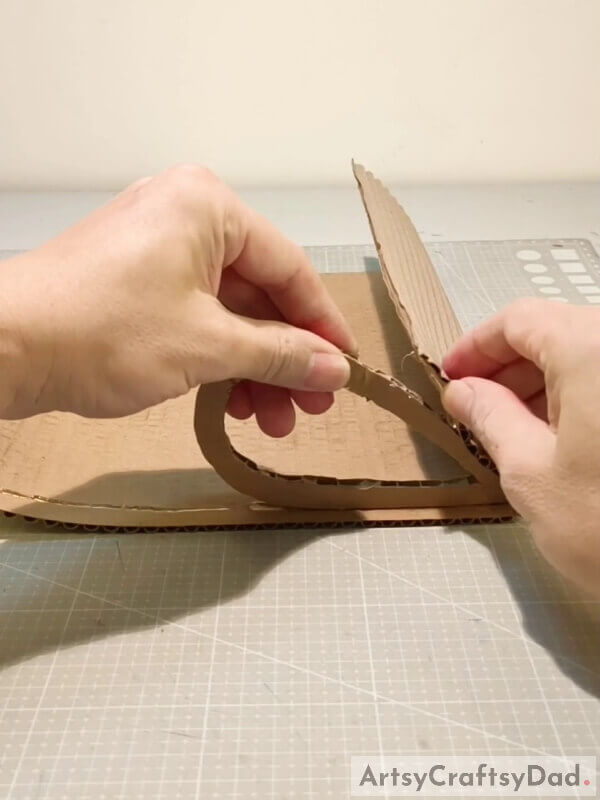
Step #2: Slowly Remove The Top Layer Of The Cardboard
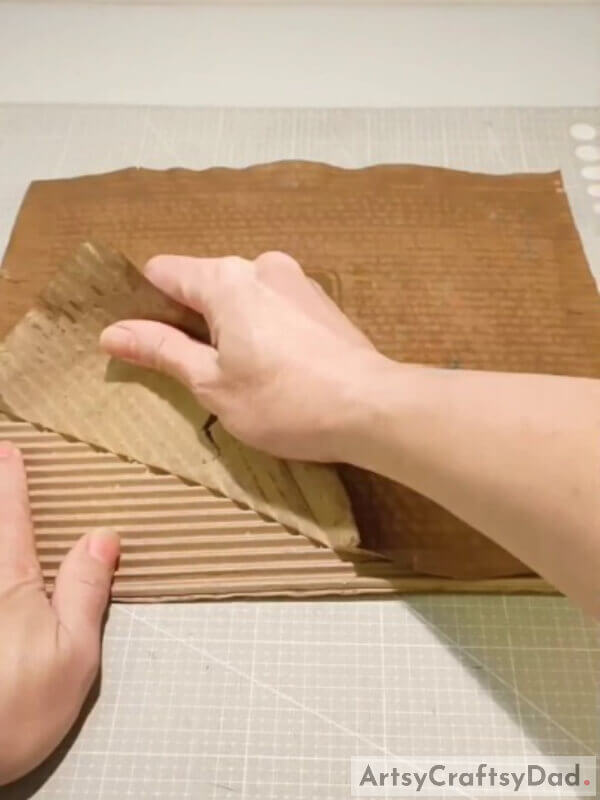
Before the cardboard dries, pull out the upper brown layer.
Step #3: The Cardboard Must Look Like This
Make sure the cardboard looks like this after you remove the surface layer.
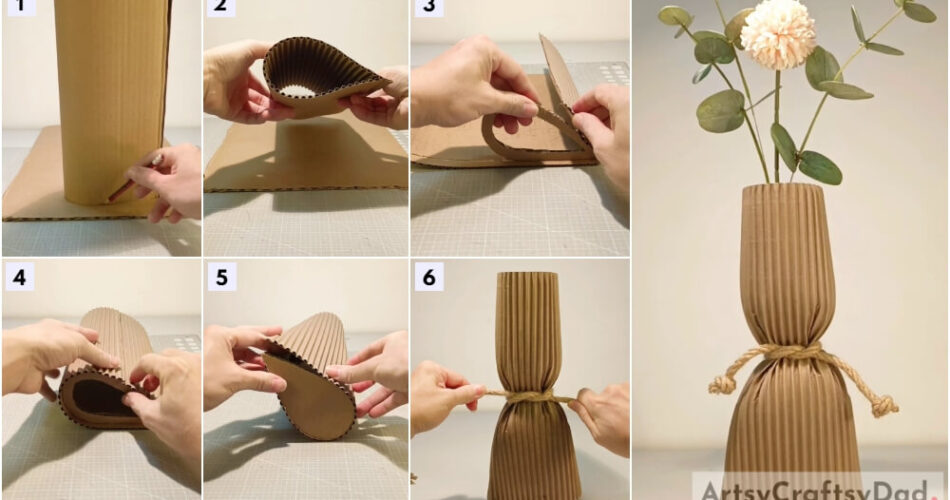
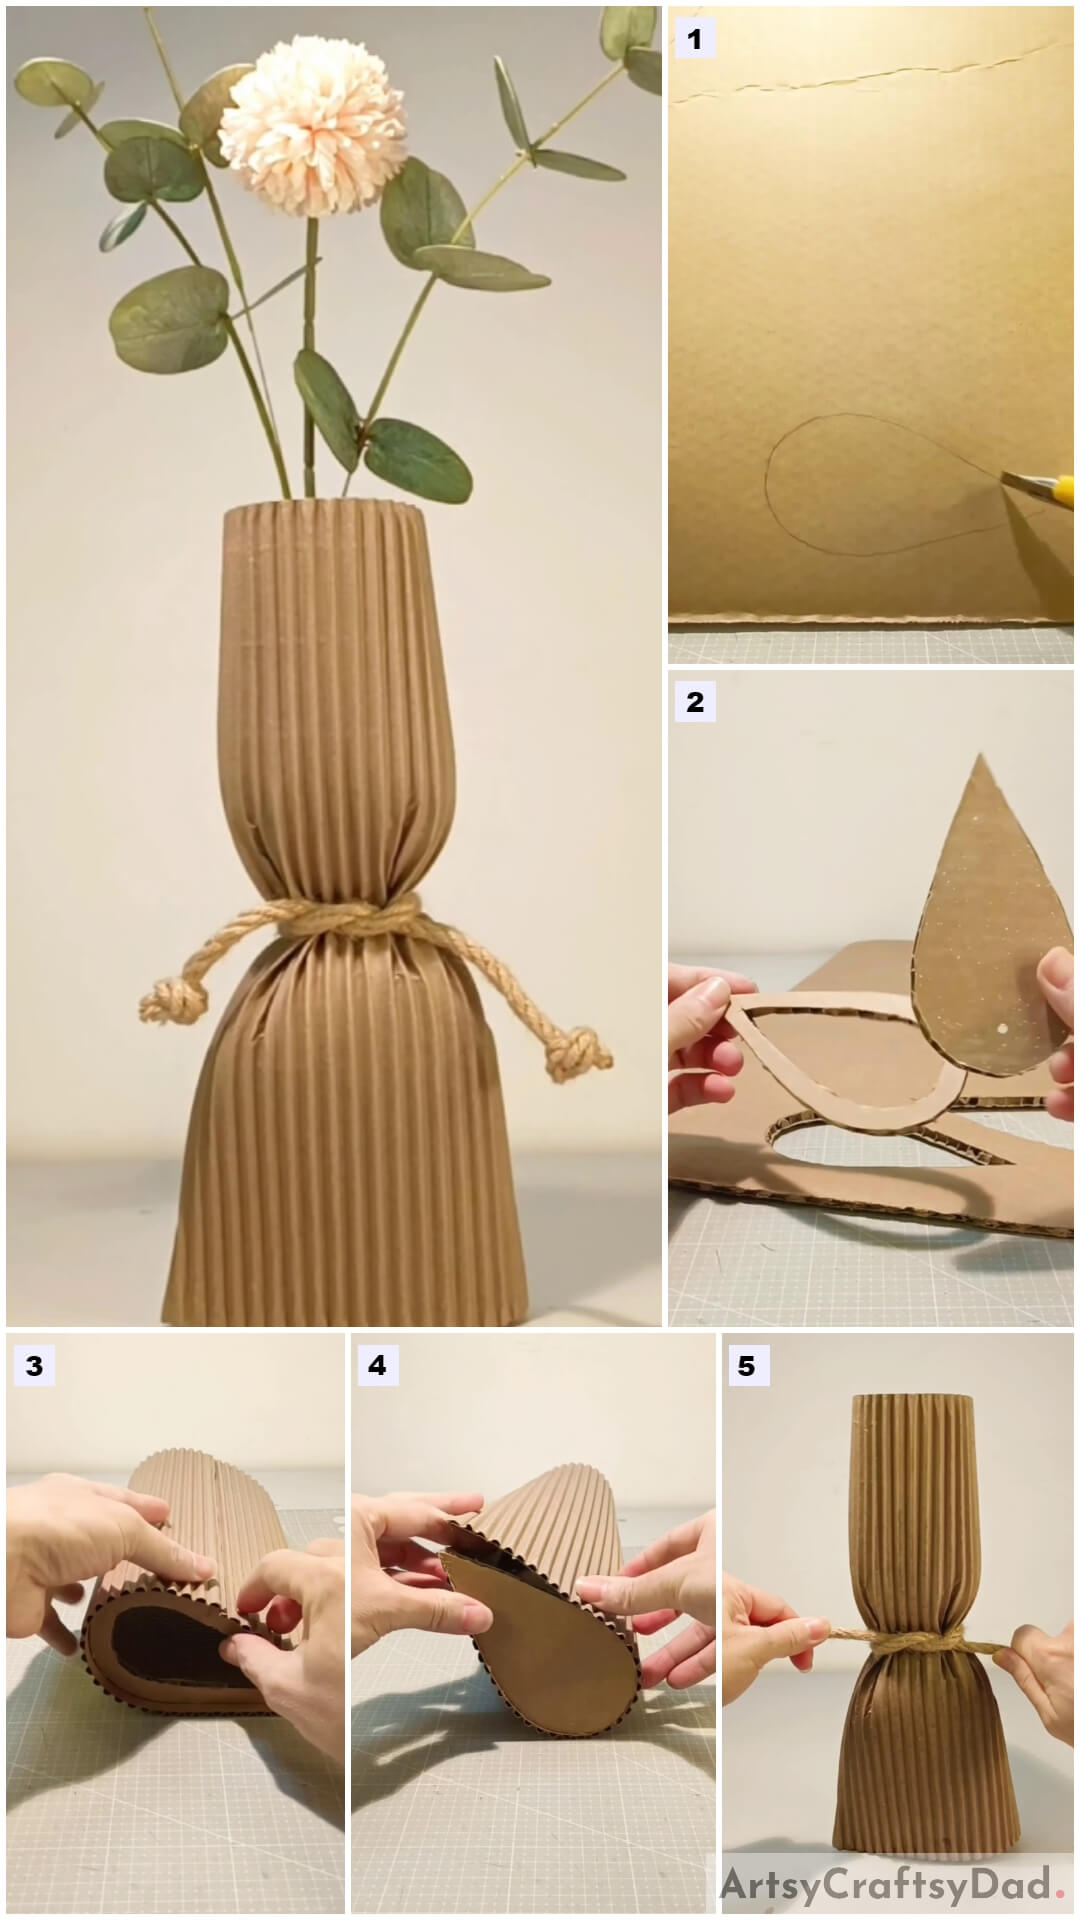
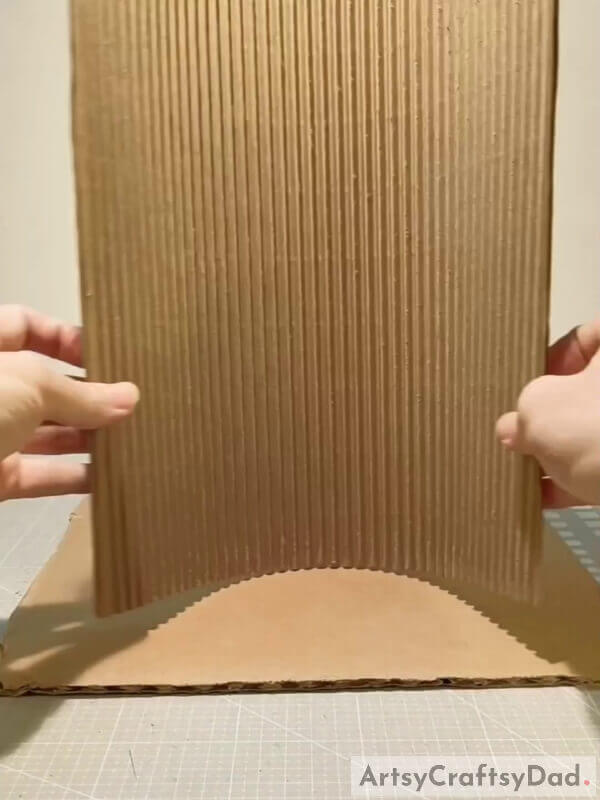
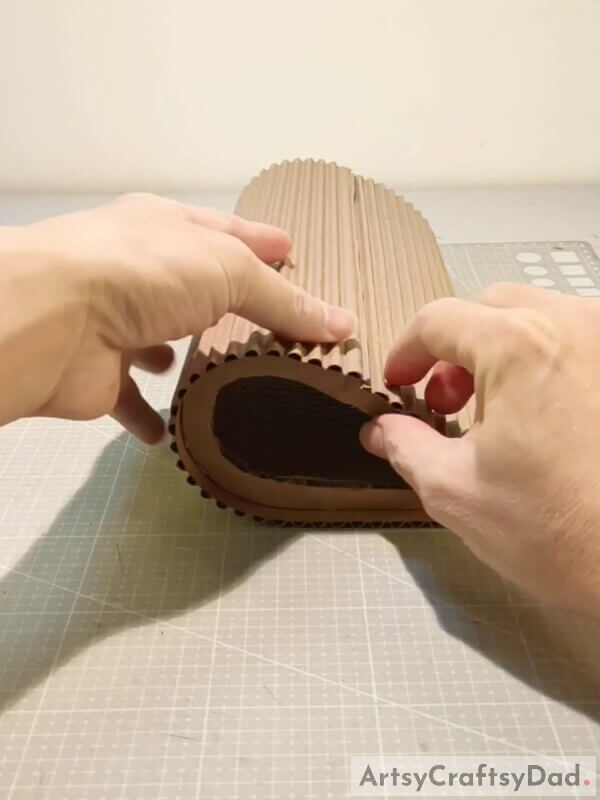
Step #4: Fold The Cardboard But Do Not Make A Crease
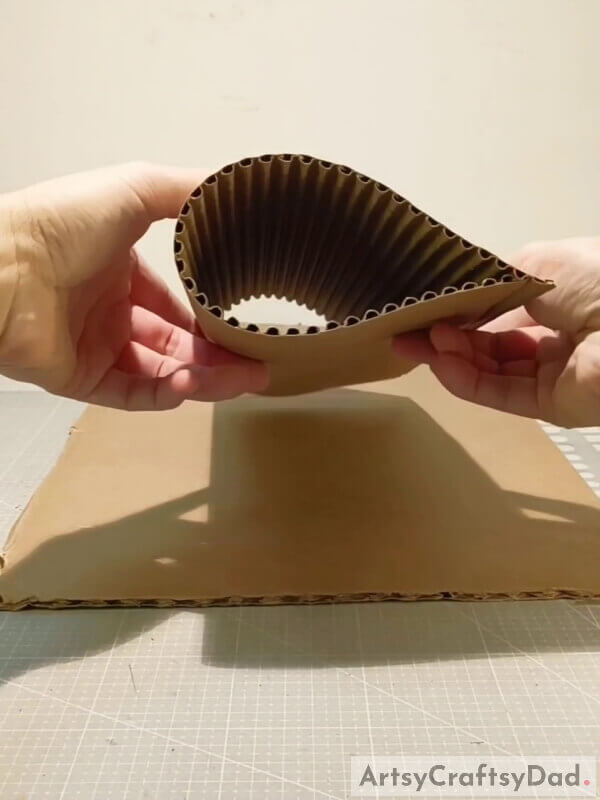
Take the cardboard and fold it in a way that it looks like a drop. Do not make the crease or fold it completely; just join the ends.
Step #5: Draw An Outline Of The Drop-Like Cardboard
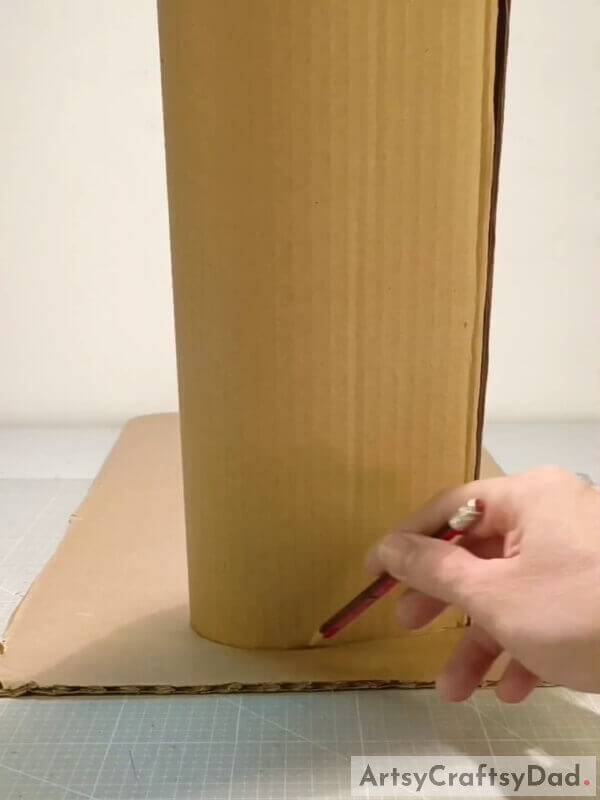
Take another piece of cardboard. Put that initially used cardboard on it and make an outline of that drop-like shape.
Step #6: Cut The Shape Out Using A Cutter
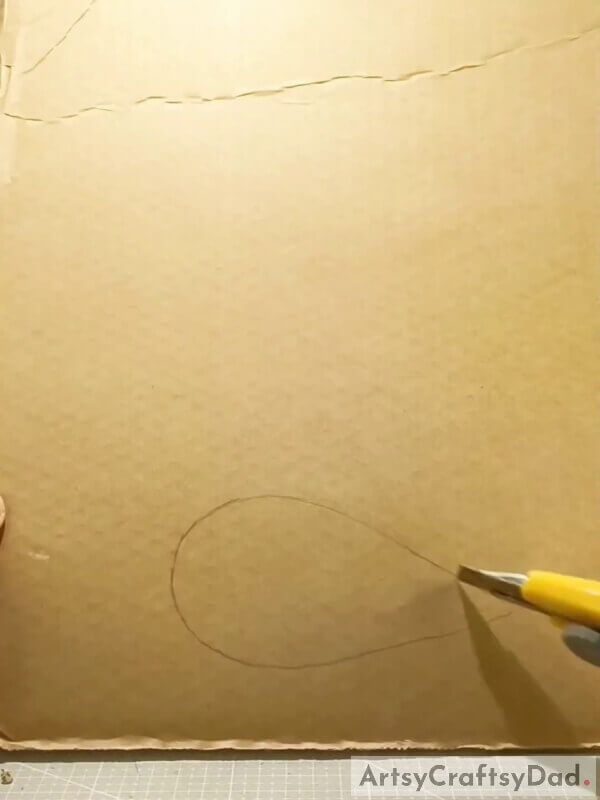
Grab a cutter. Cut out that drop-like shape.
Step #7: Cut Out One More Similar Shape
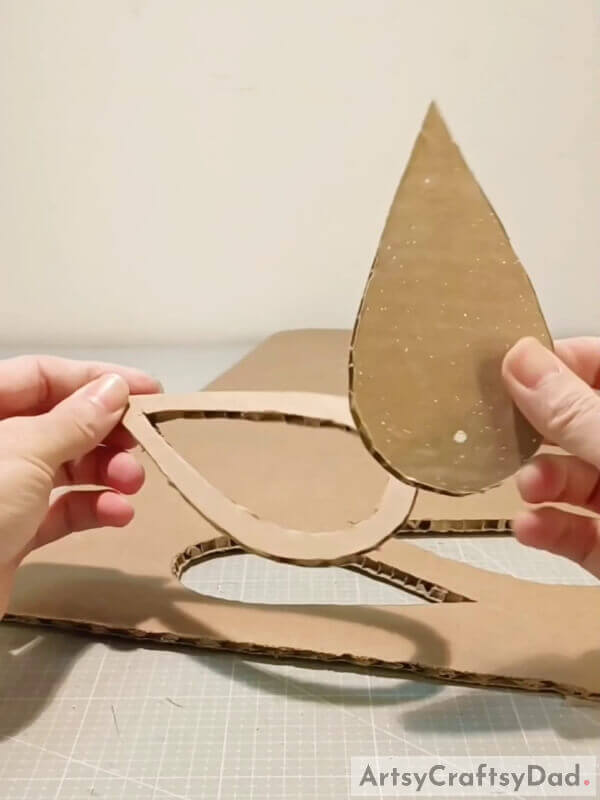
After cutting out one more of that drop, cut the border of that drop. Make sure the border and the other cutting are of equal sizes.
Step #8: Take A Glue Gun And Apply It To The Cardboard
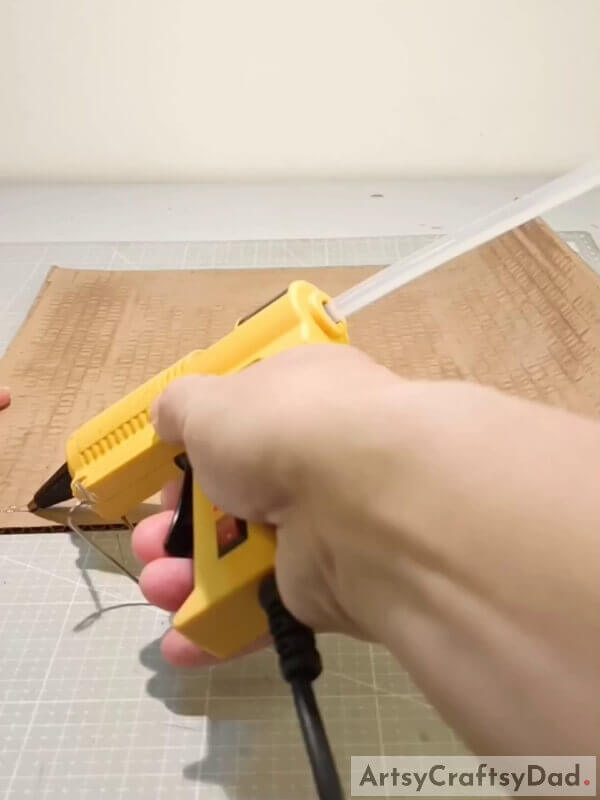
Grab a glue gun. Apply the glue gun at the border of one of the longer sides.
Step #9: Stick The Bordered Drop-Like Shape Before The Glue Dries
Now, before the glue dries, place the border cut out of that drop-like shape on it. Wrap and fold the cardboard around that shape.
Step #10: Cut Out The Extra Part If There
After you wrap it around, cut out the extra portion of the cardboard if there is any.
Step #11: Do The Same With The Other Shape On The Other Side
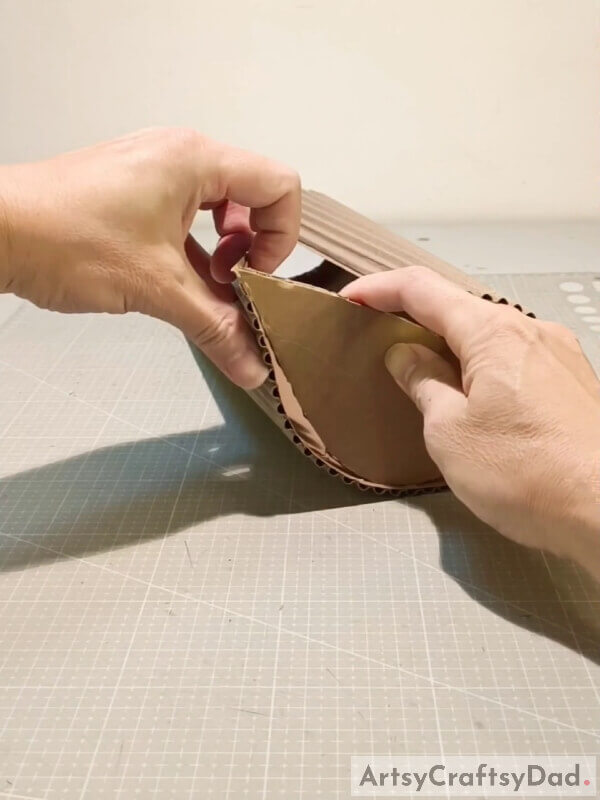
Take the other cut out and paste it on the other side, just like in the previous steps, using the glue gun.
Step #12: Properly Paste It On The Other Side
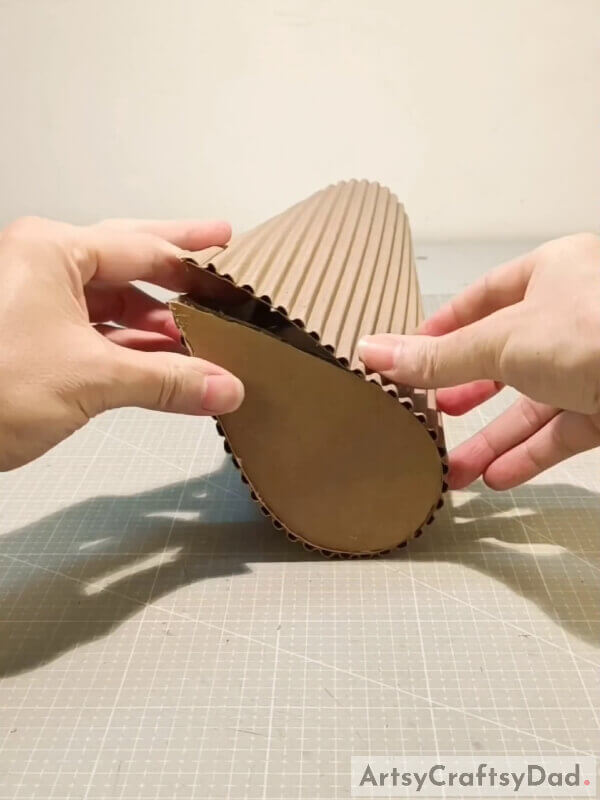
The cardboard must look as it does in the above image.
Step #13: Give It A Little Pressure To Tighten The Grip
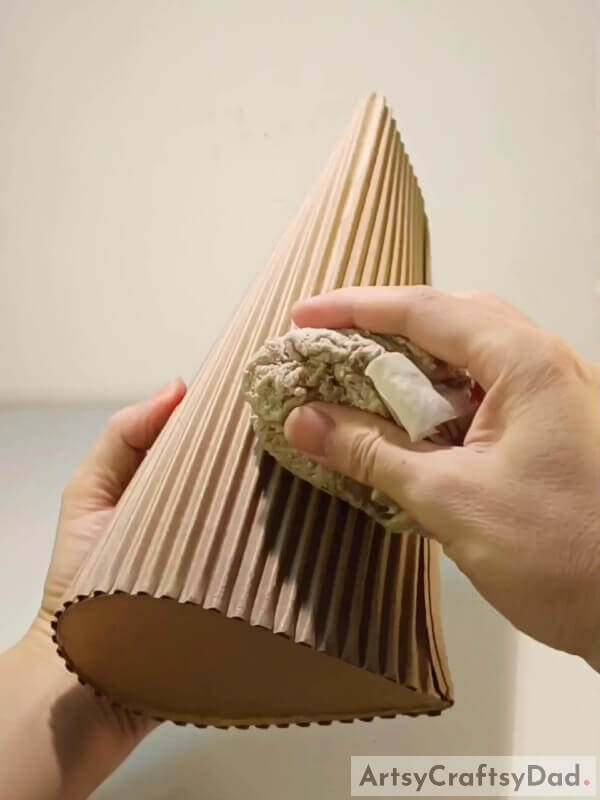
Using a hand towel or a cloth, apply some pressure on it so that it sticks properly, and the grip is ensured.
Step #14: Put A Rope Around It
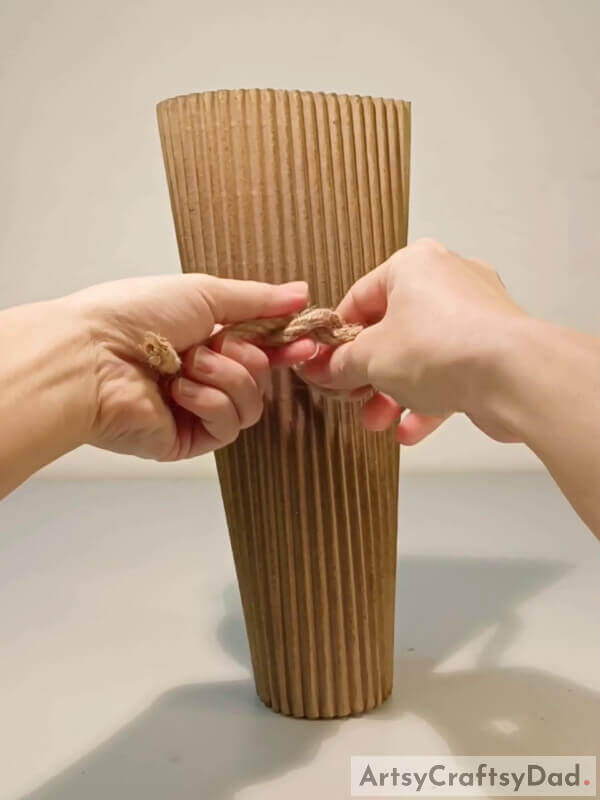
Take a jute rope and circle it around the cardboard.
Step #15: Tie A Knot In The Rope
Tie a single knot using the rope, around the cardboard.
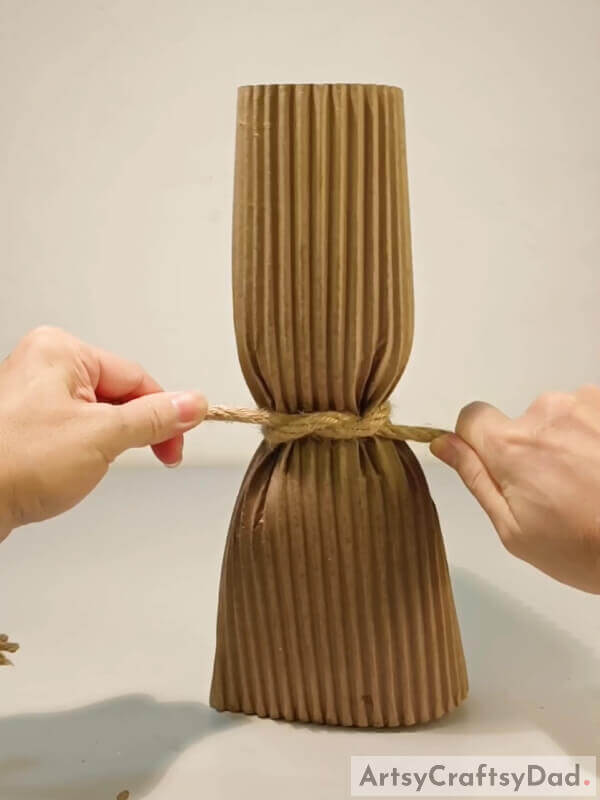
Step #16: Tighten The Rope Just A Little Bit

Tighten the rope just a little bit so that it gives it the creases that are a part of its beauty and will also support the grip of the cardboard vase.
Final Image: Well, Here It Is! The Beautiful Vase Is Made Out Of Cardboard
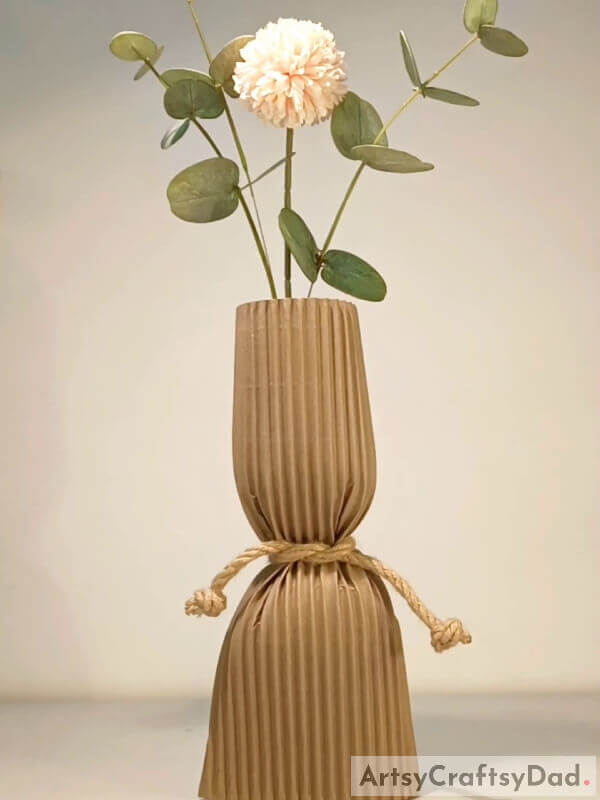
This is how the vase looks. This way, you can make vases of different shapes and patterns using the same technique. You can also make a pen stand if you take a smaller piece of cardboard. You can also paint it if you like. You can make different designs and patterns on it using markers, or you can paste little decorations, craft items, or origami items, like flowers or stone stickers, etc. to design it.
Thank you for your time and support.
You May Also Like
- Easy Tutorial To Make Flower Vase From Cardboard at Home
- How to make a flower vase out of cardboard (Tutorial)
- Clay Flower Vase Model Craft Tutorial For Kids
- Beautiful Clay Flower Vase Craft Tutorial For Beginners
- How to Make Flower Vase from Cardboard


