Looking for a really pretty handmade decoration craft item? Well, you are at the right place. These yellow and purple flowers made out of fruit foam will be fabulous.
This is a step-by-step Purple Fruit Foam Net Flowers Decor Craft Tutorial. It is very suitable for beginners. This will give them an idea, of one of the ways they can use fruit foam instead of throwing it out. It will turn out as very creative and teach some interesting and basic techniques that they can use in the future. Well, grab the following list of materials, and let us get started already. Have fun!
Beautiful Purple Fruit Foam Net Flowers Decor Craft
Must Read: Fruit Foam Net Pineapple Model Craft Tutorial
Tools & Supplies
- Dark Green Colored Textured Sheet
- A Pair Of Scissors
- A Glue
- A Green Solid, Plastic-Type Material
- A Yellow Colored Fruit Foam
- A Purple Colored Fruit Foam
- A Double Tape
- A Dark Green Colored Stick
- A Thread
- A Lighter
Fruit Foam Net Flowers Instructions
Step #1: Get Two Fruit Foams. One Yellow And One Purple
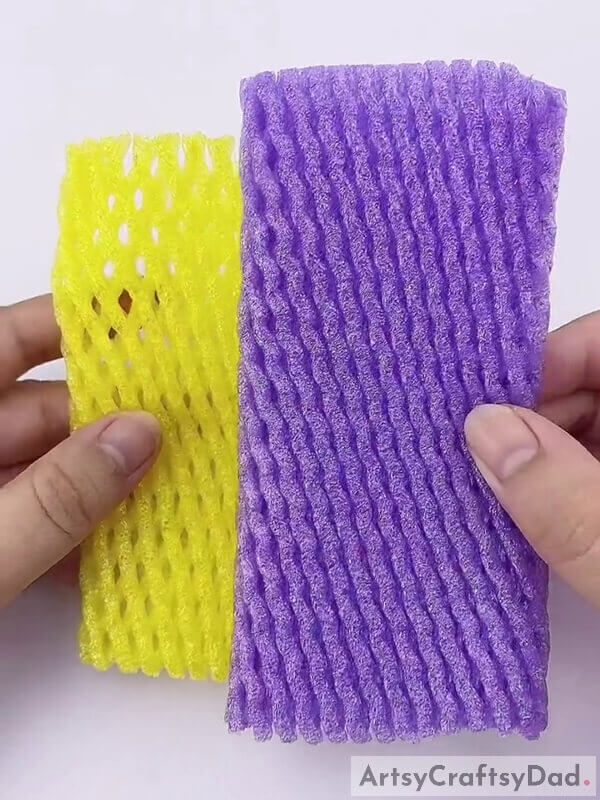
Let us start by grabbing the most important material we need, which is fruit foams. Get two fruit foams of two different colors. In this tutorial, the combination used is, yellow and purple. You can free to make your own color combinations or go with this one.
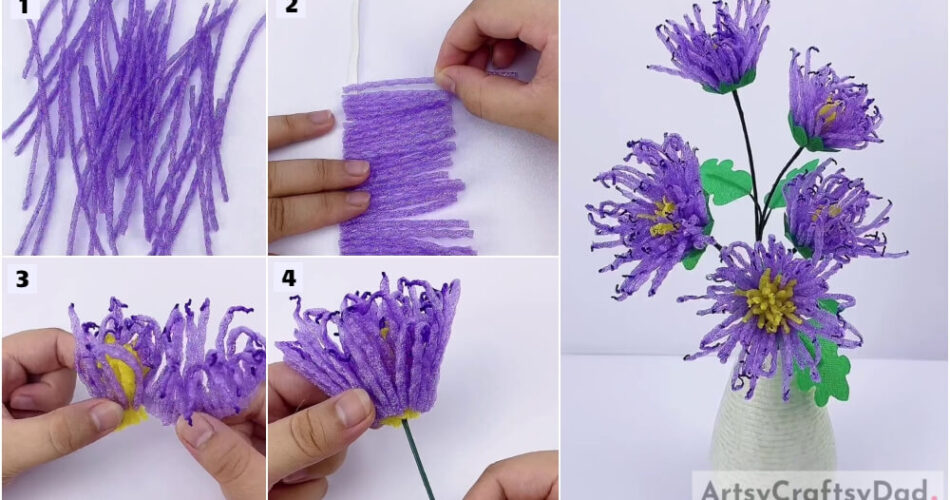
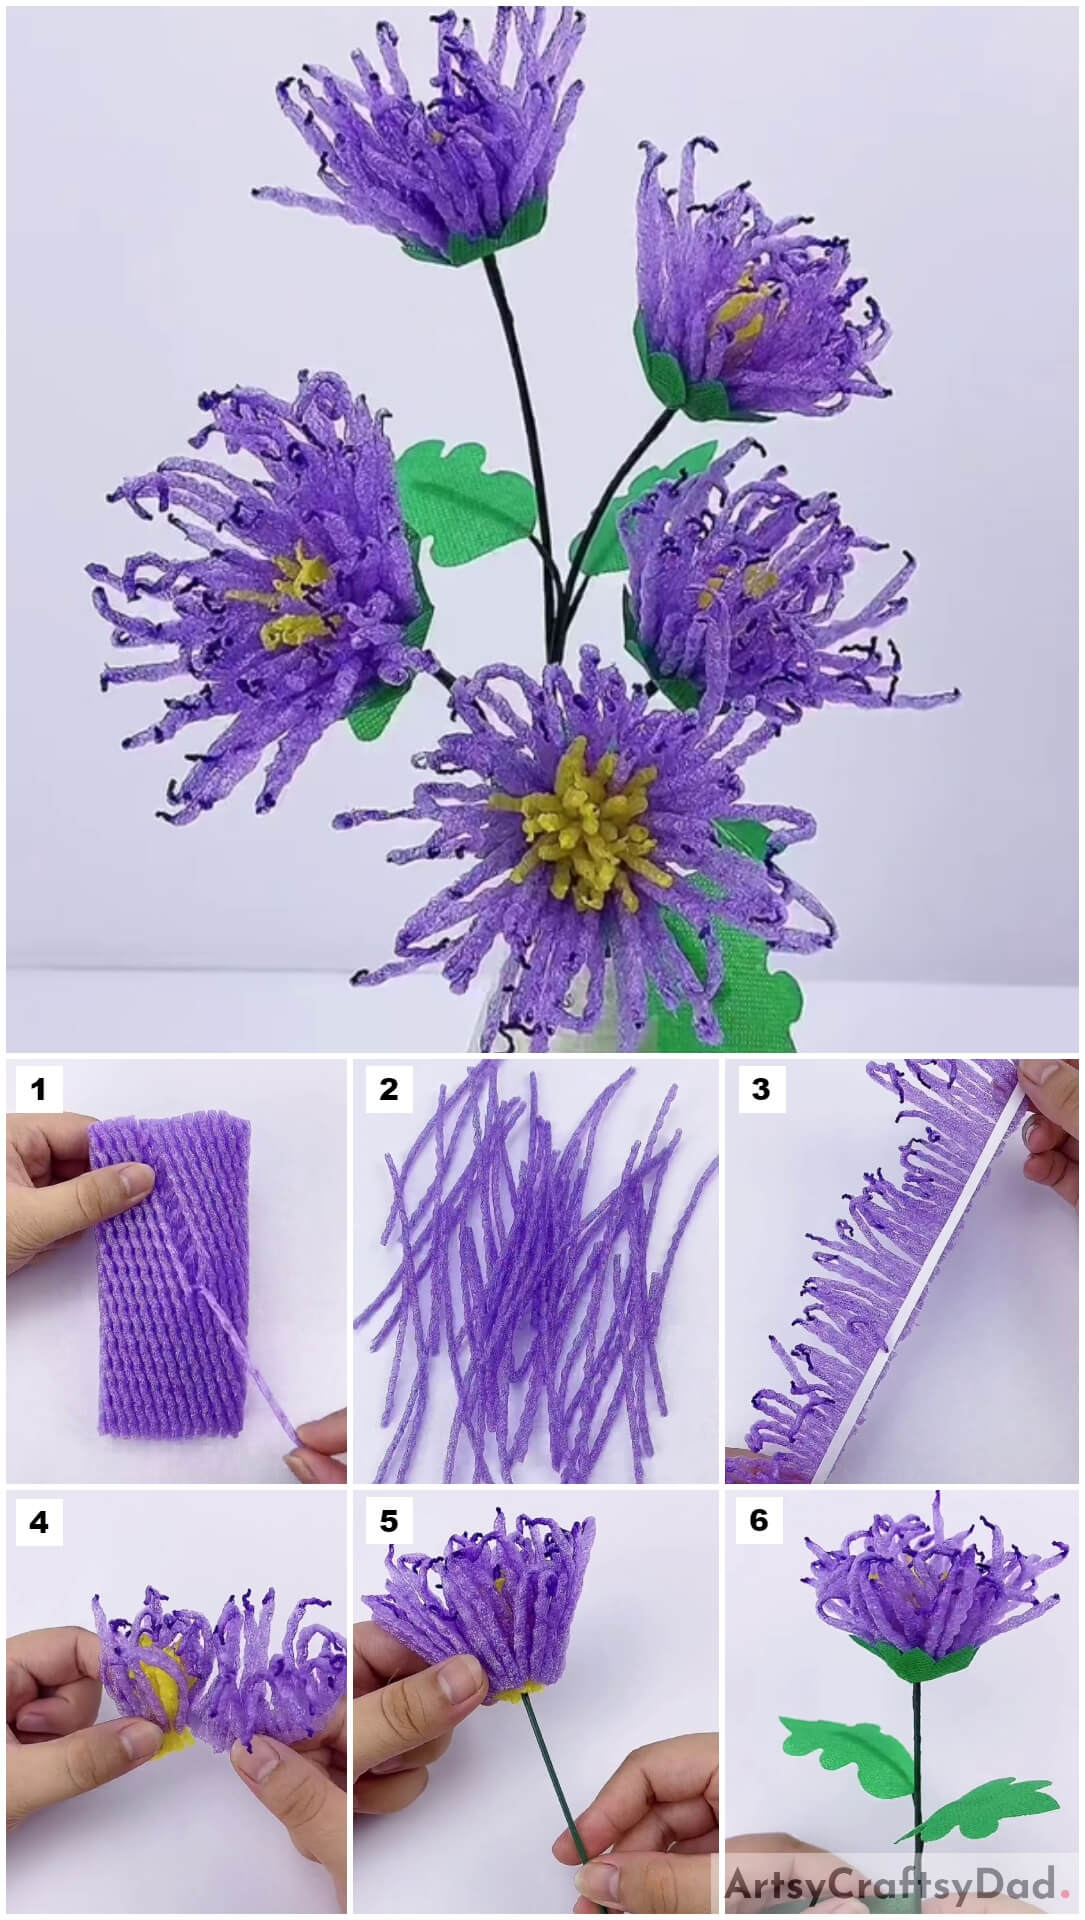
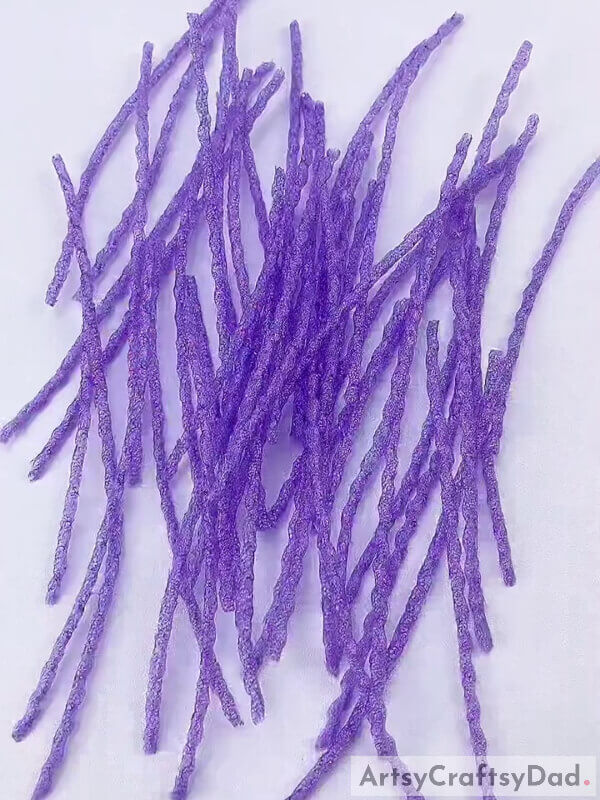
Step #2: Start By Removing The Strands Of The Fruit Foam
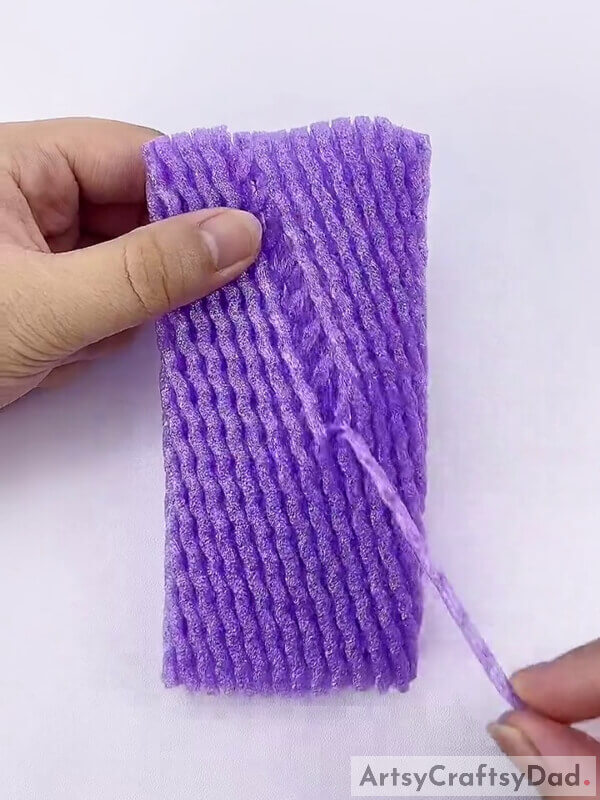
Remove and separate each strand of the fruit foam from the cluster, Do it very slowly and delicately so that it does not break off,
Step #3: Assemble And Gather All The Strands
Step #4: Take A Very Thin Strip Of Double Tape And The Strands
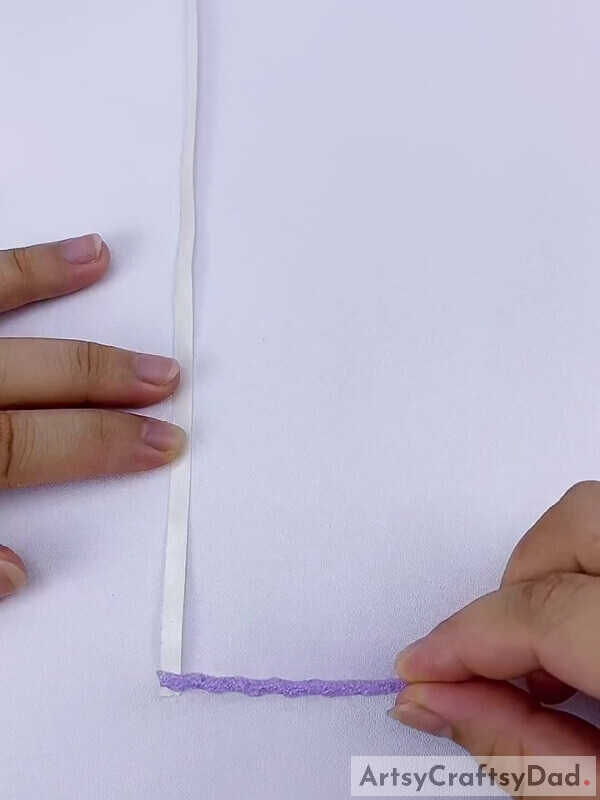
Get a double tape and cut out a very thin strip using a cutter or a pair of scissors.
Step #5: Stick The Strands On The Strip Of The Double Tape
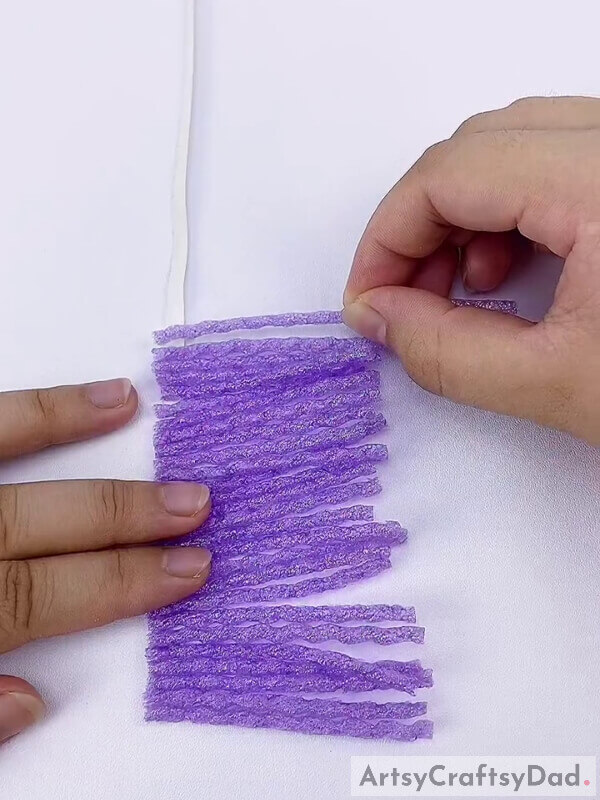
Before the glue of the tape dies, start sticking and placing the separated strands in the arrangement as shown in the above-presented image. Do not leave any gaps while pasting them.
Step #6: Complete Pasting All The Strands
All the strands must have been pasted properly by now. It must look as in the above picture.
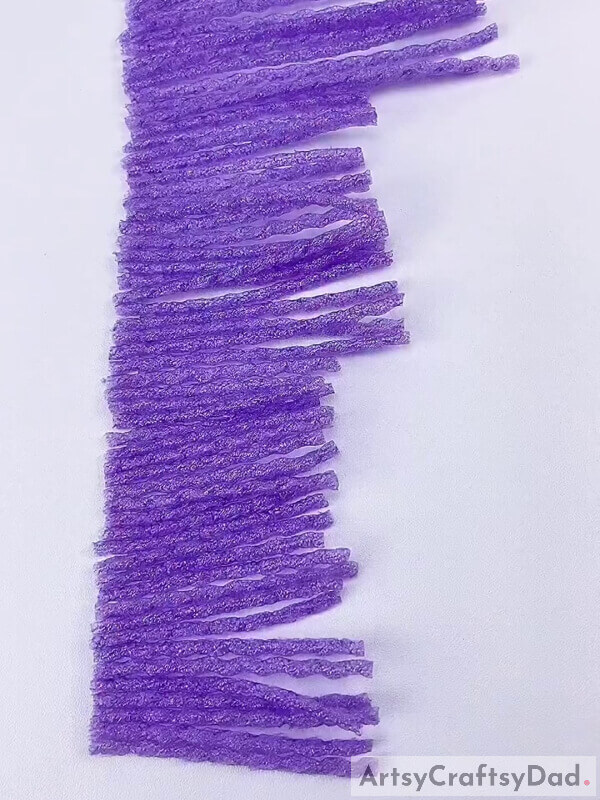
Step #7: Grab A Lighter And Brush Up The Edges For A Better Effect
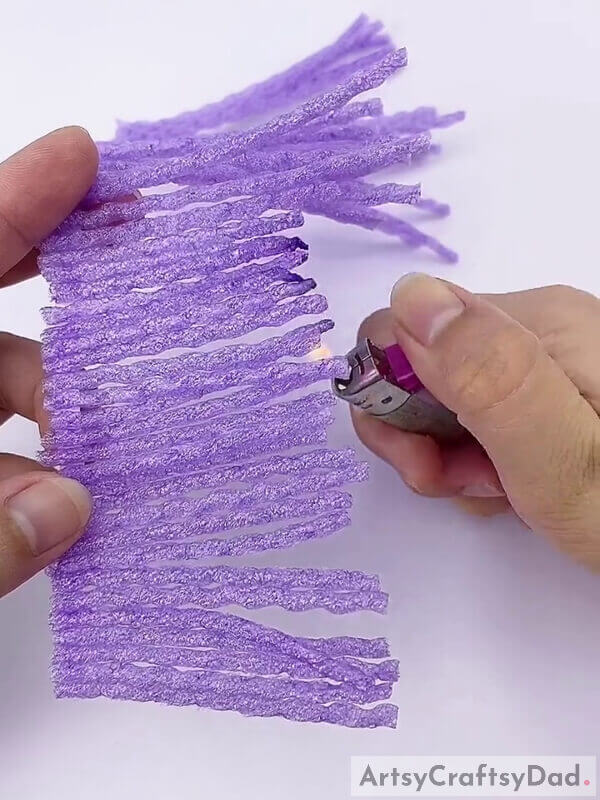
Grab a lighter now. Very delicately and carefully, with all your undivided attention, light the lighter towards the edges. Keep the flame very low. You do not want to burn the entire thing down to ashes. This will strengthen the edges and give a dark purple shade which will turn out as impressive. Remember, only the edges. and kids must do this under proper adult supervision.
Step #8: How It Looks After Lighting Up The Edges
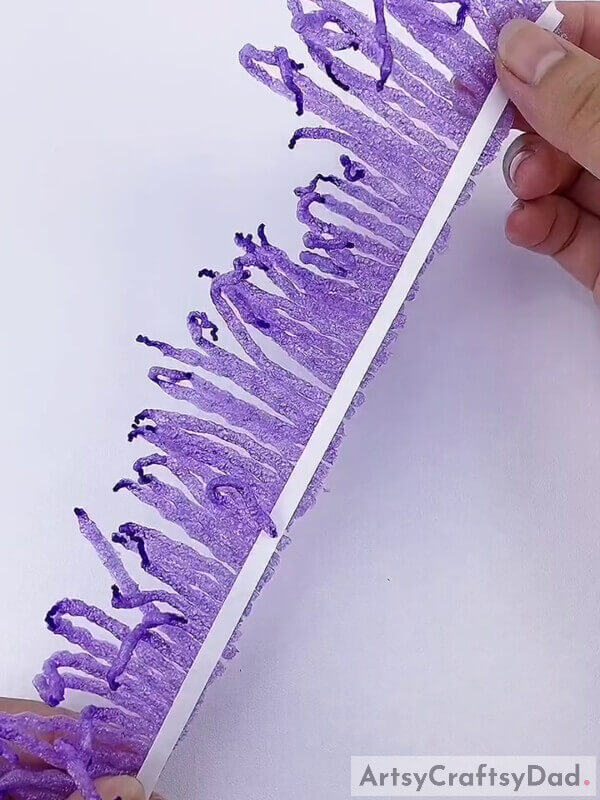
This is how it must look after you are done with the previous step. Observe the shape and structure of the edges as well. They have contracted and shrunk a bit and have developed into an uneven curve which turns out absolutely ravishing. Do not remove the brown strip of the double tape just yet. It will soon come to use.
Step #9: Take Off Of Some The Yellow Strands And Slightly Fold Them
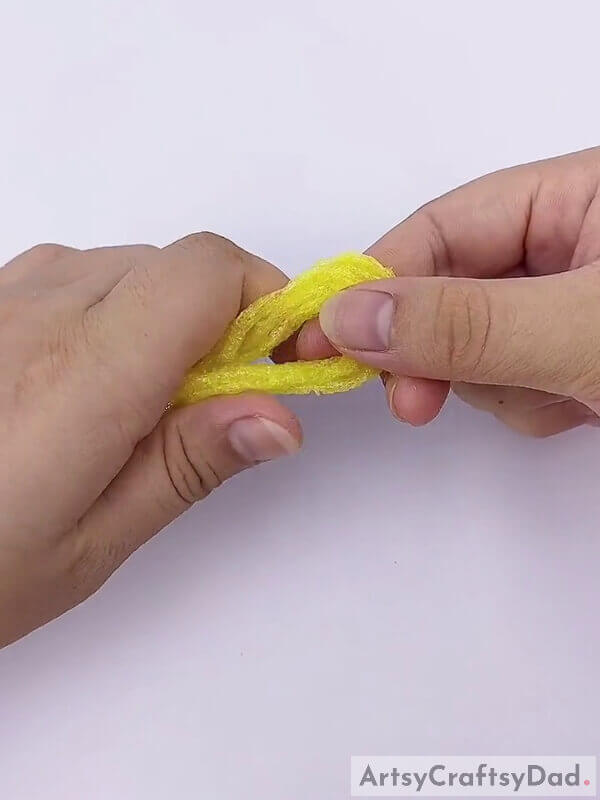
Grab the yellow fruit foam now. Pluck out and remove some strands just like you did with the purple ones. Now, fold them with a finger in the middle so that they do not break. You will get a drop-like shape.
Step #10: Tie A thread Around The Folded Portion As Instructed
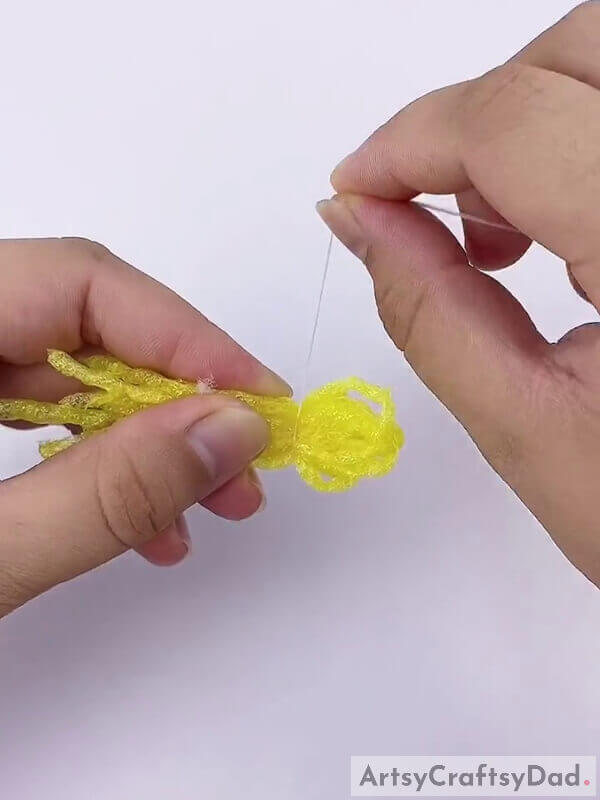
Take a piece of thread. Wrap and tie it around the folded part of the strands. It will look like some sort of puppet doll.
Step #11: Grab The Lighter And Flame The Edges Again
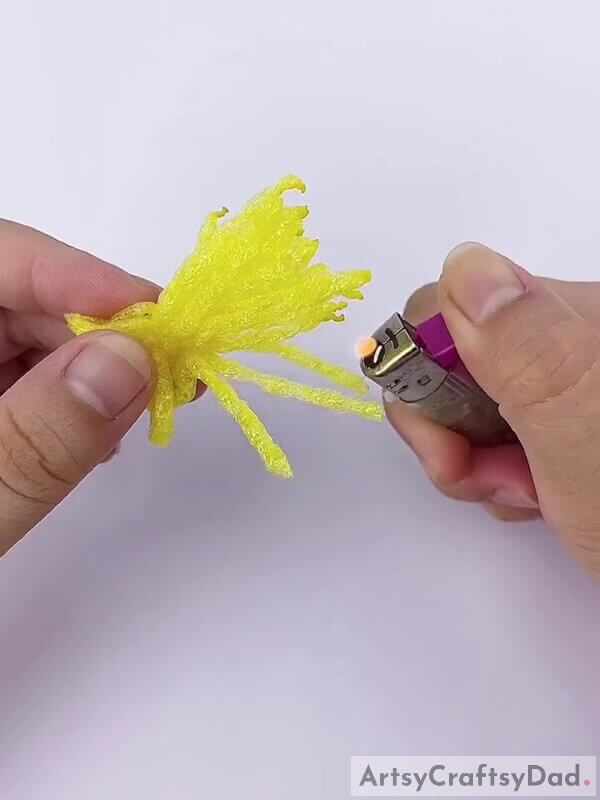
Grab a lighter. Here you need to repeat the same thing you did with the edges of the purple strands. Light up the edges carefully and if you need to, check out the past steps again. Be cautious with the lighter. Adult supervision is a must for kids.
Step #12: Remove The Cover Of The Tape Finally
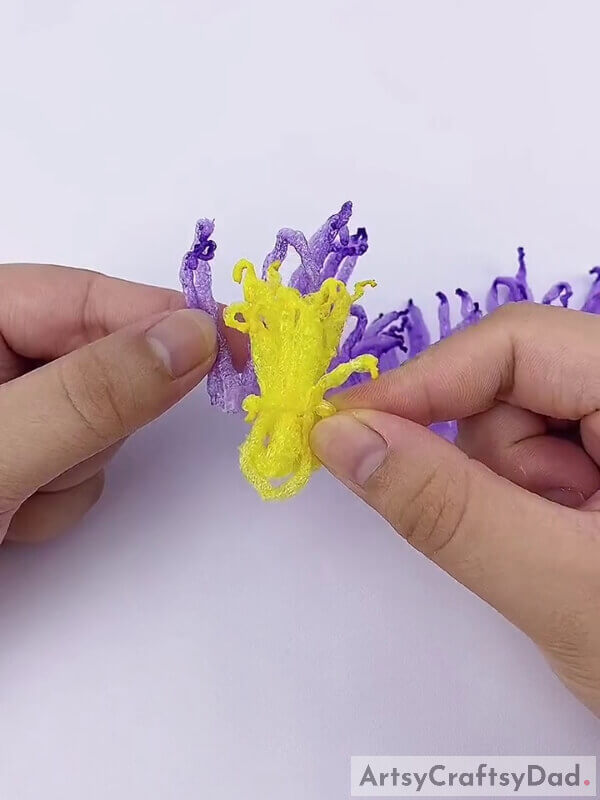
Take the purple strands again. Now, finally, remove the cover of the tape on the other side and place the yellow, flamed edges strands at the initial edge.
Step #13: Wrap The Purple Strands Around The Yellow Ones
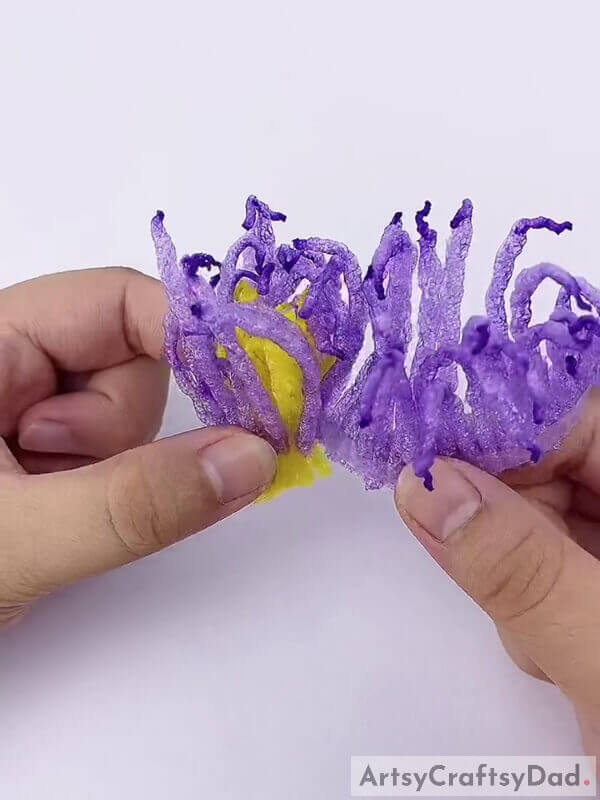
Start folding the purple strands around the yellow ones. Keep wrapping them in a spiral. Do it before the glue on the tape dies. But do it with care, joining only the borders and not the middle or upper portions.
Step #14: Make The Following Designs Through A Dark Green Plastic-Type Material
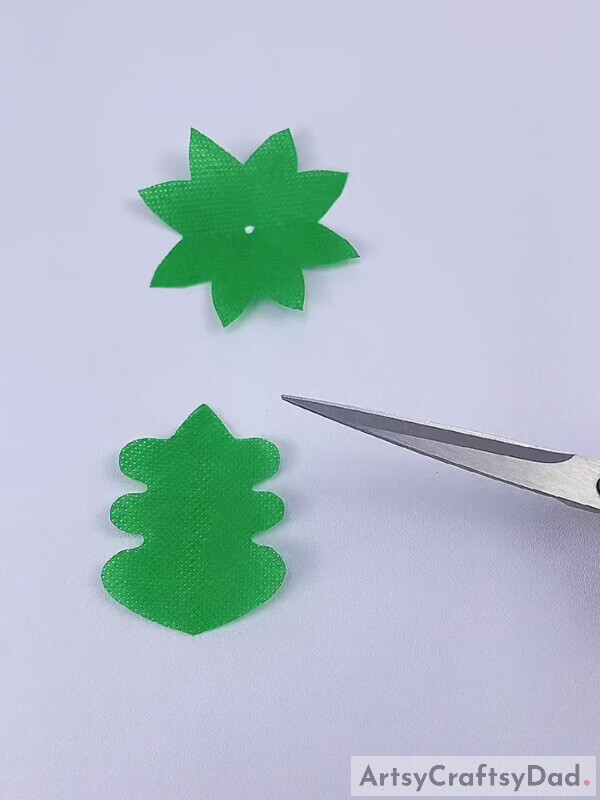
Take a dark green, plastic-type material as shown in the above image. Take the help and assistance of the image and draw the above designs. Cut them using a pair of scissors.
Step #15: Take A Dark Green Colored Straw That Will Act As A Stem
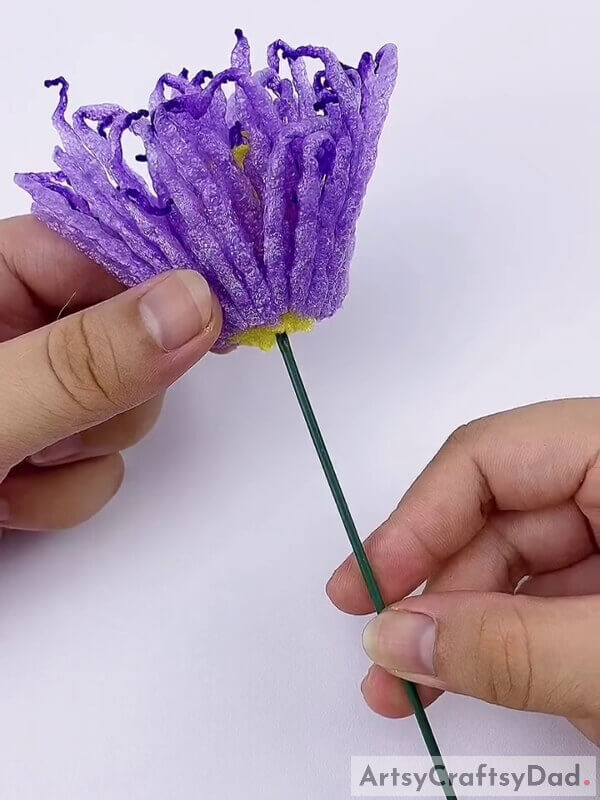
Now, grab a dark green colored straw. Insert it right in the middle of the flower from the side of the tape. This straw or stick will act as the stem.
Step #16: Take One Of Those Designs And PlaceIt Right Below The Flower
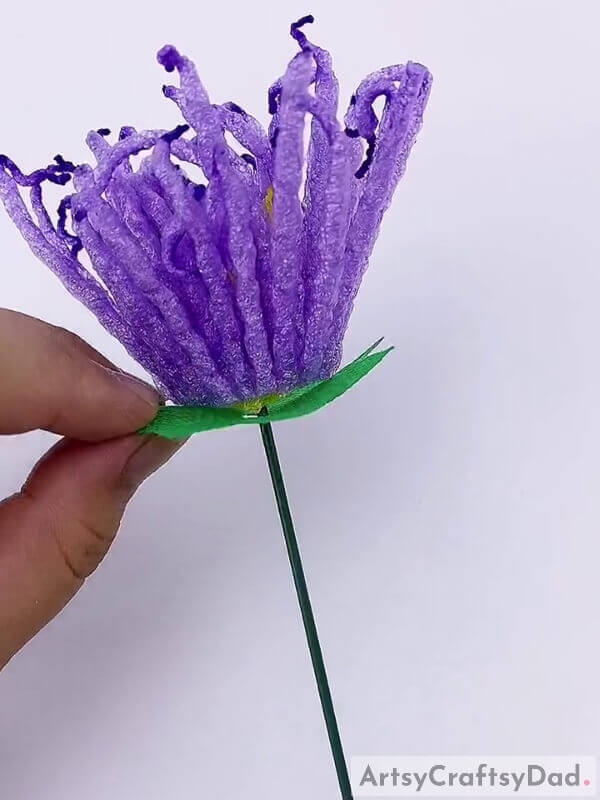
Take one of those designs, the one which will make the sepal of the flower. Place it right below the flower through the stick.
Step #17: Add In The Leaves Now
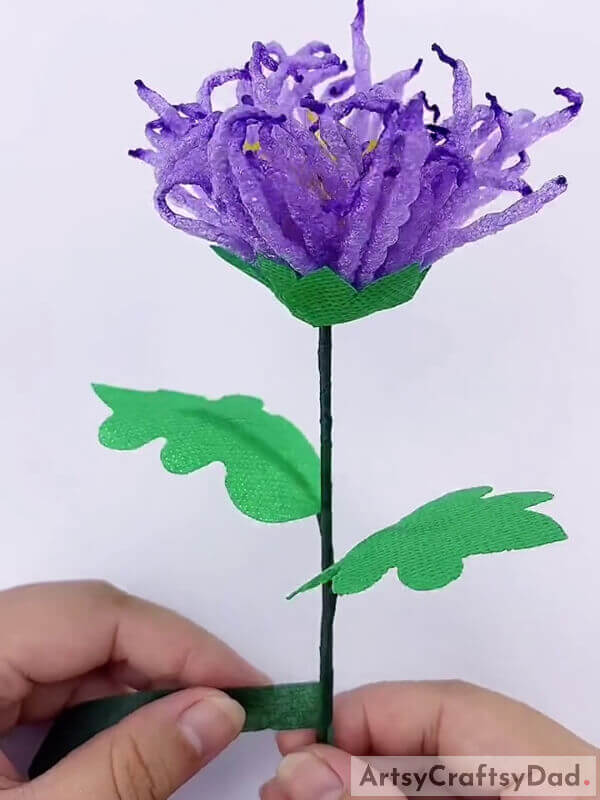
Take a dark green, textured sheet. Cut a long strip out of it. Initiate with the wrapping of the strip around the stick, that is the stem here. While wrapping, insert the leaves in a place as positioned in the image presented above. This will hold the leaves. By the way, you must have two leaves.
Step #18: Add More Leaves If You Like
Take a final look. Check the leaves if they are coming out or if the strip is not properly wrapped, etc Look for the errors and fix them.
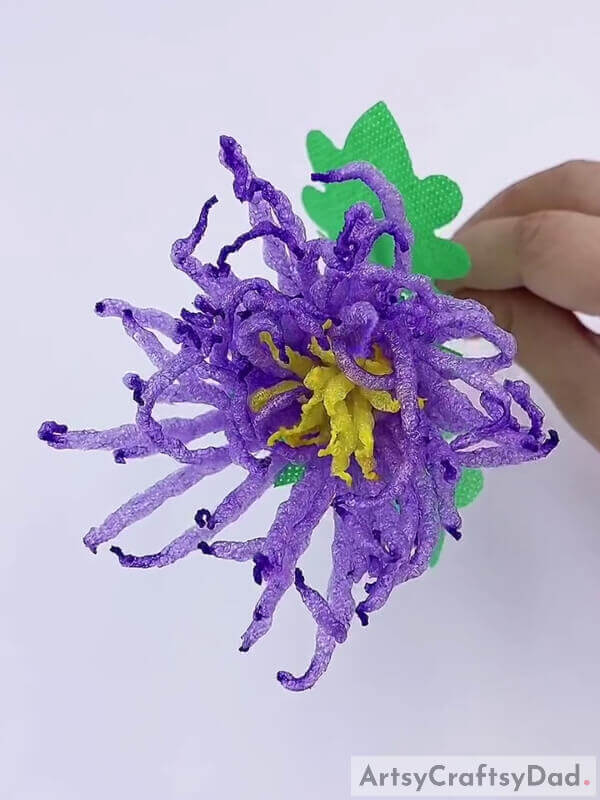
Voila! This Is The Final Appearance Of Purple And Yellow Flowers Made Of Fruit Foam
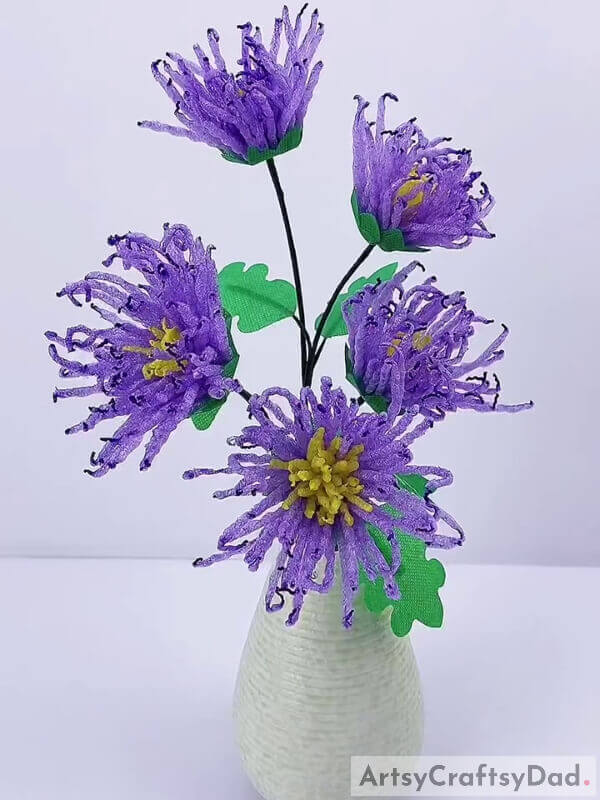
Well, the tutorial officially ends here. But you can still keep going. You can make multiple flowers and find a vase to hold them in. For more arts and crafts content, from articles, suggestions, and ideas to tutorials, check out the main website. And do mention your experience of making this, or any reviews or suggestions, in the comments below.
Thank you for your time and support.
We hope you like it.
You May Also Like
- Fruit Foam Net Apple Craft Tutorial For Kindergartners
- Autumn Trees: Fruit Foam Net Hack Artwork Tutorial
- Fruit Foam Net Flower Pot Craft Hack Tutorial
- Yellow And Purple Flowers Bunch Painting For Beginners
- Colorful Flowers Drawing & Finger Painting Tutorial


