Learn how to create a charming balloon bunny craft using nano tape with this easy-to-follow tutorial. This fun and adorable DIY project is perfect for kids and adults alike.
Balloons have always been a popular choice for crafting due to their versatility and fun, whimsical nature. In this tutorial, we will show you how to create a charming balloon bunny using the innovative and convenient Nano Tape. This easy-to-follow guide will walk you through each step of the process, from inflating the balloon to adding the finishing touches that will bring your creation to life. Get ready to unleash your creativity and make a lovely balloon bunny that will brighten up any space!
Creating a Lovely Balloon Bunny Craft Using Nano Tape Tutorial
Must Read : DIY Paper & Paper Cup Hot Air Balloon Craft Tutorial For Kids
Supplies And Tools
- Nano Tape
- Straw
- Scissors
- Sketch Color(Pink And Black)
- Pink Brush
- White Clay
- Glue
Lovely Balloon Bunny Craft Instructions
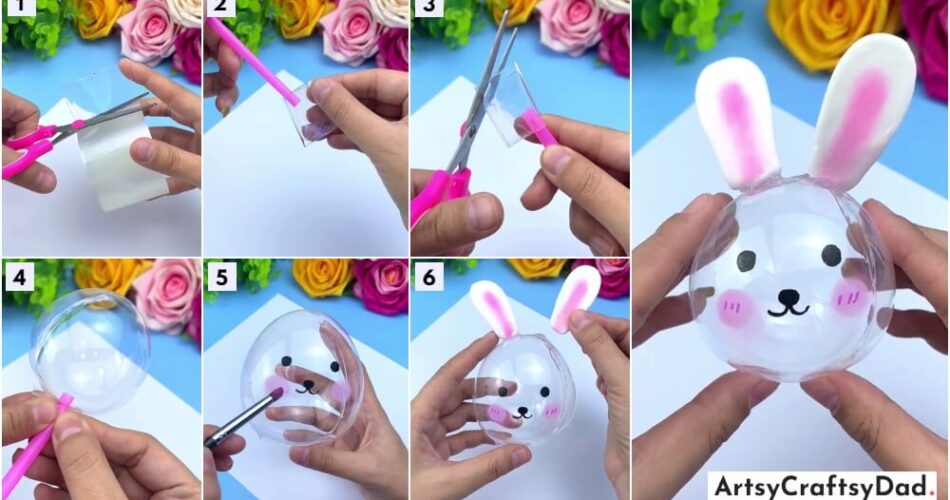
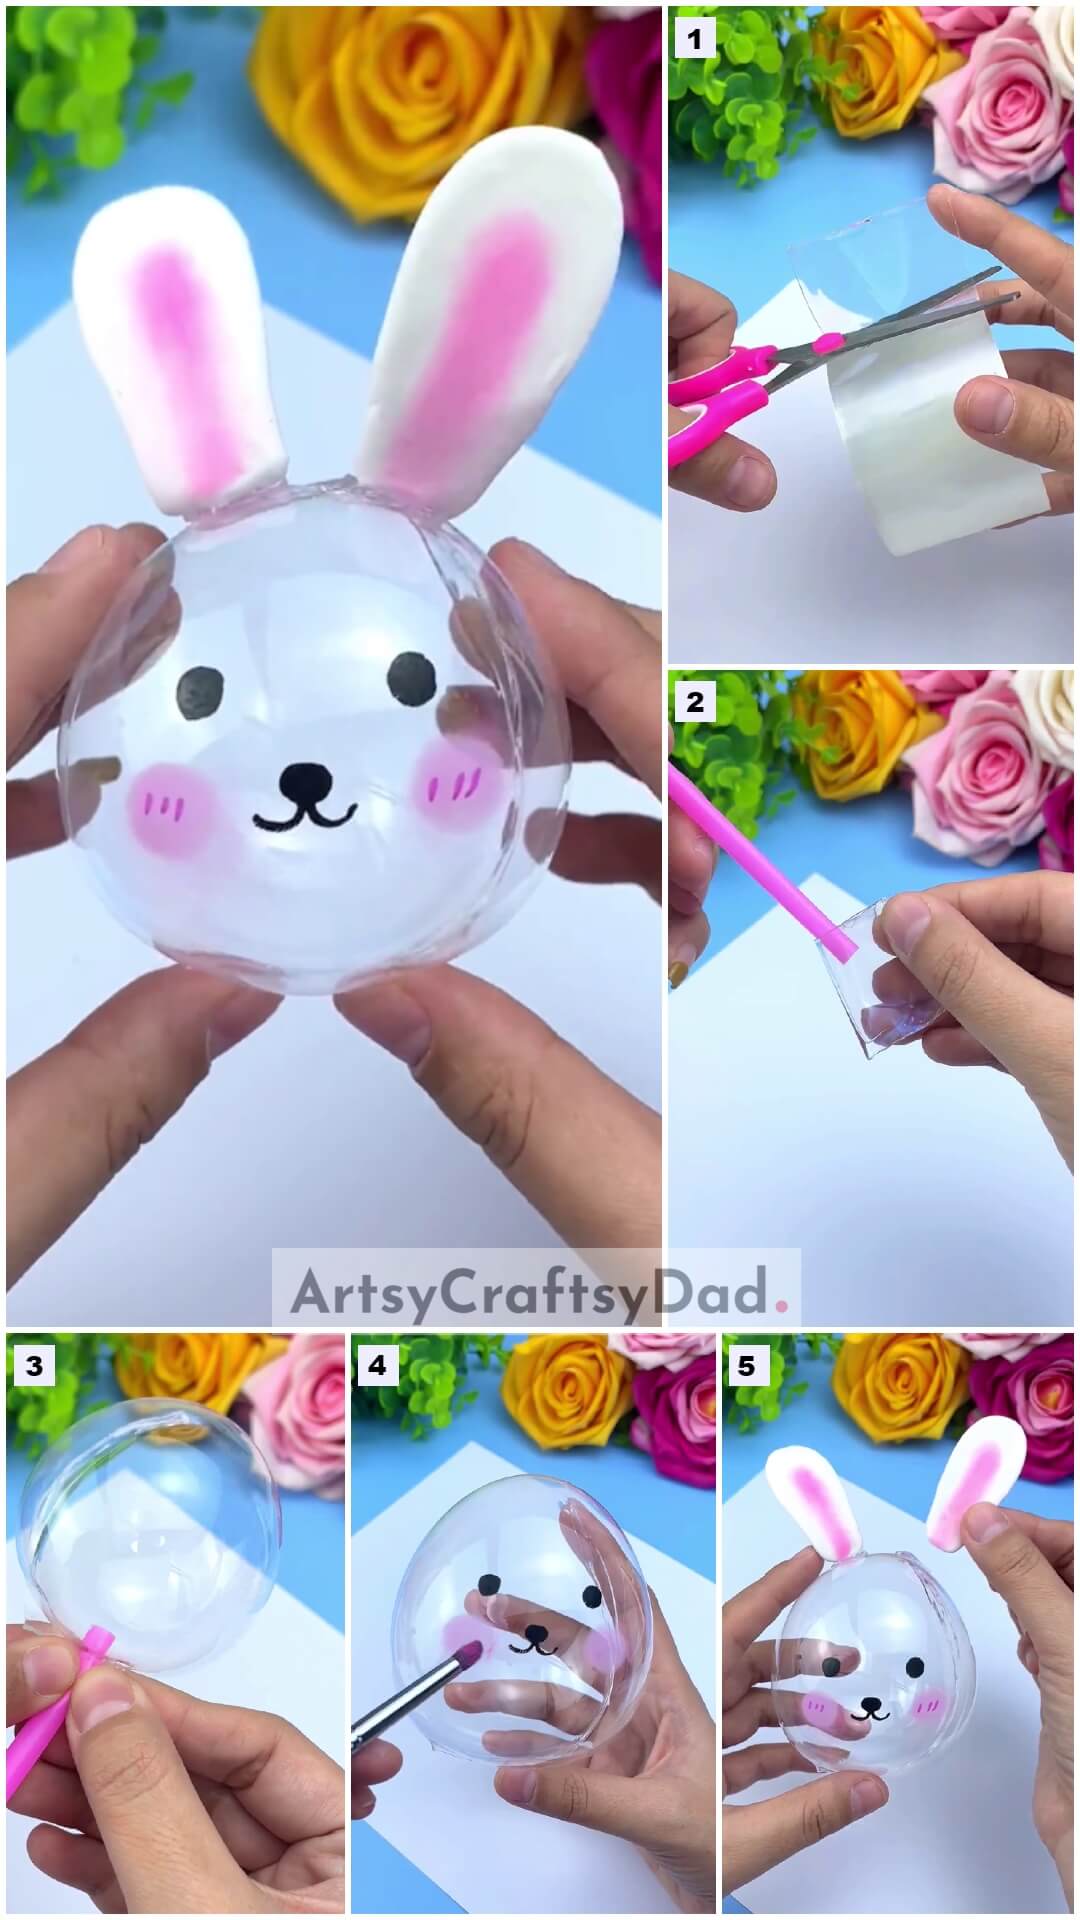
Step #1:Taking A Nano Tape

In this step, we take a nano tape (double-sided tape) and cut the small piece of the nano tape with the help of scissors.
Step #2: Folding Nano Tape

In this step, we fold the nano tape with the help of our indexed finger.
Step #3: Taking A Strow

In this step, we take a straw and put it on the nano tape
Step #4: Cutting Nano Tape

In this step, cut the top part of the left side of the nano tape and make a round shape with the help of scissors.
Step #5: Bubbling Nano Tape
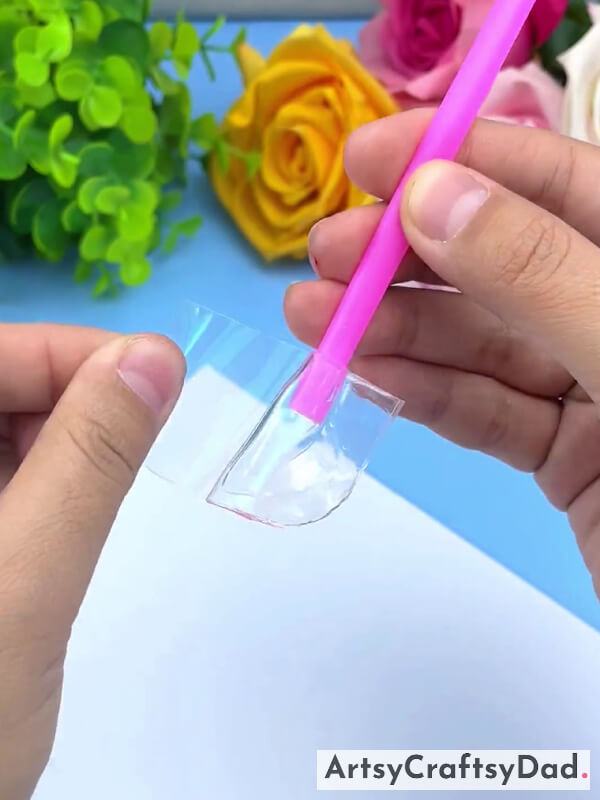
In this step seal all sides of the tape and fill the air in the nano tap with the help of the straw
Step #6: Bubbling More
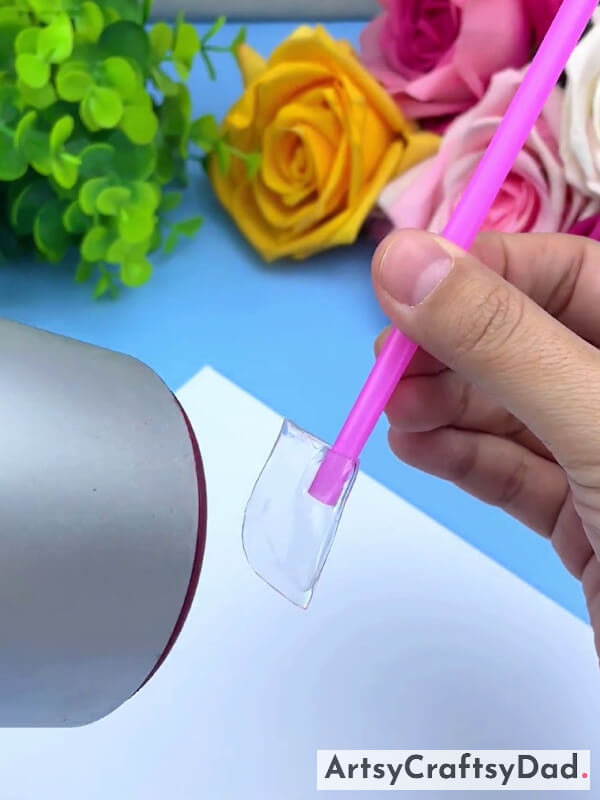
In this step, fill the air in the nano tap with the help of the straw
Step #7: Completing Ballon
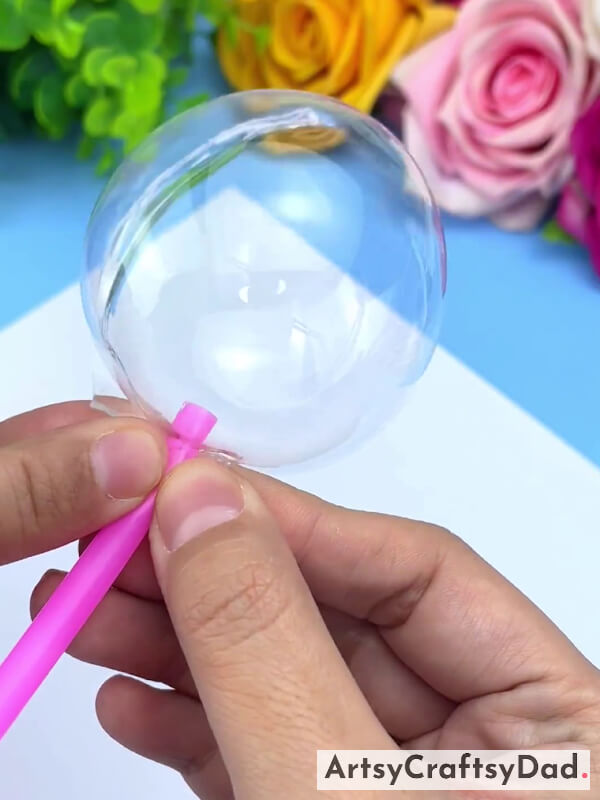
In this step, we make a Complete balloon with the help of nano tape and the straw.
Step #8: Taking A Black Color
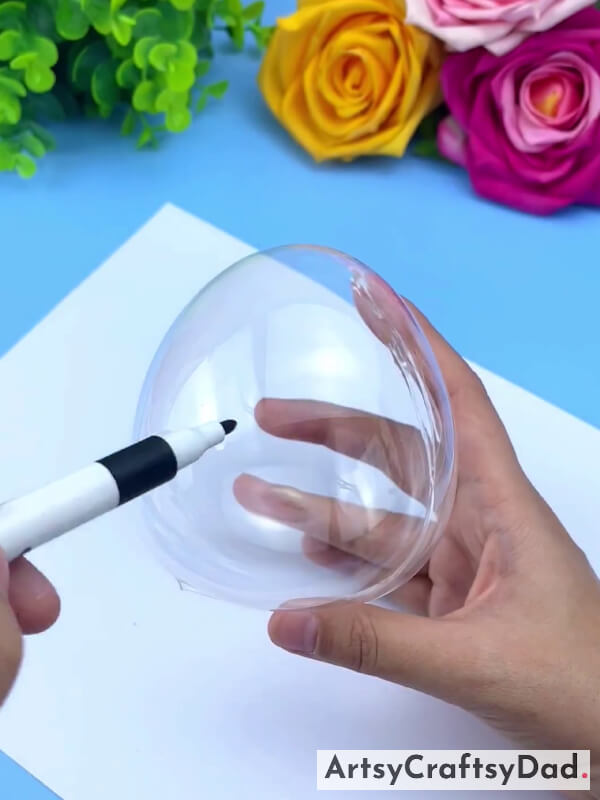
In this step, we take a black color and decorate the bunny. we draw the eye and mouth of the bunny using black color.
Step #9: Taking A Pink Color Brush
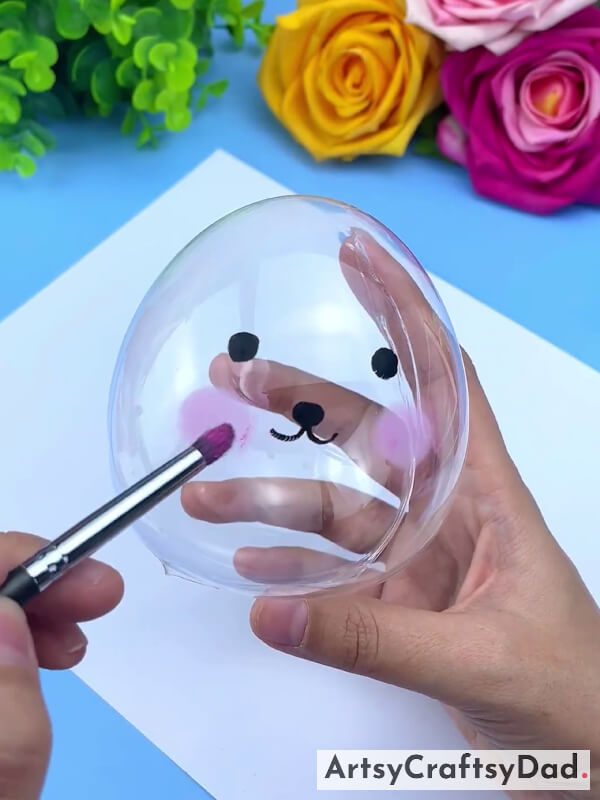
In this step, we draw a bunny blush with the help of the pink color brush in the middle of the bunny
Step #10: Taking A Pink Color

In this step, we draw three small little lines in a bunny blush with the help of the pink color.
Step #11: Pasting A Bunny Ear
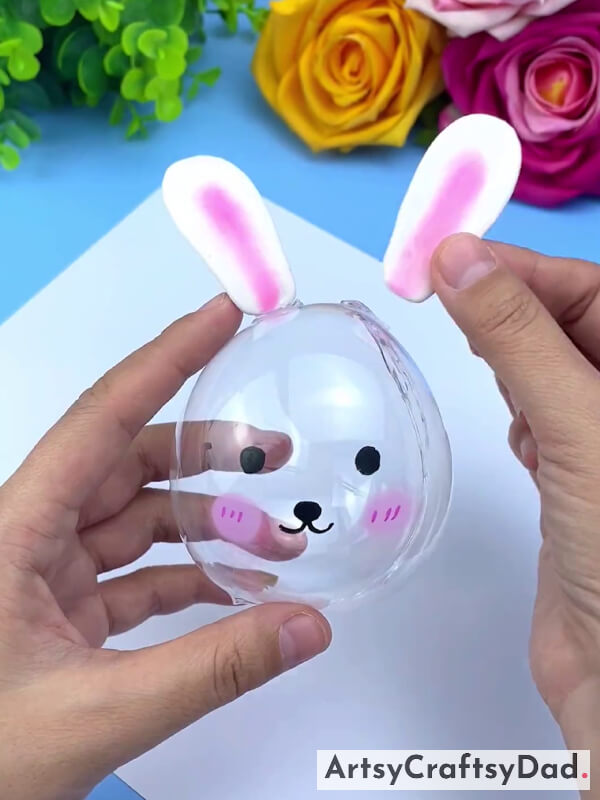
In this step, we make a bunny ear with the help of white clay and pink color. After making the bunny ear we paste the top of the bunny with the help of glue
Step #12: Squeezing Bunny

In this step, after completing the beautiful bunny we squeeze the bunny with the help of your index finger.
Our Amazing Lovely Balloon Bunny Craft Is Here!
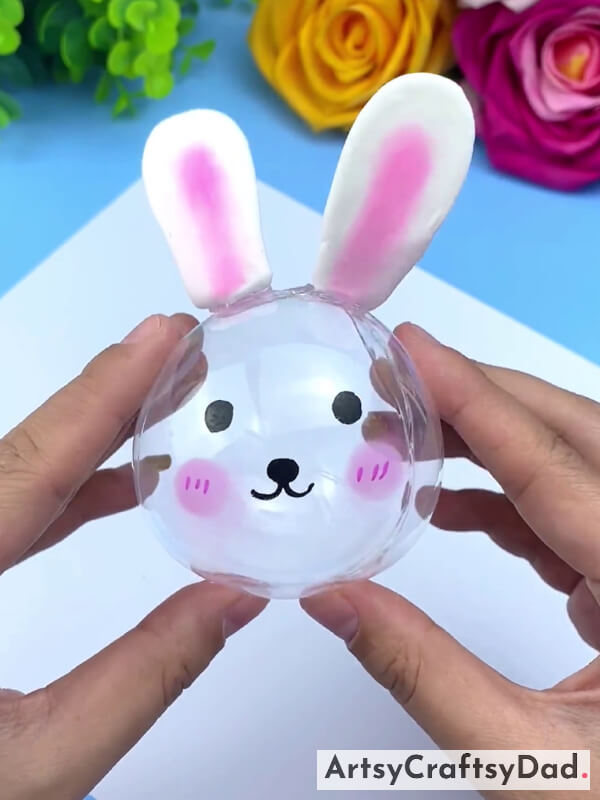
In conclusion, creating a lovely balloon bunny craft using nano tape is a fun and creative way to add some whimsy to your home decor or party decorations. This tutorial provides easy-to-follow steps for making your own adorable bunny that will surely be a hit with kids and adults alike. So gather your supplies and get crafting to bring a little bit of joy and cuteness into your space!
You Might Also Like This
- Simple Rabbit / Bunny Craft Ideas for Kids
- Creative Balloon Decoration Craft Ideas For Celebration
- Decorate Tape – Step by step (Tutorial)
- Lovely Heart Mehndi Design For Hand
- How to make bunny and cat of the thread


