Discover a captivating paper butterfly craft that will ignite your child’s imagination and provide an engaging, hands-on activity. Explore the joy of crafting with this step-by-step tutorial.
Begin a whimsical journey with this unique paper butterfly craft tutorial! Unleash your child’s creativity as they bring to life a vibrant, delicate butterfly through a step-by-step process filled with hands-on fun and artistic expression.
Creative Butterfly Craft Tutorial
Must Read: Colorful Butterfly: Tissue Paper Sketch Pen Hack Craft Tutorial
Supplies & Tools
- Sheets ( Pink, Yellow, Green)
- Glue
- Scissor
- Pencil
- Stick
- Watercolor ( White, Blue)
- Earbuds
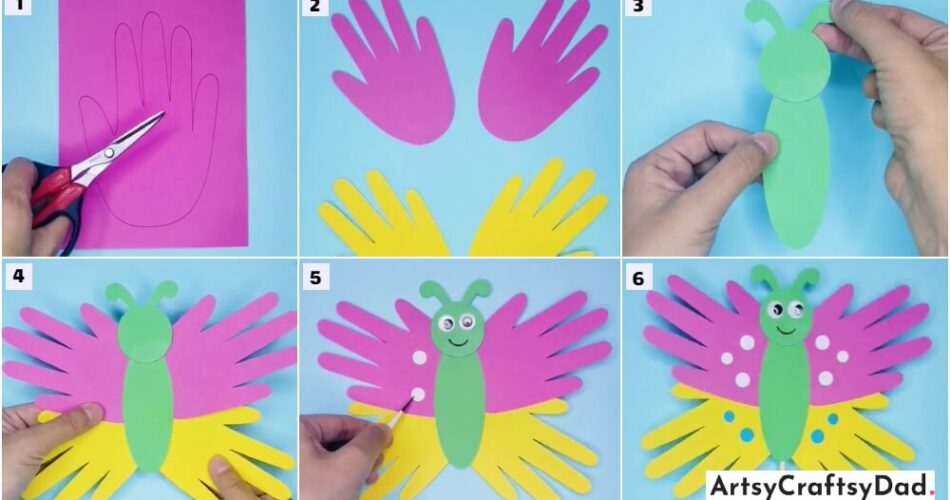
Paper Butterfly Craft Instructions
Step #1: Initialize With The Base
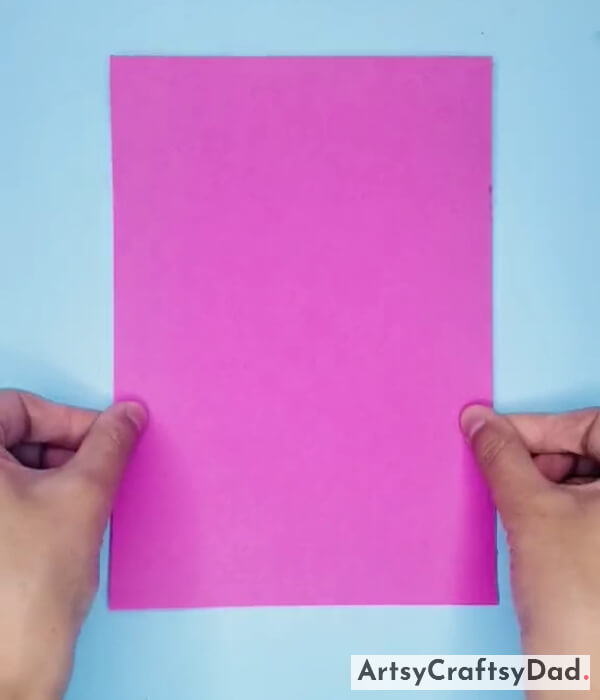
First, initialize with the base sheet. Here, for the base, we taking a plane pink rectangular sheet.
Step #2: Draw The Handprint On The Sheet

Now, with the help of a pencil draw your hand by putting your hand on the sheet.
Step #3: Cut The Handprint

Now, with the help of scissors cut the handprint which is drawn on the sheet.
Step #4: Repeat The Steps With Another Sheet

Now, again repeat the steps for another sheet, this time you will take a yellow sheet and repeat the steps which is mentioned above.
Step #5: Draw a Butterfly on another Sheet

Take a green sheet and draw the structure of a butterfly with the help of a pencil on it. A circle shape, a big oval, and a dunk.
Step #6: Cut Those Properly

Now, cut all the drawn shapes properly and paste the circle and oval with each other with the lower end of the circle and the upper oval face.
Step #7: Paste Dunks Too

Now, paste the dunks along with the circle and an oval shape, but the dunks will be pasted in the upper part of the circle.
Step #8: Add The Cut Hands

Use the cut out of your hands and paste it on the right side of the butterfly.
Step #9: Paste Another And Cut It Out On The Other Side
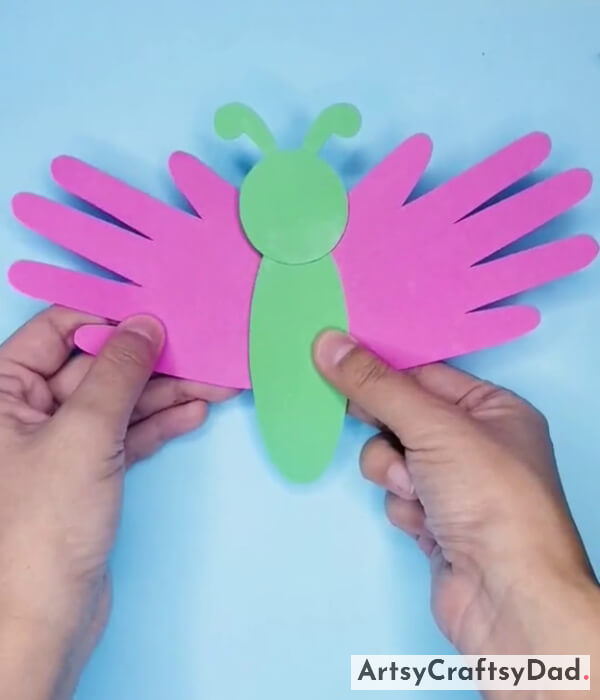
Now, paste the cut out of another hand on another side of the butterfly.
Step #10: Paste The Yellow Hands Cut Out To

Now, paste the cut-out of yellow hands just below the pink one so that I will look like the wings of the butterfly.
Step #11: Paste The Eyes

Use the artificial eyes and paste them on the circle shape properly cum accordingly.
Step #12: Decorate The Pink Wings

Now, decorate the pink wings with the help of earbuds and a white watercolor.
Step #13: Decorate The Yellow Wings

Now, decorate the yellow wings with the help of earbuds dipping in the blue watercolor.
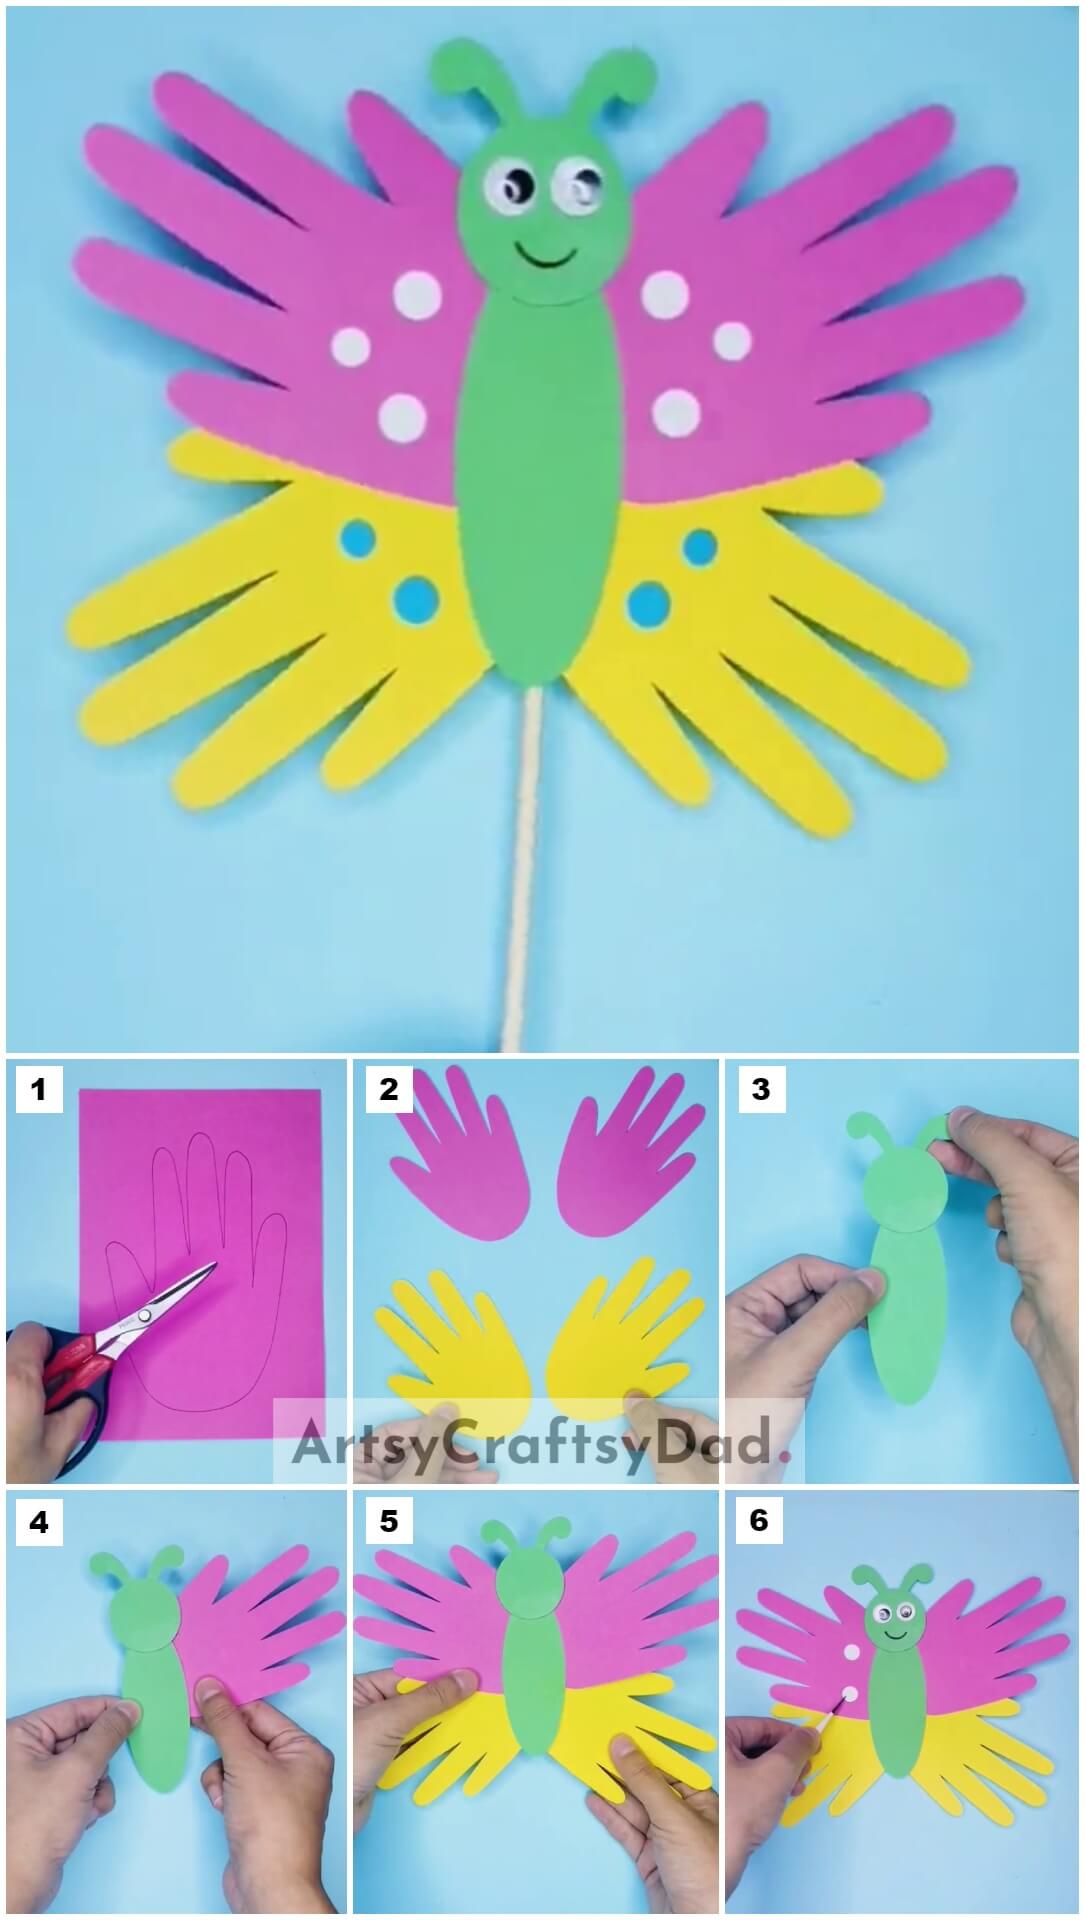
Your Unique Paper Butterfly Craft Is Ready

Your beautiful paper butterfly is ready. At the end add a stick to the butterfly. The stick you can prepare by using the sheet or any normal sheet. It should look like this. This is very easy and simple To draw and fun oo.
This paper butterfly craft is a delightful way to foster your child’s creativity and dexterity. The easy-to-follow tutorial ensures a rewarding experience, leaving them with a beautiful butterfly creation to display with pride.
You Might Also Like This
- Easy Paper Hot Air Balloon Craft Step-By-Step Tutorial
- Dumpling Dragon Boat Paper Craft Step-By-Step Tutorial
- Red Rabbits Paper Craft Step-By-Step Tutorial For Kids
- Paper Strips Tree Craft Step-By-Step Tutorial
- Crab Paper Craft Step-By-Step Tutorial For Kids


