Dive into the world of paper crafting with this unique paper sea and fish craft tutorial! Follow these step-by-step instructions to create a stunning ocean scene featuring colorful fish and seaweed.
Get ready to dive into the depths of creativity with this one-of-a-kind paper sea and fish craft tutorial! Using just a few simple materials, you’ll be able to create a breathtaking ocean scene that’s perfect for decorating your room or giving as a gift. This project is ideal for kids and adults alike and is a great way to relax and express your artistic side.
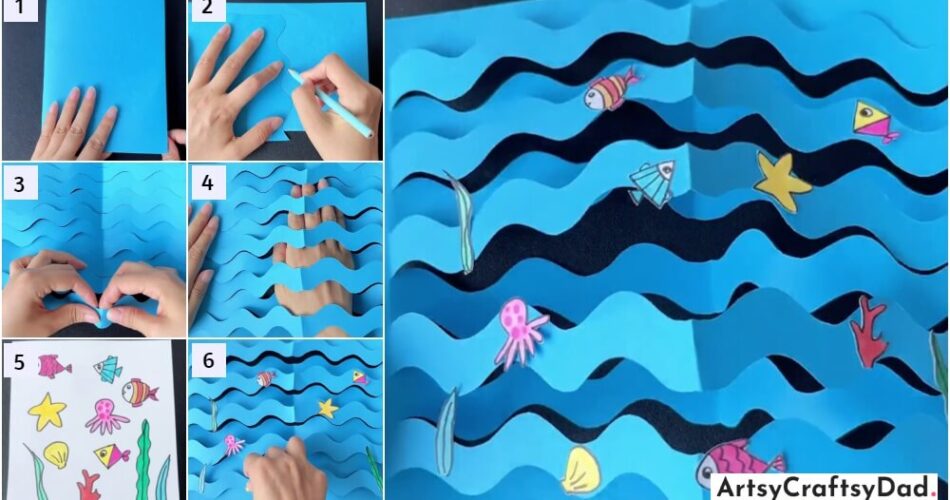
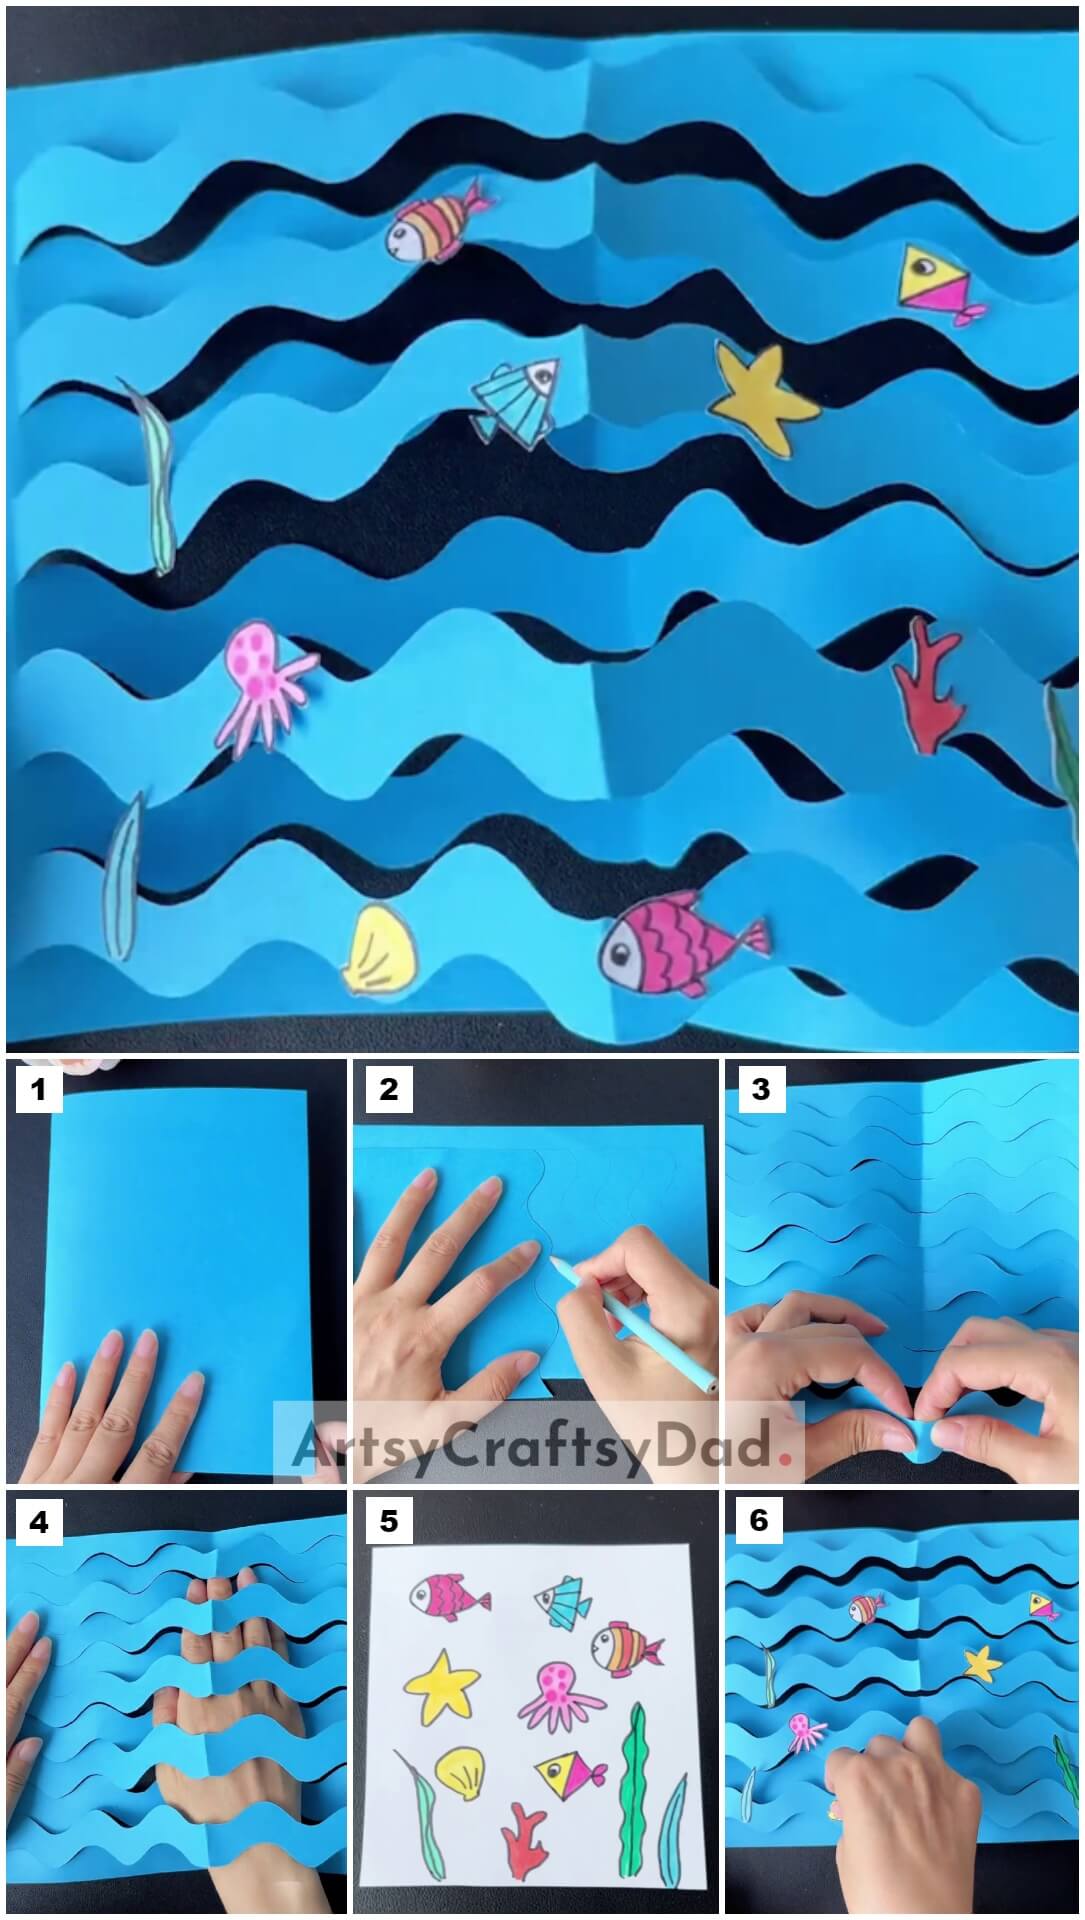
Paper Sea & Fish Craft Step By Step Tutorial
Must Read: How To Make Paper Fish Aquarium Step By Step Tutorial
Supplies & Tools
- Sheet (Blue, White)
- Pencil Colors
- Glue
- Scissors
- Black Marker
- Pencil
Sea & Fish Craft Instructions
Step #1: Initialize With The Craft
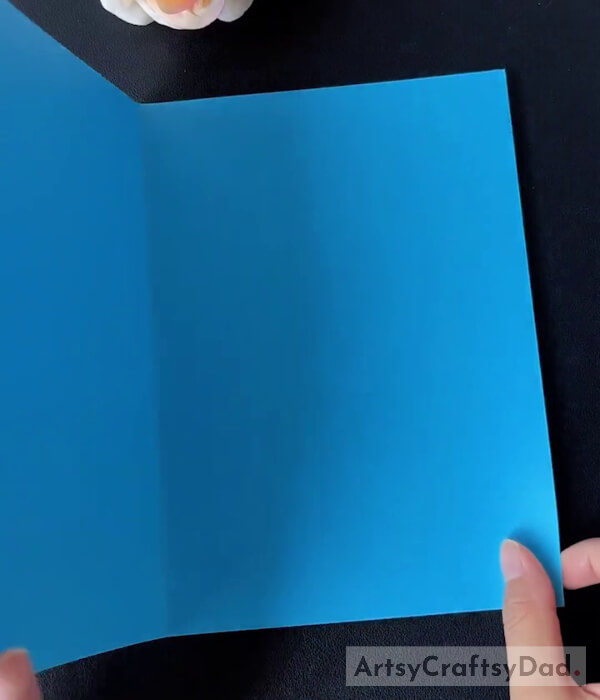
Take a blue sheet and fold it from the middle in the vertical-upward direction.
Step #2: Fold It Completely

Fold it properly.
Step #3: Make Curly Design

With the help of scissors cut another sheet in a zig-zak way and then with the help of a pencil make a design on the folded sheet.
Step #4: Cut The Design

Now, cut the design which has been made in the previous step with the help of scissors.
Step #5: Unfold The Sheet

Now, unfold the folded sheet and the design should look like this.
Step #6: More Folds

Now, fold it more but this time fold only the waves that are in the middle of the sheet. Remember, fold the waves alternately.
Step #7: It Got Separated Like This

Now, it should get separated like this.
Step #8: Take A Sheet And Make A Design

Now, take a white sheet and with the help of a black marker make a design like fish, octopus, starfish, etc aquatic animals.
Step #9: Make Some Inner Water Design

Draw accordingly as much as you can, and make leaves too.
Step #10: Color Them

Now, with the help of pencil colors, you can color all the drawn pictures accordingly.
Step #11: Paste It On The Waves

Now, cut the colored design with the help of scissors and paste it on the waves that we had made. You can paste accordingly.
Step #12: Paste Every Shape

With the help of glue paste all the drawn images in the waves.
Wow! Your Craft Is Ready

Here, your craft should be like this. This is a complete image of your craft.
And that’s it! You’ve created a stunning paper sea and fish craft that’s sure to impress. With its vibrant colors and delicate details, this craft is perfect for anyone who loves the ocean. Whether you’re a seasoned crafter or just starting, this tutorial is easy to follow and requires minimal materials. So why not give it a try and add some fins-tastic flair to your space?
You Might Also Like This
- Fruit Foam Net Fish Craft Tutorial For Kids
- Crab Paper Craft Step-By-Step Tutorial For Kids
- Paper Strips Tree Craft Step-By-Step Tutorial
- Fish Underwater View: Fruit Foam Net & Clay Craft Tutorial
- Easy Paper Hot Air Balloon Craft Step-By-Step Tutorial


