Explore the underwater world with us inexpensively! Create this fish underwater view craft using a fruit foam net & clay in this tutorial!
Oh yes! We are super excited to make this craft with you! This step-by-step tutorial will serve you as a guide on each and every step of this craft-making! This is a fish underwater view craft that you will make using the budget-friendly supplies that you already have at home like fruit foam net, clay, and some basic craft materials! This craft can be the best time pass activity to do in the boring afternoon hours rather than engaging in those harmful screens and devices. Let’s begin to make it!
Simple Underwater Fish Craft For Kids Using Fruit Foam Net
Must Read: Polymer Clay Mushroom Tutorial For Kids
Supplies & Tools
- Blue Circular Paper Sheet
- Colored Clay (Green, White, And Grey)
- Fruit Foam Nets (Yellow And Red)
- Scissors
- Googly Eyes
- Glue
Fish Craft Instructions
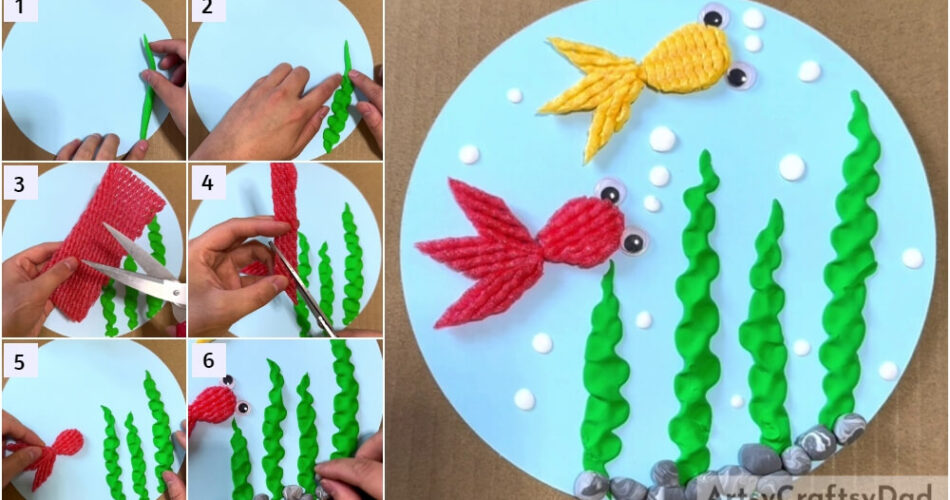
Step #1: Making The Water Plant
Begin this craft by taking a blue circular paper sheet as the base for this craftwork and green clay. Dough the green clay into a thin and long roll with a sharp end. Stick the green clay roll on the right bottom of the base irregularly vertically. See the image for reference. This will be the green water plant of your craft.
Step #2: Shaping The Water Plant
Using your fingers, press the clay water plant from both sides to flatten it and press from both sides one above the other alternatively to give the plant a wavy shape. See the image for reference.
Step #3: Cutting Open A Red Fruit Foam Net
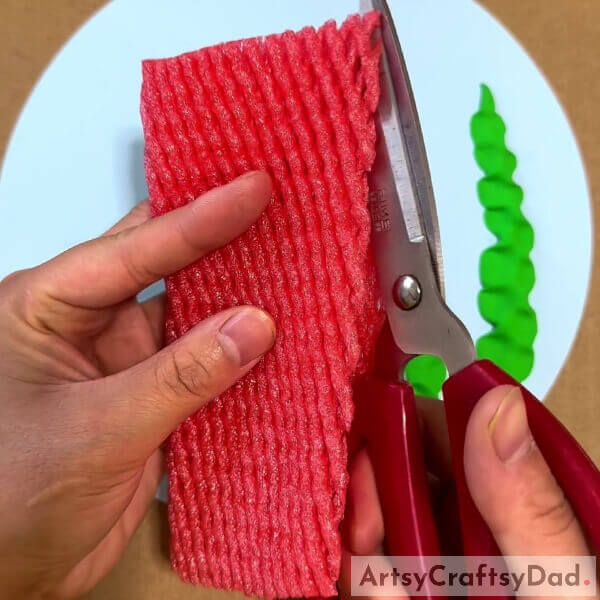
Using scissors, cut open a fruit foam net.
Step #4: Making More Water Plants And Cutting Out A Foam Strip
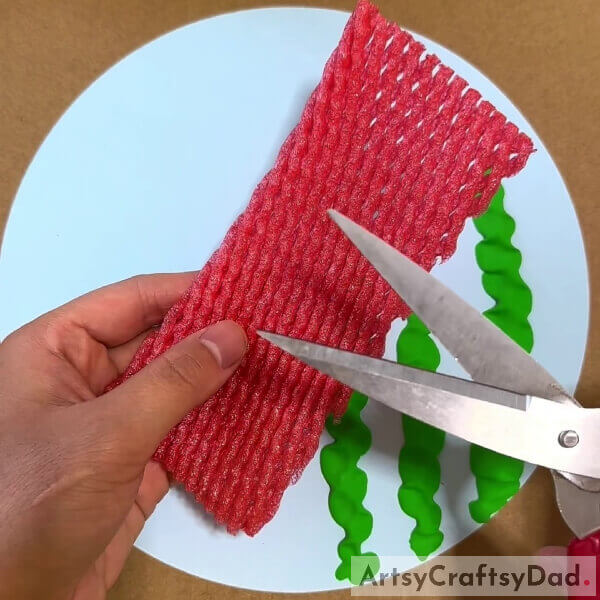
As you made the wavy water plant previously, make more on the left of the already made one and or small random sizes. Also, using scissors, cut out a long thick strip from the fruit foam net.
Step #5: Pasting A Fish Body Cutout
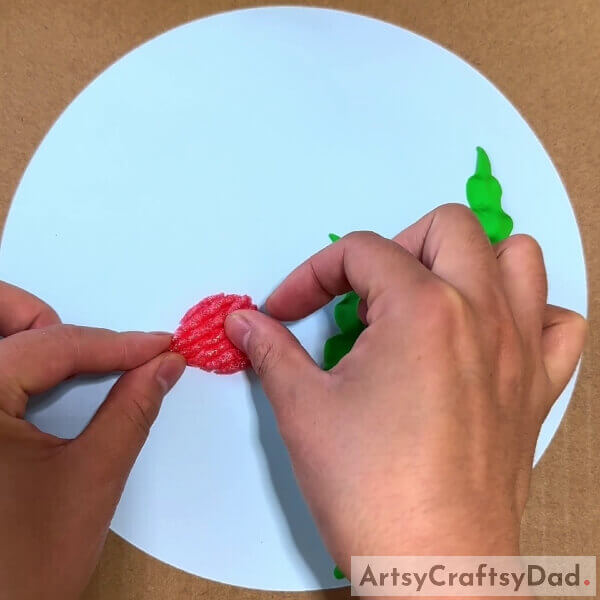
Using scissors, cut out a small drop shape cut out from the fruit foam net and paste it horizontally tilted over the base beside the water plants using glue. This will be the fish body.
Step #6: Cutting Along The Foam Lines
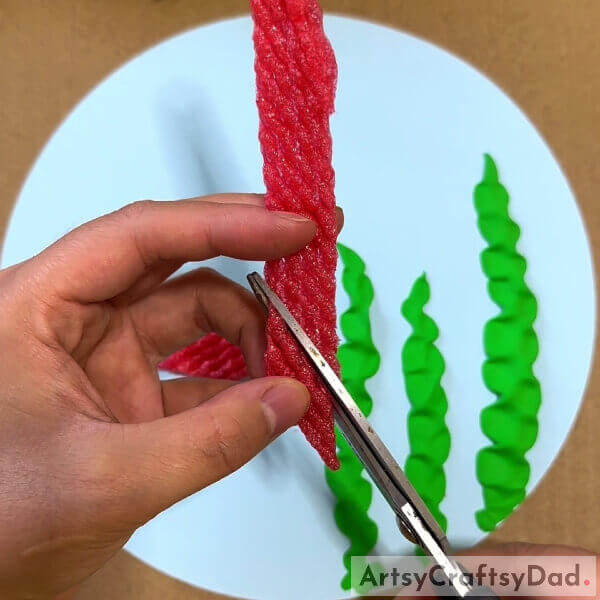
Using scissors, cut out a thin and long foam strip. Along the slanting lines over the foam strip, cut small bits from it. See the image for reference.
Step #7: Pasting 2 Foam Bits
Using glue, paste the 2 foam bits from their short sides to form an arrow shape as shown in the image.
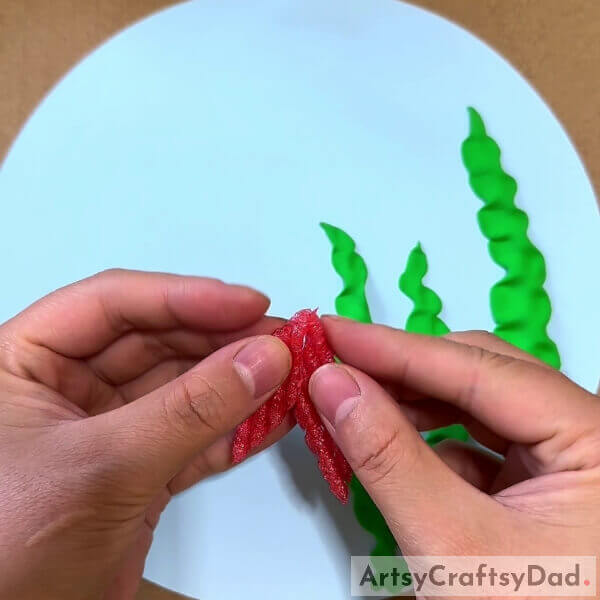
Step #8: Making The Tail Of The Fish
Paste another foam bit to the arrow shape from the side using glue to make the tail of the fish.
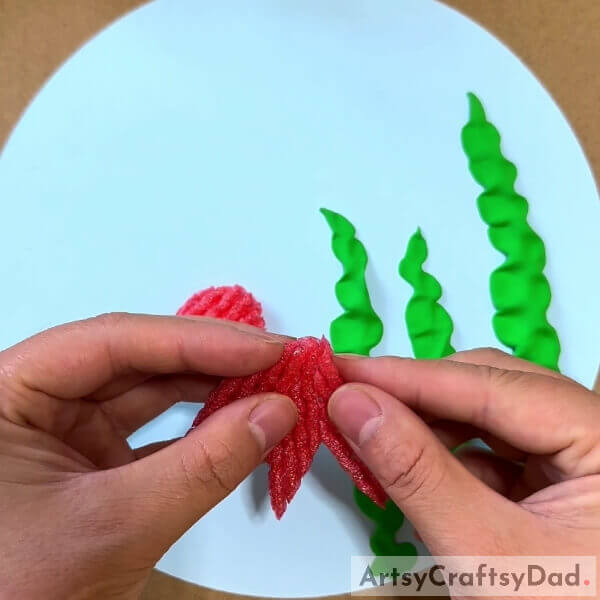
Step #9: Pasting The Tail To The Fish Body

Paste the tail to the fish’s body from the pointed side of the body over the base using glue as shown in the image.
Step #10: Pasting Googly Eyes
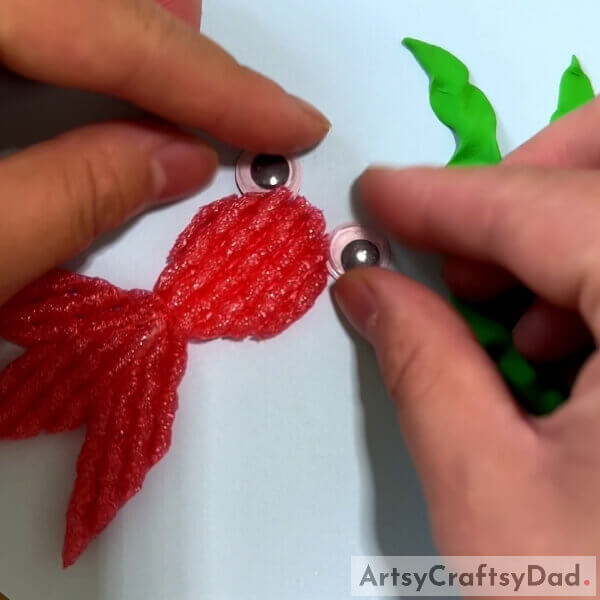
Paste googly eyes on both sides and above the fish’s body using glue. See the image for reference.
Step #11: Adding Some Pebbles To The Craft
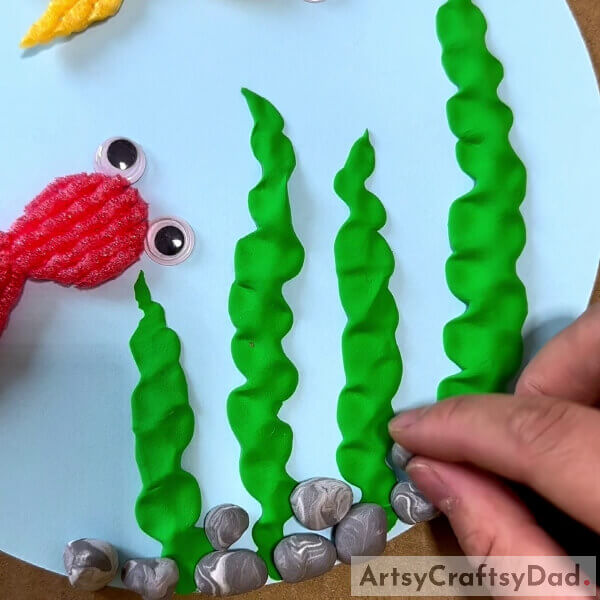
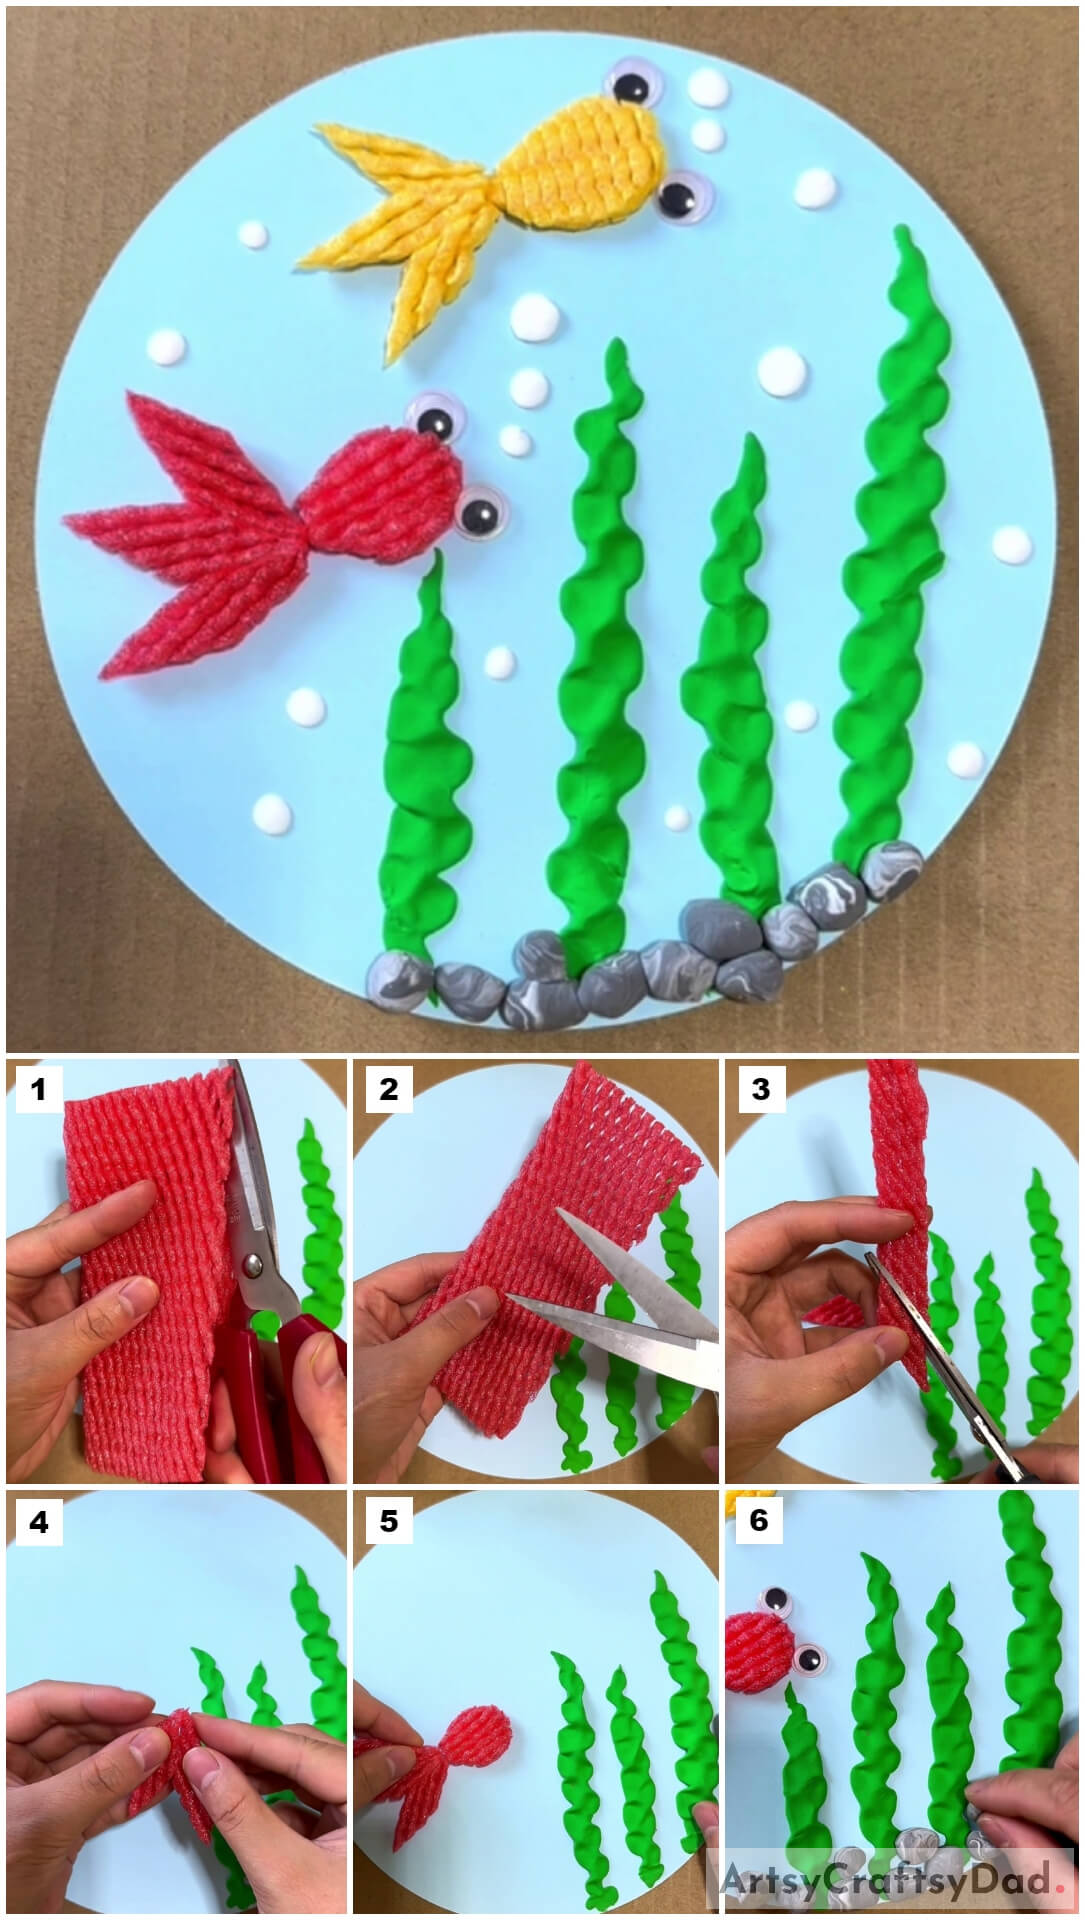
Take grey and white clay and mix and dough them into a single one, you will see some lines of the white lines on the grey mixed clay. Dough small irregular ovals from this mixed clay and stick them at the bottom of the base among the water plants to add pebbles at the bottom of the ocean.
Step #12: Making Another Fish And Bubbles
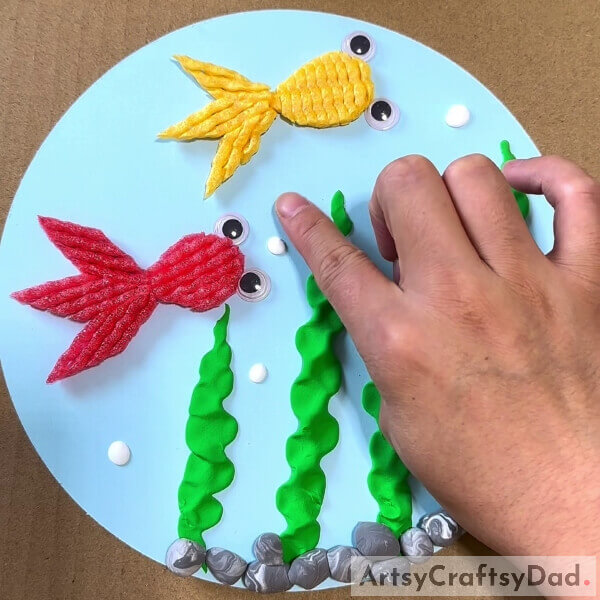
As you make the red-colored fish, make another fish above the red one to a little right using the yellow fruit foam net. Take white clay and dough tiny clay balls of it. Stick these clay balls over the blue base randomly and press to flatten them. These will be the bubbles in your craft. Make a line of bubbles over the fish as shown in the image.
This Is The Final Look Of Your Foam Net Fish Underwater Scenery!
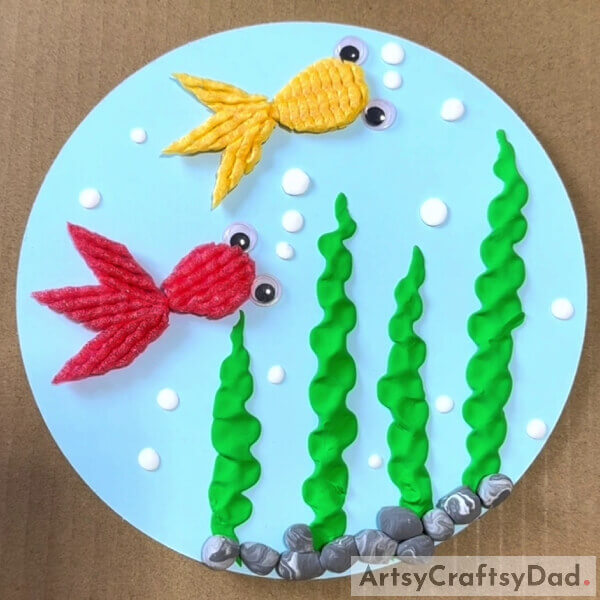
Tada! You have successfully created your fish underwater view craft in no time!
You can now decorate this piece of craftwork in your room to brighten the room up! You can also make this craft for the school craft project, I’m definitely sure your teacher will like it and will admire your skills and creativity! This craft will also serve as the best decor for kids’ rooms as kiddos always like something colorful and funky! You can also encourage your kids to customize this craft using their own creativity and imagination!
Hope you had fun making this craft! If so, do give it a like and share it with your knowns! Also, don’t forget to leave a comment in the comments section below! We would love to hear from you!
You May Also Like
- Clay Snails On Leaves Craft Tutorial For Kids
- Clay-Paper Sunflower Garden Craft Tutorial
- Clay Heart Leaf Tree Craft Tutorial For Kids
- Clay Chicks In Garden Craft Tutorial
- Popsicle Stick Fish Craft at Home


