Think you’ve mastered the Lazy Daisy? Let’s kick it up a notch! The Whipped Lazy Daisy is a gorgeous variation that creates a smooth, raised, and outlined petal that looks far more complex than it is.
How to Whip It:
Stitch a Base: First, make a normal Lazy Daisy stitch. This is your foundation.
Whip It Good: Thread your needle with a contrasting or matching thread. Come up at the base of the petal. Now, without piercing the fabric, whip your needle under the loop of the lazy daisy stitch, from base to tip.
Secure: Once the entire loop is whipped, take your needle down through the fabric at the tip of the petal to secure.
This technique adds incredible depth and a beautiful finished look to your floral embroidery, making it perfect for special projects.
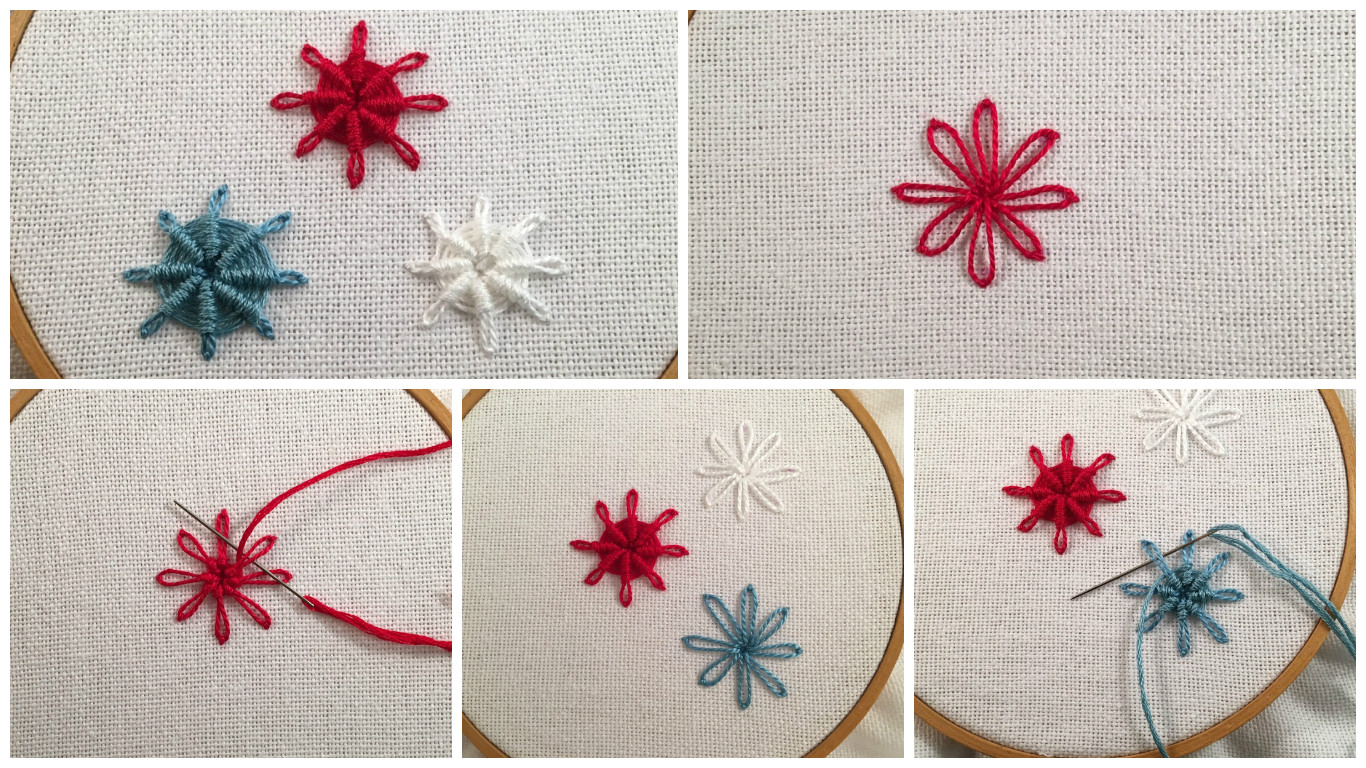
I used a circle template to mark my flower petals as evenly as possible.
One exception: when you start whipping, do not come up through the middle of the daisy, come up in between two of the petals and then start whipping around each petal.
The red daisy petals are #5 Perle cotton whipped with DMC floss.
I stitched a couple more daisies in #5 Perle cotton to practice.
The blue and white daisies are also whipped with DMC floss.
All three whipped!
Hope you try this stitch sometime!