This step by step tutorial will help you to create mini cycle model using paper and plastic straws, this easy craft is perfect for kids of all ages.
Welcome to this cycle craft tutorial! In this tutorial, we will show you how to create your own cycle craft using few craft materials. This is a simple and easy craft to create, which is suitable for kids and beginners. To create this craft, you need few supplies such as paper cup, plastic straw, toothpick and glue. Let’s get started!
Cycle Craft Model Using Plastic Straw Craft Tutorial
Must Read: DIY Craft Ideas from plastic spoons
Supplies & Tools
- Two paper cup
- Plastic straws
- Toothpick
- Scissors
- Hot glue
- Black marker
- Construction paper(if needed)
Plastic Straw Cycle Craft Instruction
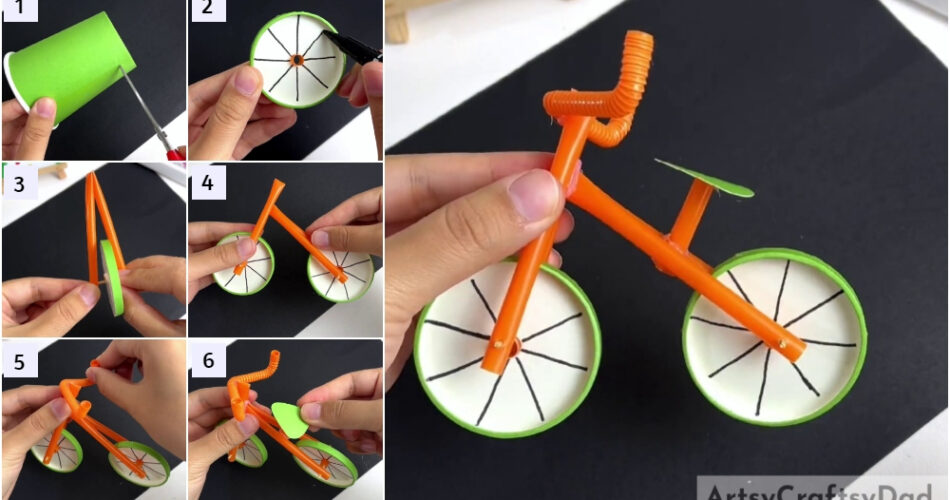
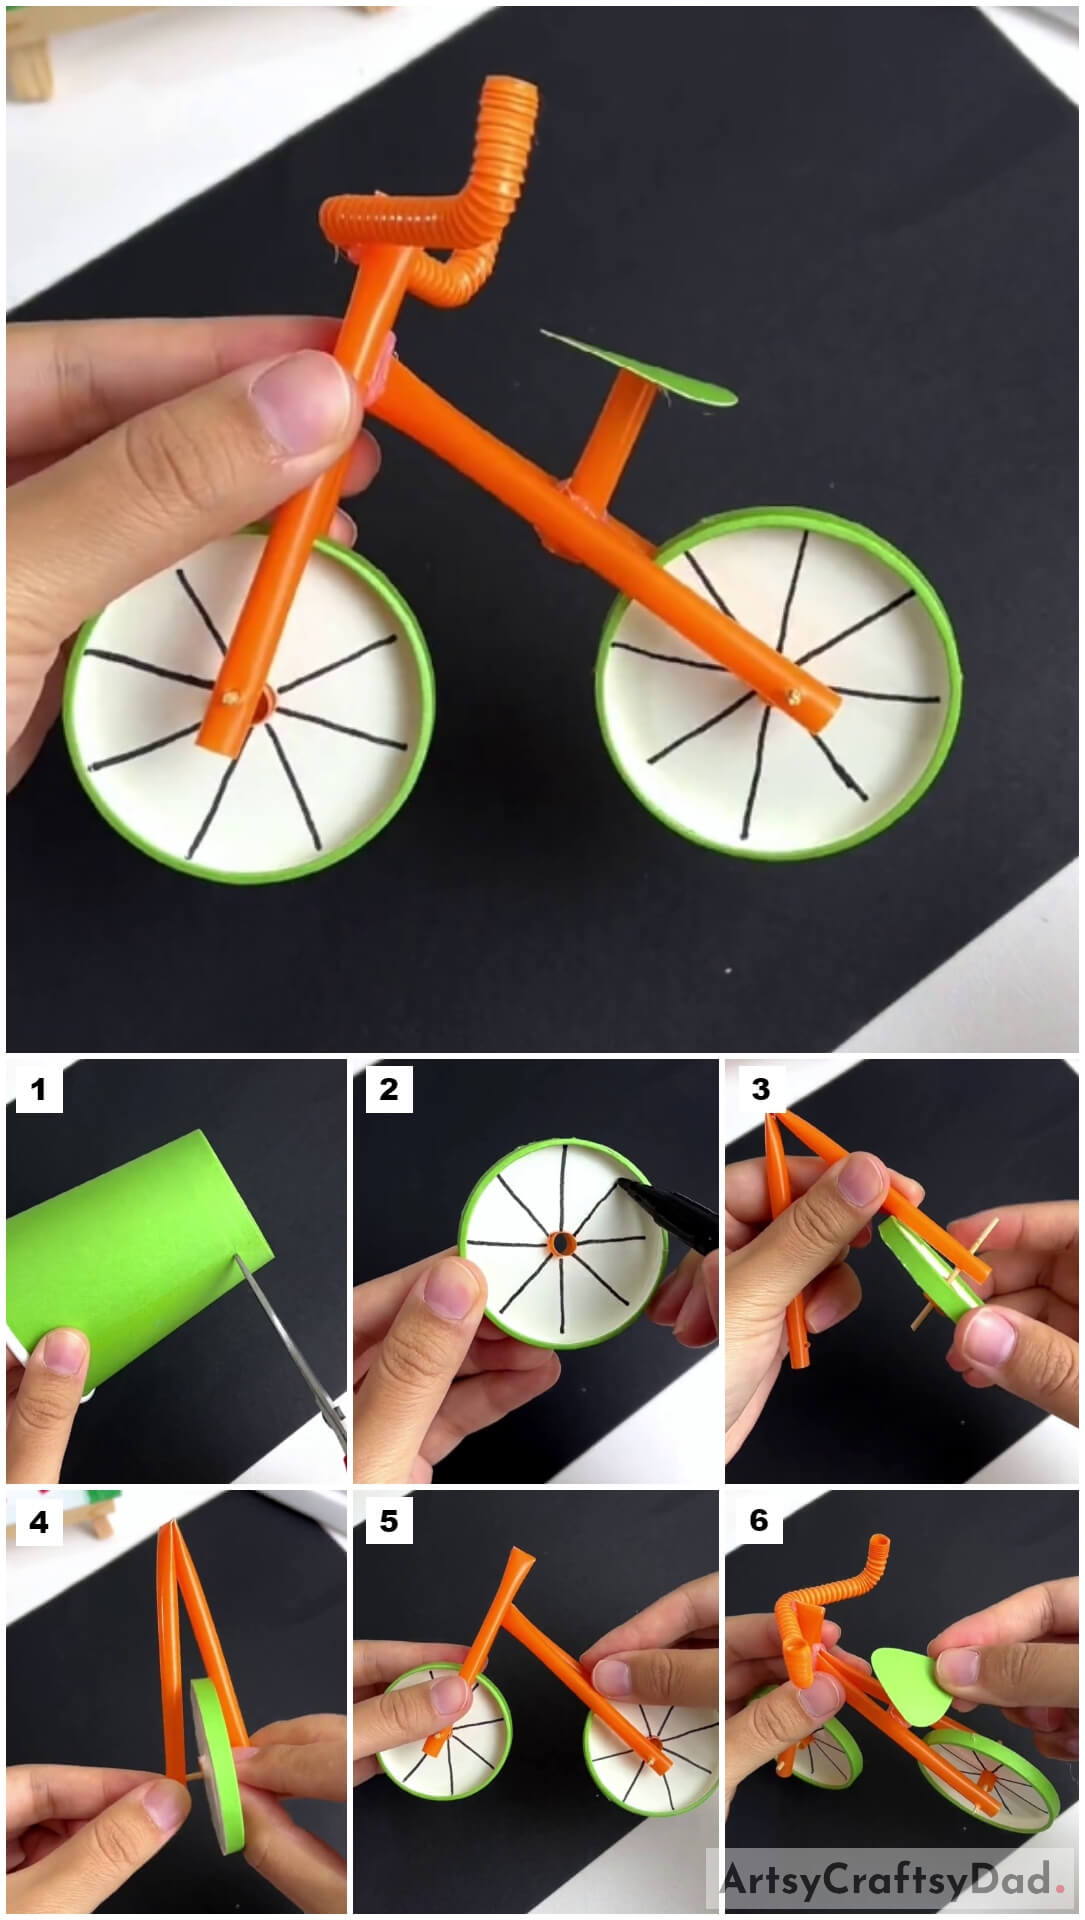
Step #1: Cutting Paper Cup Using Scissors
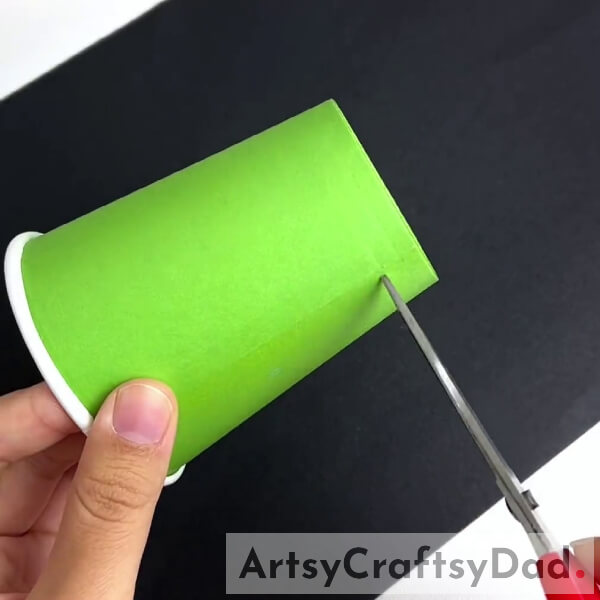
Grab your scissors and paper cup, at the bottom of your paper cup, place your scissors few millimeters above as shown.
Step #2: Cutting Cycle Wheel From Paper Cup
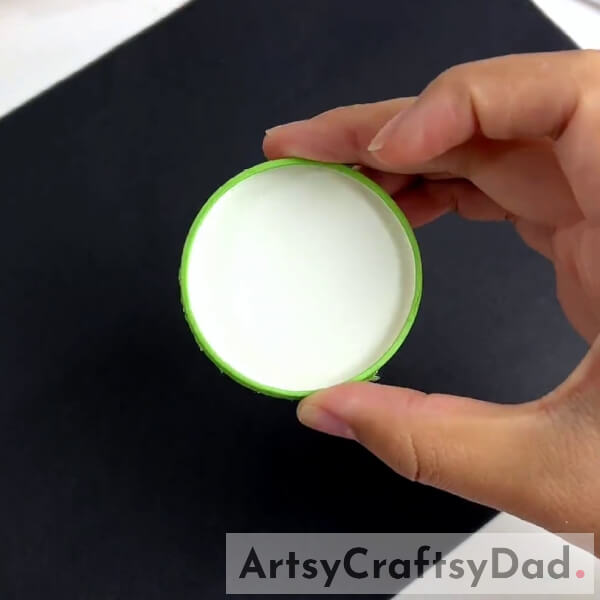
Then, start to cut your paper cup and take the bottom part of your cup for cycle wheel.
Step #3: Putting Hole In The Middle Of Paper Cup
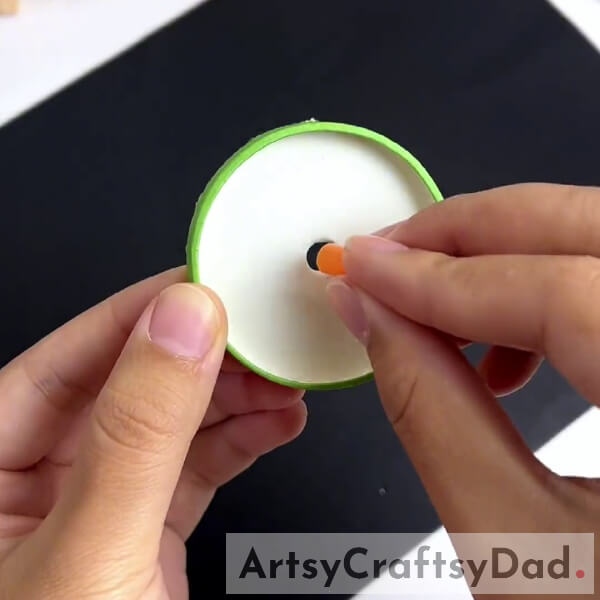
Then, put one small hole in the middle of your paper cup. Cut small piece of plastic straw and insert that piece into the hole in the middle.
Step #4: Drawing Lines In The Paper Cup To Create Cycle Wheel
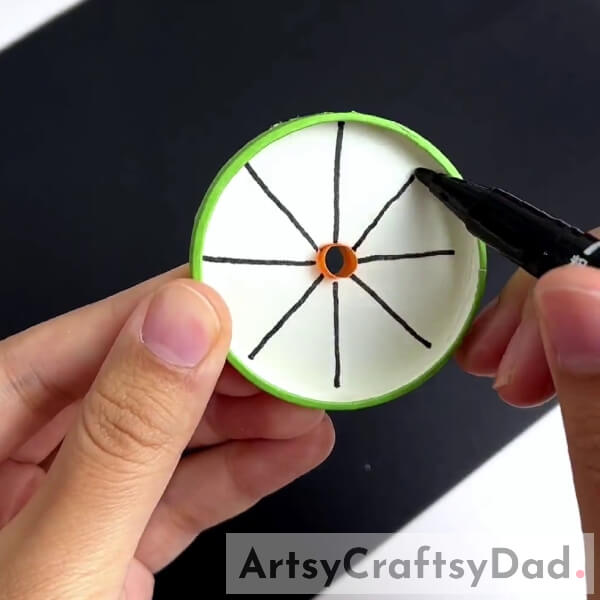
Start from the middle, draw 6 to 8 lines around the hole using black marker to create our cycle wheel.
Step #5: Putting Hole On Plastic Straw Using Needle
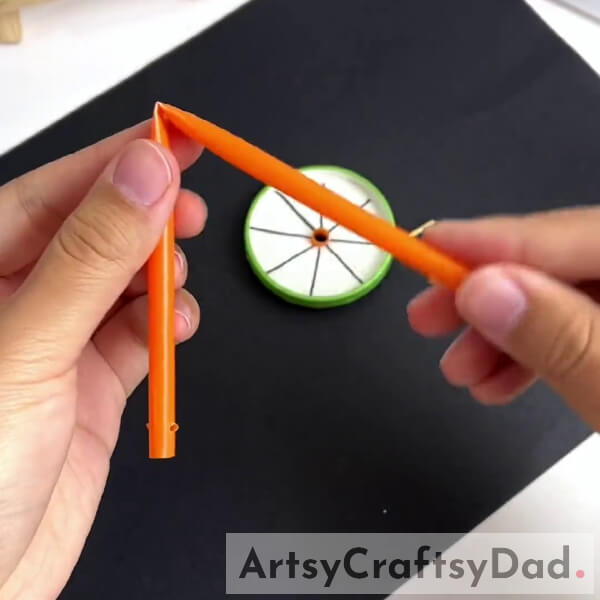
Take one piece of plastic straw and put hole on top and bottom of that straw using needle. Then bend that plastic straw into half as shown.
Step #6: Inserting Toothpick Into Our Straw
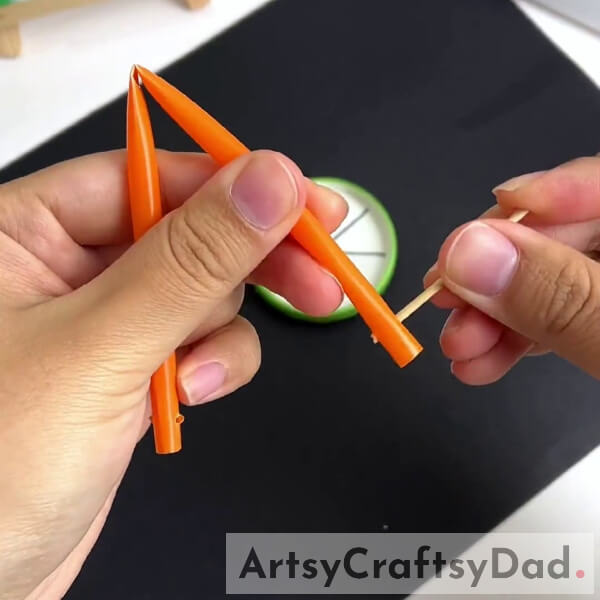
Take a piece of toothpick, then cut its sharp edge. Insert that piece of toothpick into the hole (which we put before) at the one end of our straw.
Step #7: Attaching Straw With Paper Cup Cycle Wheel
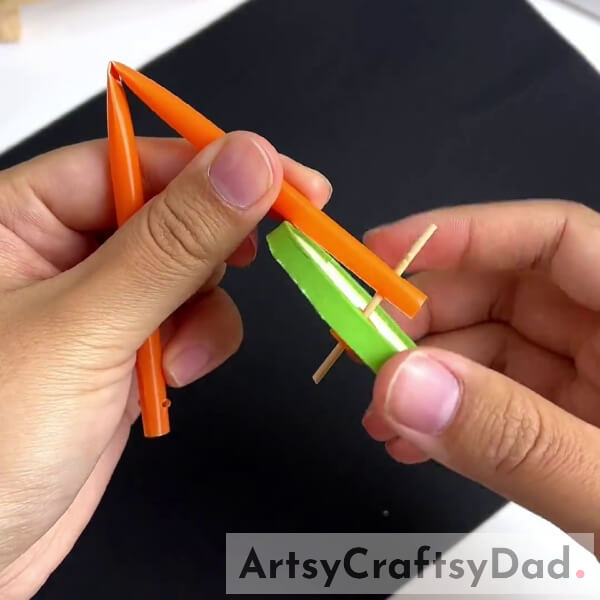
Now take our paper cup cycle wheel which we create before. Insert the toothpick that we attached to the straw in the hole of our cycle wheel, make sure to place the cycle wheel inside of the straw like in the image.
Step #8: Attaching Both Ends Of Straw With Toothpick
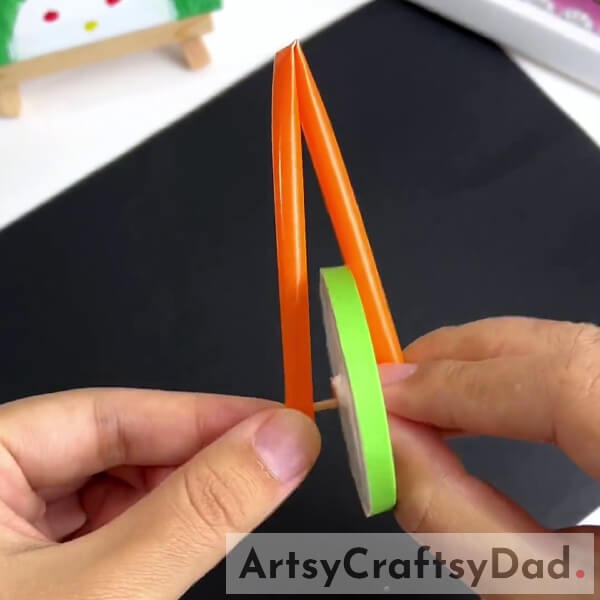
Now, insert the toothpick to the hole at another end of the straw to attach both side of straw.
Step #9: Creating One More Cycle Wheel And Pasting It Together
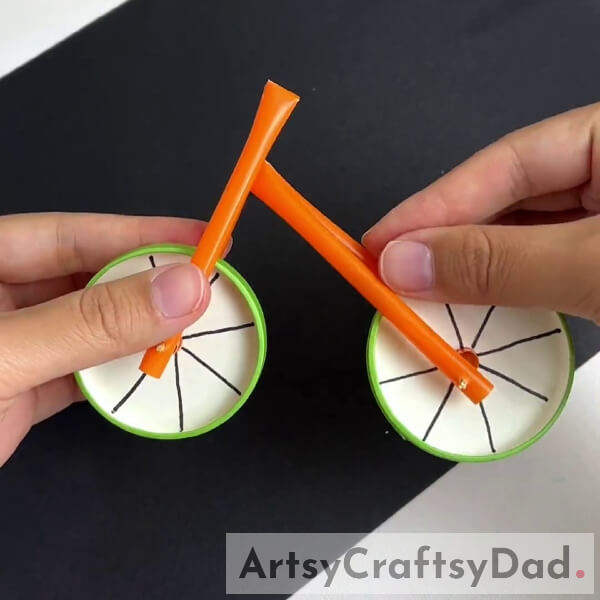
Follow the same steps to create one more cycle wheel and apply some hot glue at the top of one cycle wheel’s straw. Then paste it in the middle of another wheel’s straw as shown in the image.
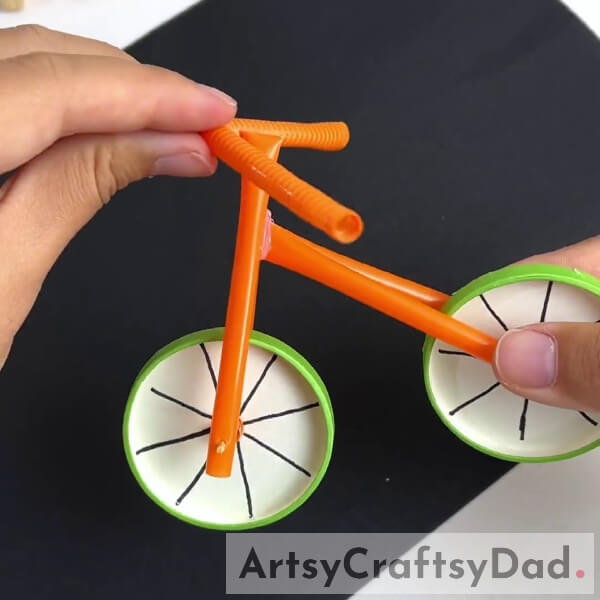
Step #10: Cutting Flexible Straw For Cycle Handle
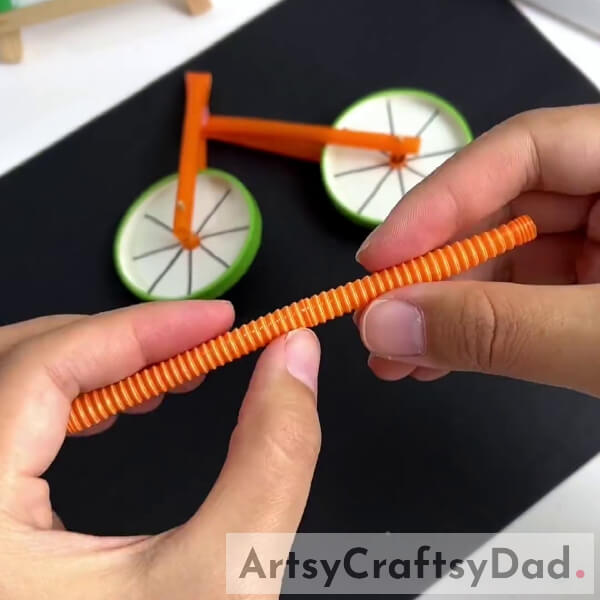
Grab one flexible straw, cut the flexible part of that straw and pull it out, then bend it into V shape.
Step #11: Pasting Piece Of Flexible Straw With Cycle
Paste the piece of our flexible straw which we bend it in V shape with our cycle using some hot glue.
Step #12: Creating Handles For Our Cycle
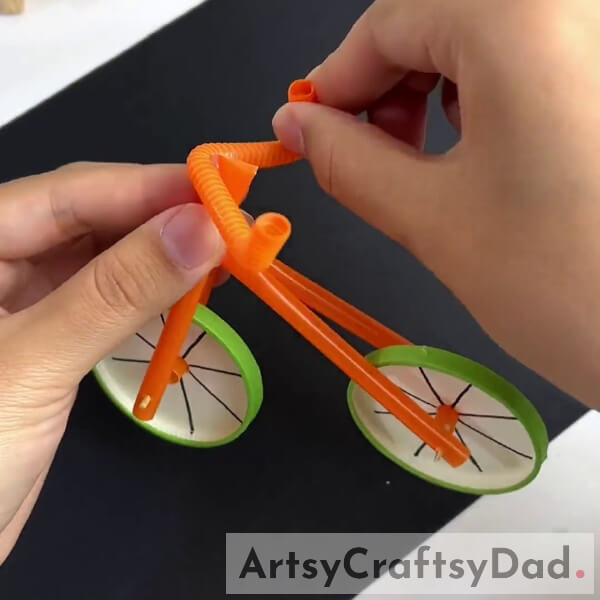
Then, bend the both ends of flexible straw upwards for cycle handles.
Step #13: Pasting A Piece Of Straw In The Middle Of Our Cycle
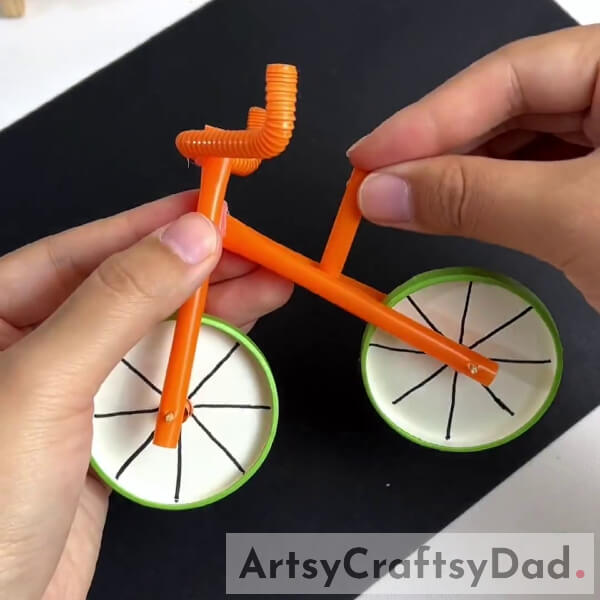
Cut a 2 cm piece of straw and paste it in the middle of our cycle with hot glue as shown in the image.
Step #14: Creating Cycle Seat With Construction Paper
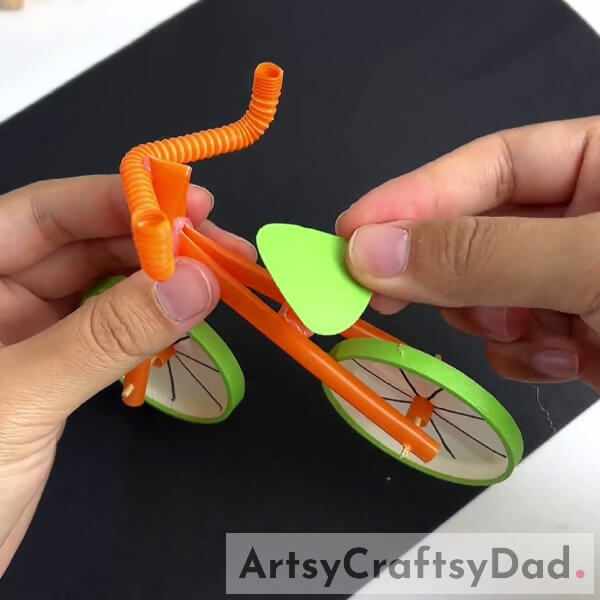
Draw cycle seat outline on green color construction paper(or you can use the excessive part from your paper cup) and cut it out. Then, paste that piece of paper on top of the straw which is in the middle of our cycle.
We Have Completed Our Paper Cup Plastic Straw Cycle!

Yeah! our simple paper cup plastic straw is ready! This craft is really easy one to create, which is suitable children of all ages. Using very few craft materials and simple steps you can create this simple cycle effortlessly.
We hope you like this cycle craft using paper cup and plastic straw tutorial. Leave your thoughts about this tutorial in the comment section below. Visit more craft and art tutorials from our website.
Thank you for visiting our website.
You May Also Like
- How to make a doll dress with plastic straw
- DIY Recycled Plastic Bottle Craft Tutorial
- Clay-Paper Sunflower Garden Craft Tutorial
- How to make a Paper Flower Vase – Paper Craft Tutorial
- Simple Paper Tearing Flowers Craft Tutorial


