In the cold season, there is a lot of bright sunny colors, so I propose not to wait for the summer, but to create it yourself. Today’s master classes want to devote a flower with a beautiful name “Dahlia”, which we perform in the technique of quilling from a minimal set of material and tools.
Upon completion of work, we are sure that the resulting flower arrangement will decorate any interior, and also bring joy to its owner. MK are a detailed instruction with a step-by-step description and pictures, which even the novice quilling lover will understand.
The first way of torsion of Dahlia
In order to make quelling dahlias it is necessary to prepare the following materials:
- double-sided colored paper or paper strips;
- album or notebook sheet;
- scissors;
- Quilling tool;
- glue;
cardboard for the background.
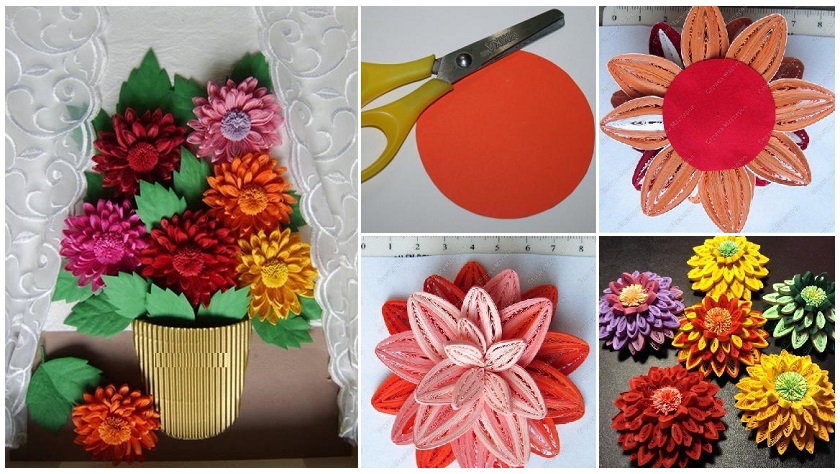
First of all, I will gradually describe how to make a simple bud of dahlia in three ways, for the first one you need 4 colors: 2 orange and 2 pink (different shades). Take about 170 ready-made strips for quilling or cut yourself out of colored paper. Cut a circle about 3.5-4 cm in diameter, close in color to the future petals, for example, pink. Twist the rolls of different diameters, then give them a droplet shape, set aside until completely dry. See the scheme of the flower assembly and the color solution of the petals.
Assemble one of the three modules in the form of a drop, one petal, then glue a strip of paper of the same color along the entire perimeter. Start sticking the petals on the tiers, according to the above assembly scheme.
As a result, this dahlia should look like, about 8 cm in size, the reverse side of which looks quite neat and reliable.

The second way to make bud of dahlia
The second way of making a dahlia flower in the quilling technique is simpler and quite possible for any beginner needlewoman. This kind of crafts can be made even in the company of children from paper of the same color.
The third way to make bud of dahlia
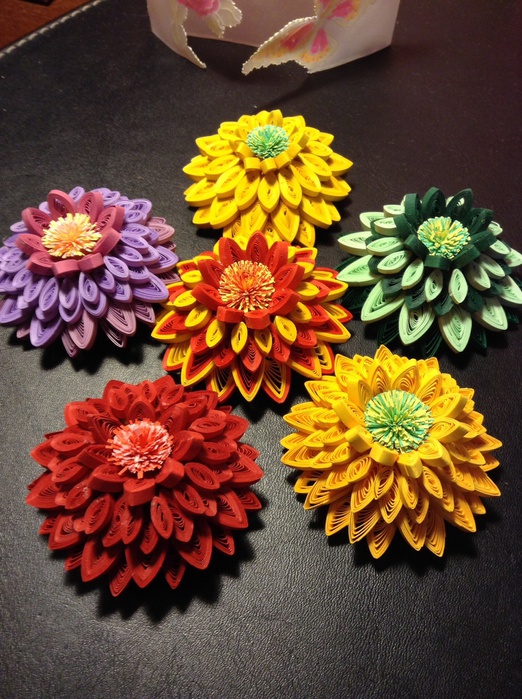
The third method, similar to the first, only the petals are made from yellow rolls of different diameters, oblate in the shape of the eye and pasted on a circle-base in three tiers. For the dahlia core, it is necessary to cut the green and yellow strip of paper into a fringe, so that the petals are not very thin. When cutting into a fringe, use a cardboard blocker (a piece of cardboard), which you need to hold with your fingers at the edge of the paper, so as not to make a too deep cut and not to damage the strip.
Twist the resulting fringe into a tight roll, glue the loose end, fan the roll with your fingers. Stick the petals, as was said, in three tiers, leaving an empty space for the core. As a result of the assembly, you should get a bud of dahlia, as shown in the photo.
Flower arrangement from dahlias
Flower arrangement of buds made in the third way is a great idea for a gift for any holiday, for example, the forthcoming Eighth March.
So, make 7 buds in the third way, as well as 26 rolls, like the heart of a flower from green strips of paper – they are useful for decorating the composition. For dahlias, cut out leaves from a landscape / notebook sheet using the template below or your own sketch. Leave the edges of the leaves with the tip of a pair of scissors.
For the stalk of dahlia, twist a leaf of green and light green paper into the tube, fix the free edge with glue. Collect the composition together, paste on cardboard and decorate with figures of ladybirds or butterflies.
The composition of dahlias in quilling technique is ready, in my opinion, it turned out beautifully and, at least, originally. For aesthetics, the handicraft can be placed in a frame without glass and, if desired, sprinkled with acrylic lacquer for reliability.
Video master-classes “flowers quilling”
To get acquainted, we suggest you to watch video tutorials on creating flowers in this style.
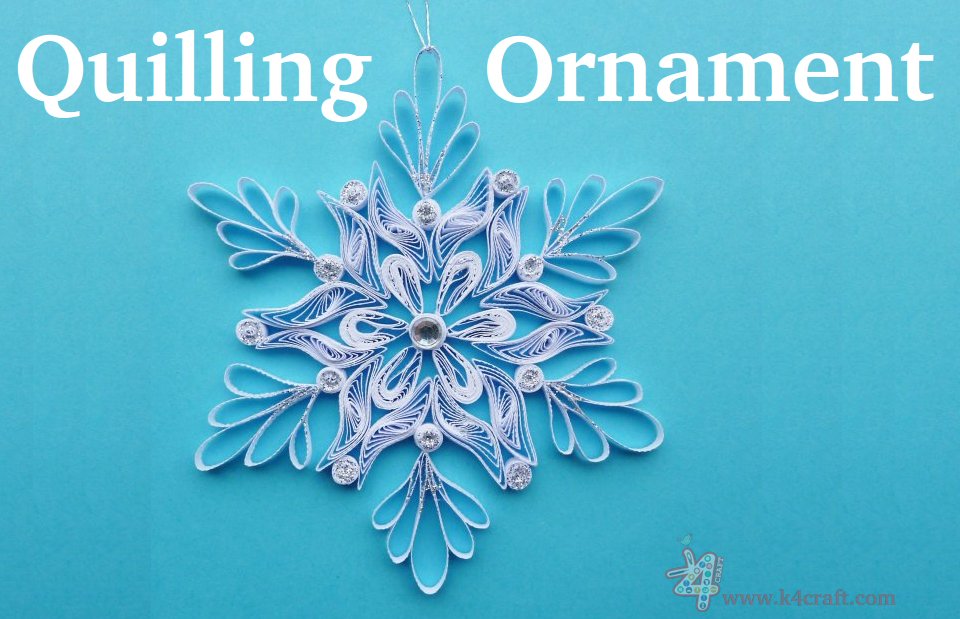
Paper Quilling Ornaments for Christmas decoration
You’ll also like:
- How to make quilling flower necklace
- How to make hanging flowers
- How to make flower vase using paper rolls
- A floating cup with flowers – A satin ribbon Craft Tutorial
- How to make Flower vase made of cardboard


