Dive into your imagination to make a pretty various-colored tree! This step-by-step tutorial will guide you through a panting hack for it!
This step-by-step tutorial is on making a tree with colorful leaves with an amazing painting hack! The hack in this article will make this painting much easier and you will complete it in just the blink of an eye! You will be using the basic art supplies and the cotton earbuds that you already have at home! This is a budget-friendly painting artwork! Just imagine what the world would look like if we had colorful trees! Just wow, right? Well, it’s not possible so we create art! Let’s begin!
Earbud Stamping Tree Artwork For Kids
Must Read: Colorful Button Jellyfish Craft For Kids
Supplies & Tools
- White Circular Paper Sheet
- Plastic Rubber Band
- Cotton Earbuds
- Paint Colors
- Paintbrush
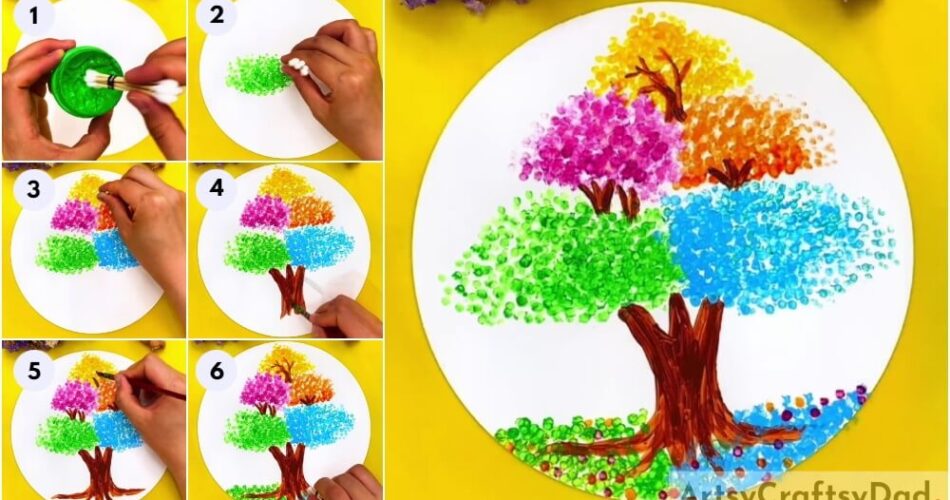
Earbud Stamping Instructions
Step #1: Securing A Bunch Of Cotton Earbuds Together
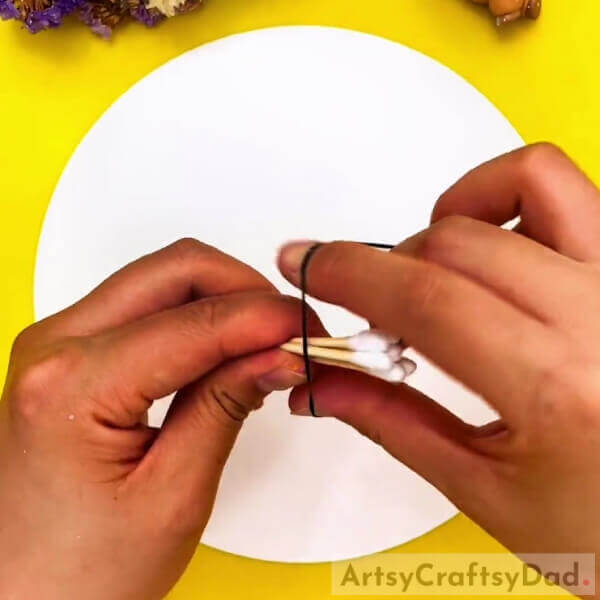
Begin this painting by taking the white circular paper sheet as the base for this artwork, 6-7 cotton earbuds, and a plastic rubber band. Secure the bunch of the cotton earbuds together with the plastic rubber band. This will be the paintbrush in our artwork.
Step #2: Dipping The Buds Into Green Paint
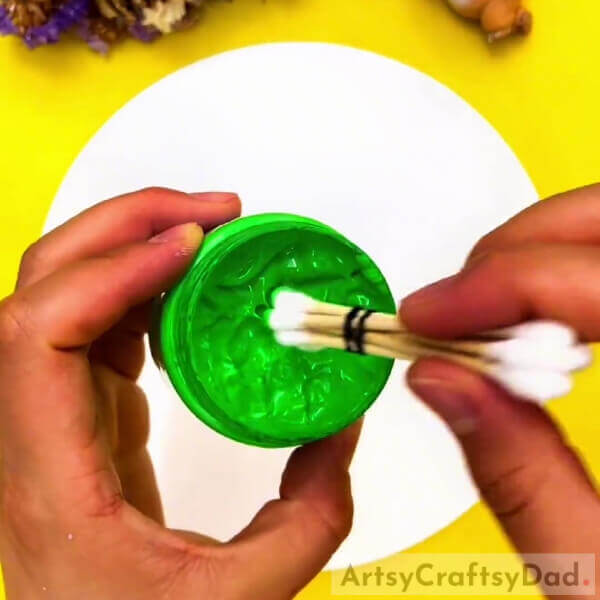
Dip the bunch of cotton earbuds into a green paint.
Step #3: Making Green Leaves

Dab the green-painted cotton buds on the base on the left side to make a bunch of green leaves on the left as shown in the image.
Step #4: Making More Leaves Of The Tree
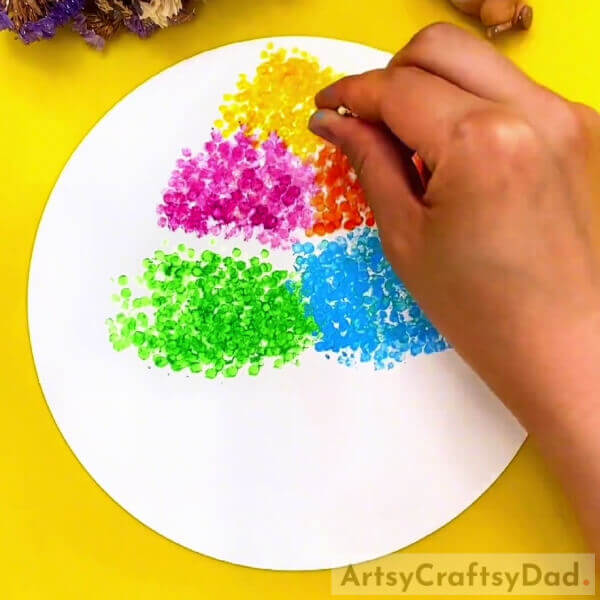
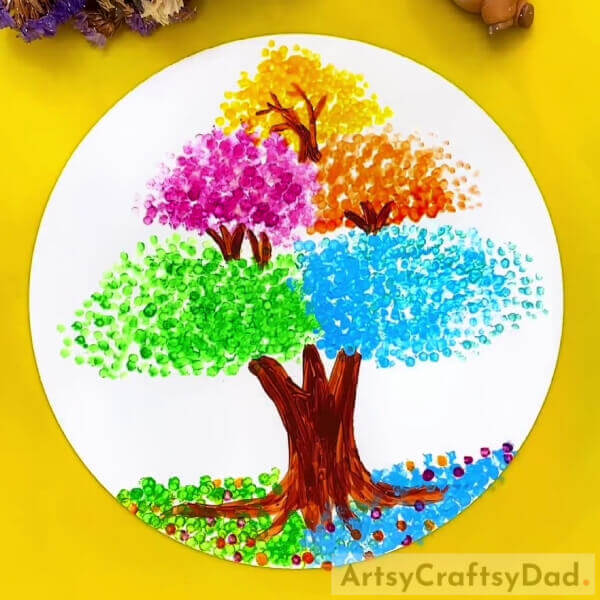
Now, dip the buds into blue paint and make a bunch of blue leaves on the right of the green ones. Following the same, make a bunch of pink leaves above the green ones and orange leaves on the right of the pink ones, above the blue ones. At last, make a bunch of yellow leaves on the top mid of the pink and orange leaf bunches.
Step #5: Making The Tree Trunk
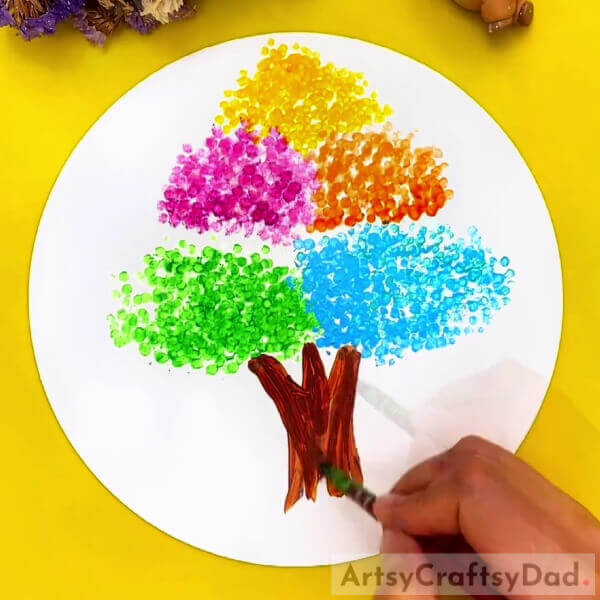
Dip a paintbrush into brown paint and make a broad tree trunk beneath the colorful leaves of the tree. Make the 3 layers of the trunk from the top as shown in the image and make a scattered trunk from the bottom to make it look spread over the ground.
Step #6: Making Branches Of The Tree
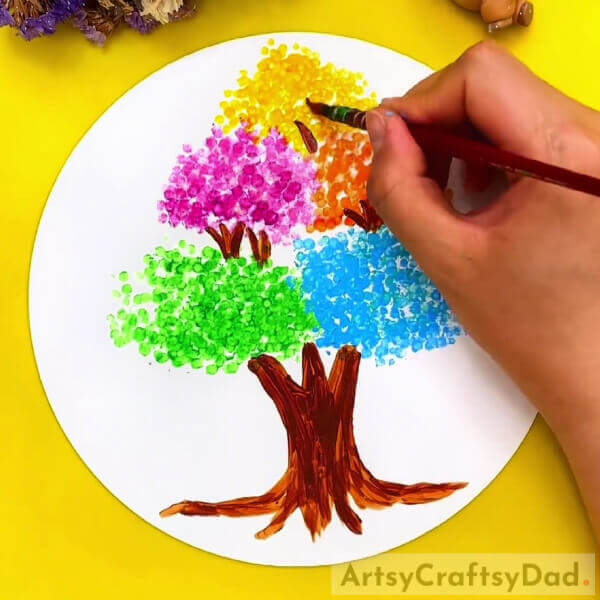
Make some tree branches between the bunch of 2 different colored leaves using the brown painted paintbrush.
Step #7: Making Ground Filled With Fallen Leaves
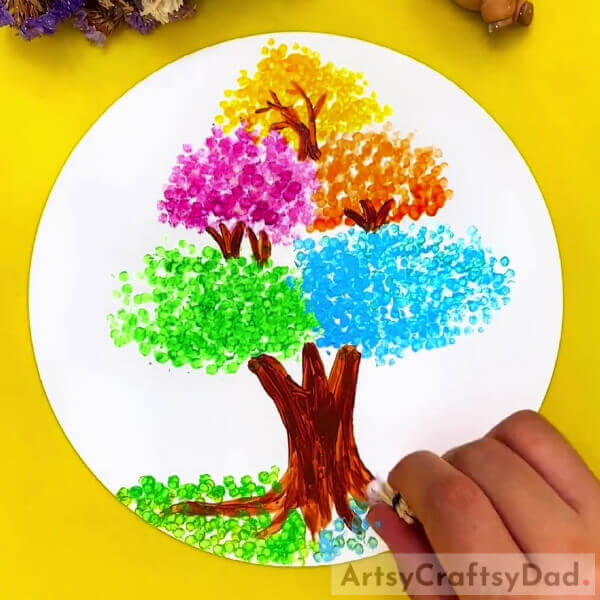
Again dip the buds paintbrush into green paint and dab it over the bottom of the base to make the ground on the left side of the tree. Similarly, make the blue ground of the artwork on the right side of the tree. These will represent the fallen leaves on the ground.
Step #8: Making More Fallen Leaves
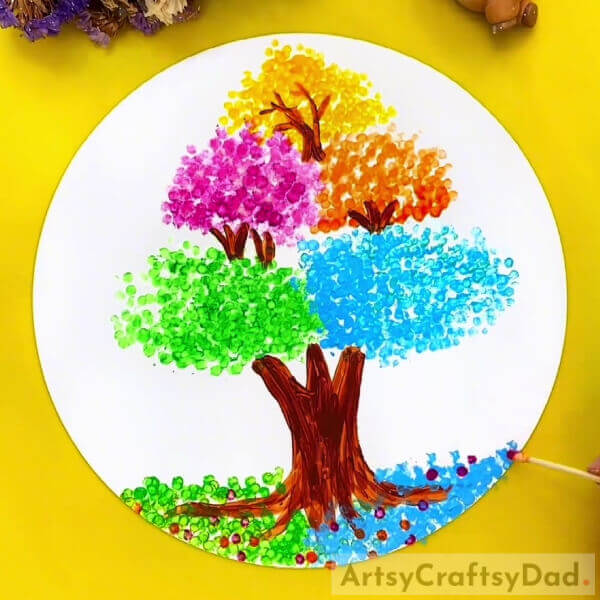
Dip a single cotton bud into pink paint and make random dots over the ground, then dip it into orange paint and do the same. These represent some pink and orange fallen leaves on the ground.
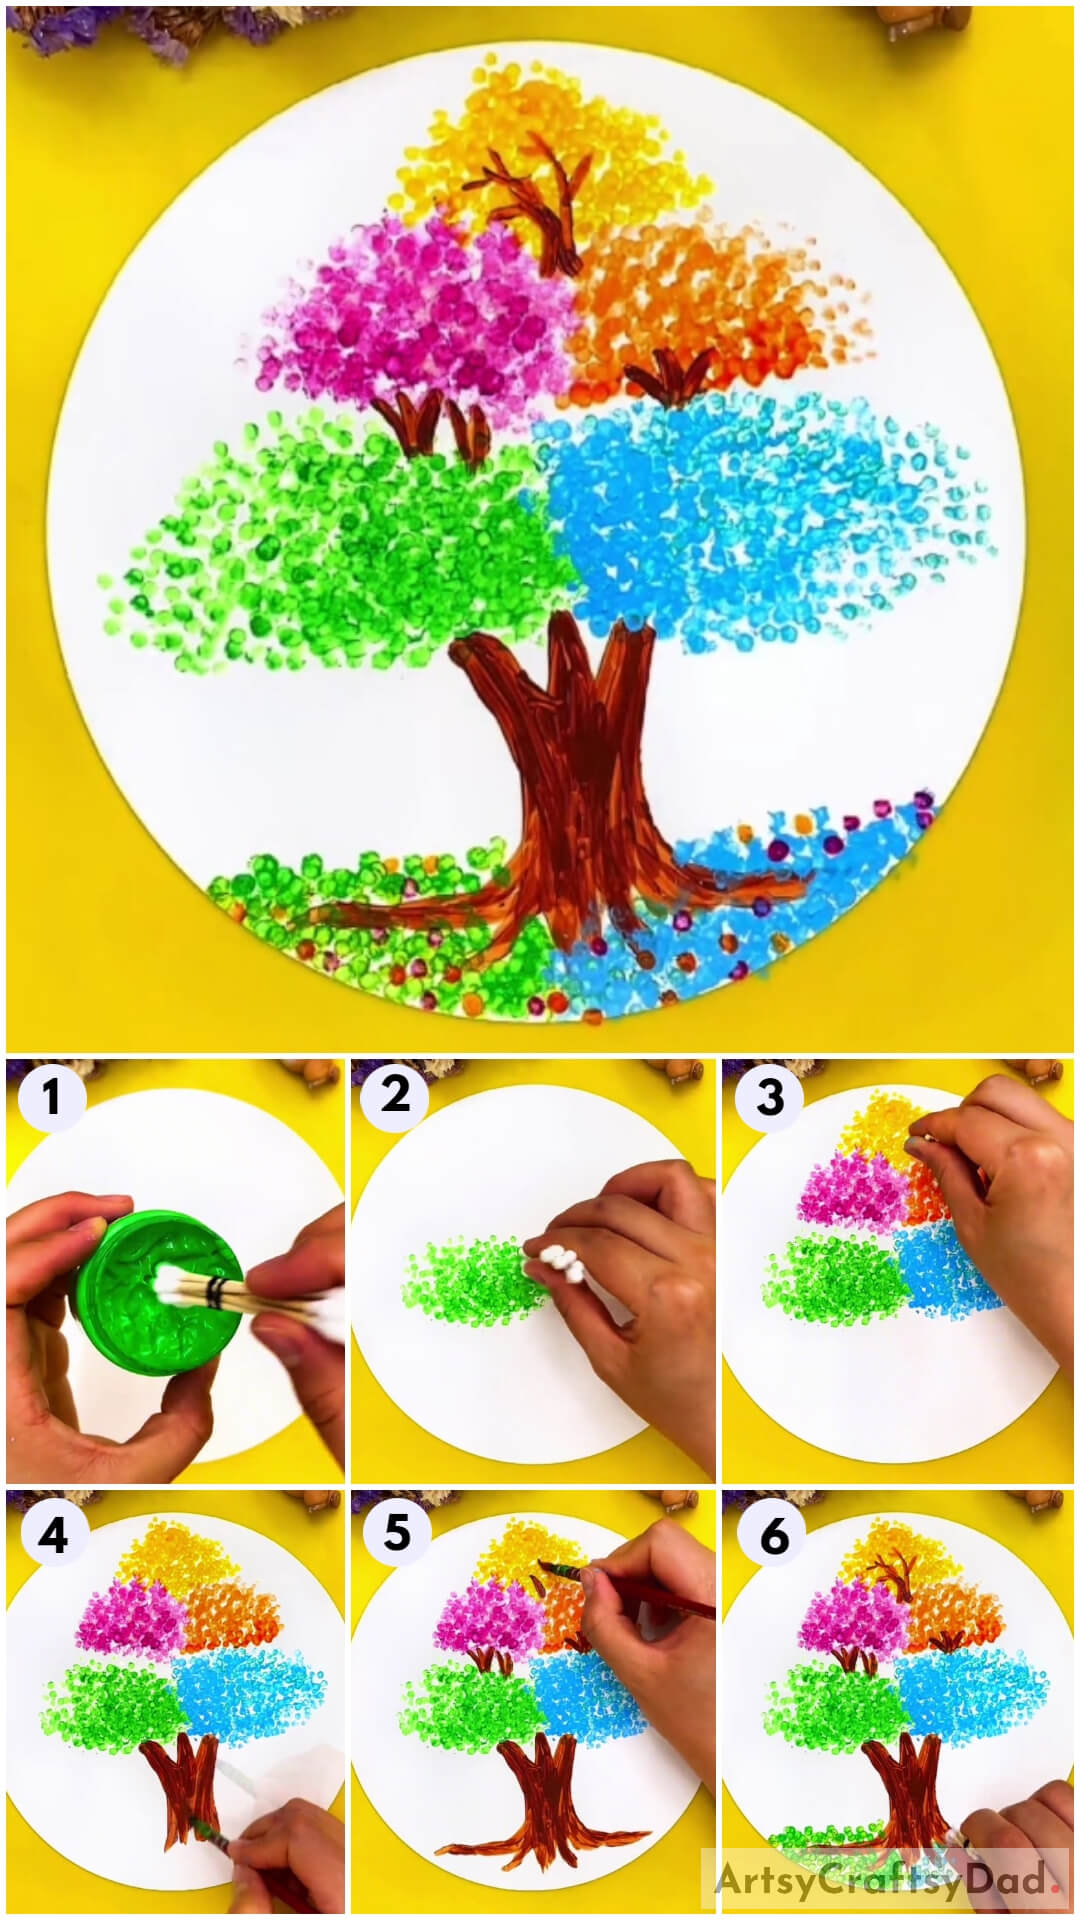
This Is The Final Look Of Your Colorful Tree Painting!
Congratulations! You have finally completed making your tree with colorful leaves just in time!
Decorate this painting as wall art on your room’s wall to dive into your imaginary world every time you look at it! The best part is you won’t need the guidance and help of any elder or experienced person to make this painting! You can also make it more unique according to you as you know it is your imaginary world! Make it as creative and amazing as you want it to be! Show it off to everyone and let them admit your skills and imagination! They will definitely be happy and will be proud of your creation just like you!
Hope you loved the article so, give it a like and share it as much as you can to keep us encouraged to keep bringing such art for you!
You May Also Like
- Clay Heart Leaf Tree Craft Tutorial For Kids
- Balloon Stamping Painting Ideas
- Family Tree School Projects for Kids
- Kids Craft : How To Make Valentine’s Tree for Mom
- Easy Town Landscape Drawing Tutorial For Kids


