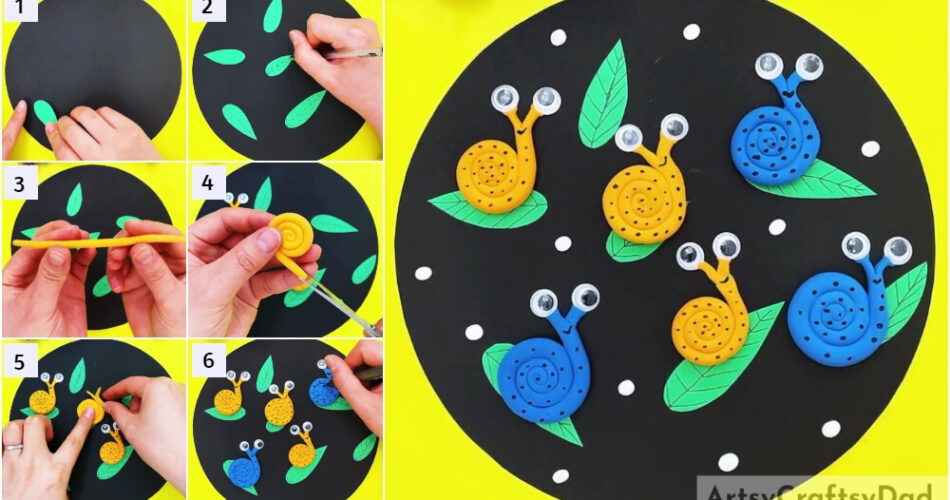
Get creative by creating pretty snails using paper & clay! This tutorial will engage your kids to make this craft in an easy & exciting way!
Do you know? Snails can live both in water and on land, and they have about 1400 teeth! What a shocking fact! Well, you can learn more about them if you have the curiosity! And for that, we are here with a crafting solution! This step-by-step tutorial will guide you on making snails using clay and paper, and the basic craft materials that you already have at home! The results will definitely look eye-catching! Without wasting any minute further, let’s begin!
DIY Clay Snails Craft Using Leaves For Kids

Must Read: How to Make Peacock Clay Pot at Home
Supplies & Tools:
- Colored Paper Sheets (Black And Green)
- Black Pen
- Scissors
- Colored Clay (Yellow, White, And Blue)
- Black Marker
- Googly Eyes
- Glue
Clay Snails Craft Instructions
Step #1: Pasting A Leaf Cutout
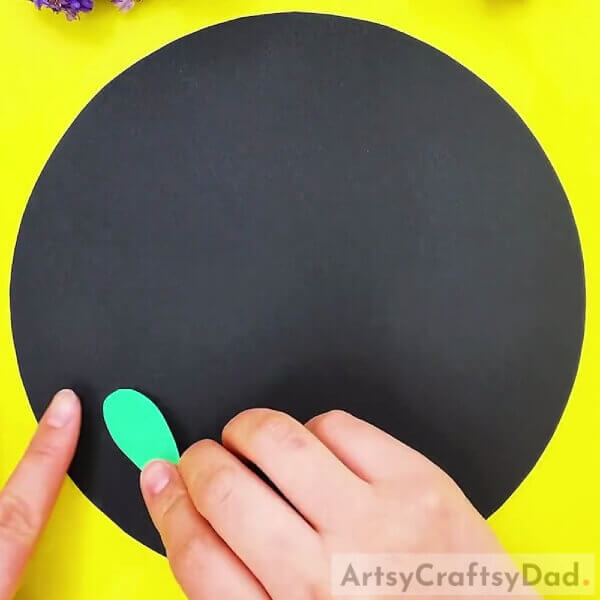
Begint his craft by taking a black and a green paper sheet, a pair of scissors, and glue. Using scissors, cut down the black paper sheet into a circle to make the base of the craftwork and cut out a leaf from the green paper sheet. Using glue, paste the leaf over the base.
Step #2: Pasting More Leaf Cutouts
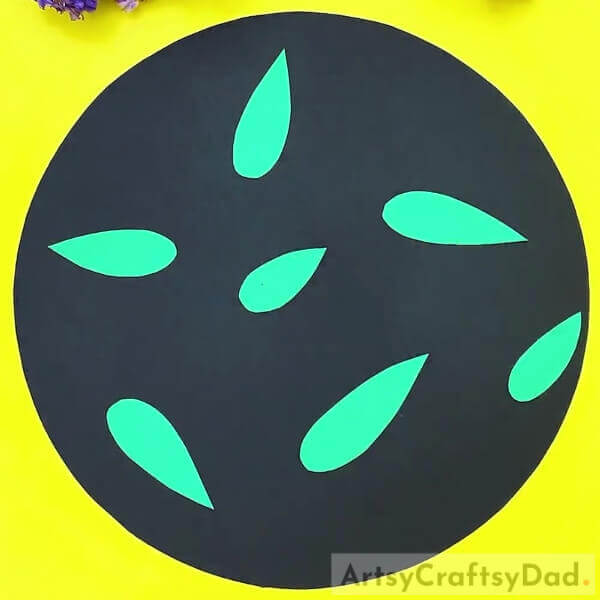
Following the same, make more leaf cutouts and paste them onto the base randomly as shown in the image using glue.
Step #3: Drawing The Leaf Veins

Using a black pen, draw the veins of the leaves over each leaf cutout.
Step #4: Making A Yellow Clay Roll

Take yellow clay and dough it into a long and thin roll.
Step #5: Making Spiral Of The Roll

Roll the clay roll to make the spiral shape. Make sure to leave the end of the spiral unrolled.
Step #6: Making A Cut On The End Of The Roll
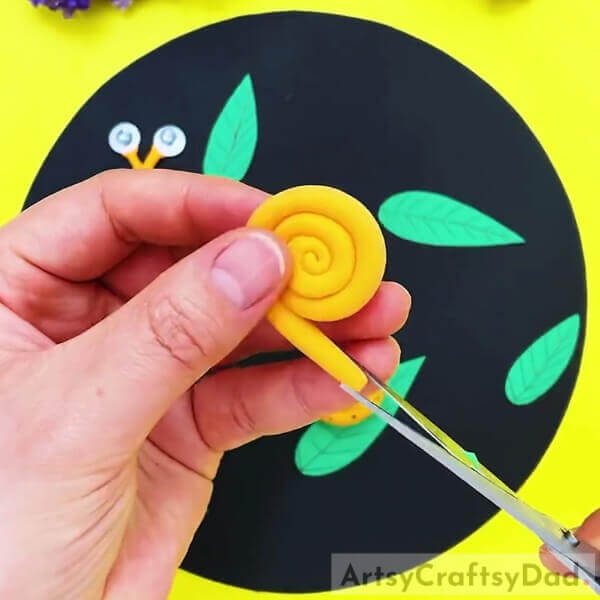
Using scissors, make a small cut on the end of the rolls to separate the end into two strands. The spiral roll will be the shell of the snail, and the two strands will be the tentacles over the head, all together it will be your snail.
Step #7: Sticking The Snail Over The Base
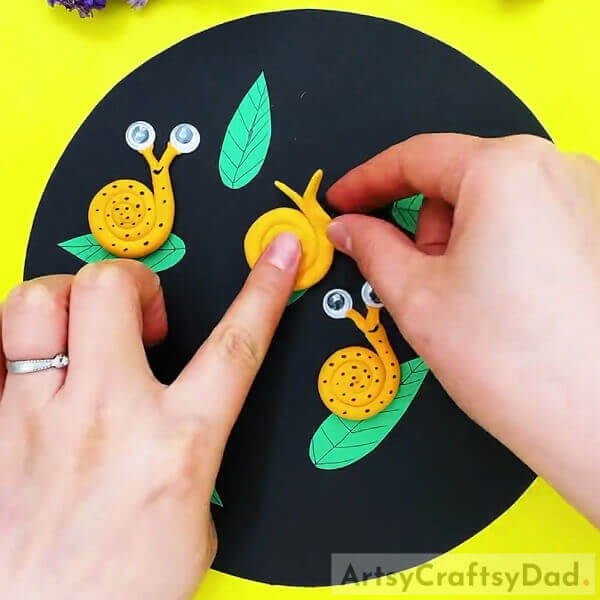
Stick the snail over the base on the leaf cutout to make it look like it is sitting on a leaf as shown in the image.
Step #8: Adding Eyes To Your Snail
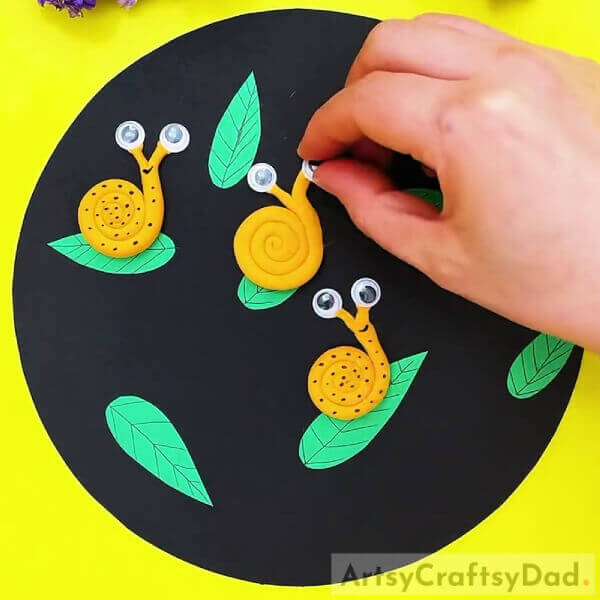
Stick googly eyes on the ends of the strands i.e. tentacles to add eyes to your snail.
Step #9: Detailing The Snail

Using a black marker, make dots on the spiral at a certain distance from each other till the face of the snail. Also, make a curvy smile below the end of the tentacles.
Step #10: Making More Snails
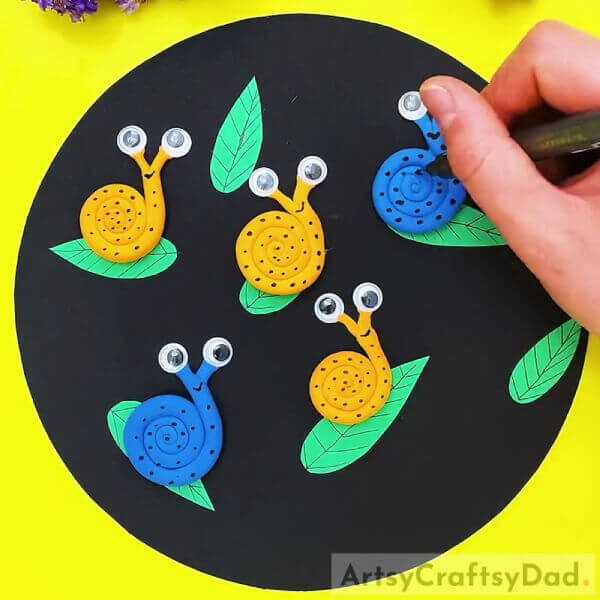
Following the same previous steps, make more yellow and blue clay snails sitting on leaves.
This Is The Final Look Of Your Clay Snail Craft!
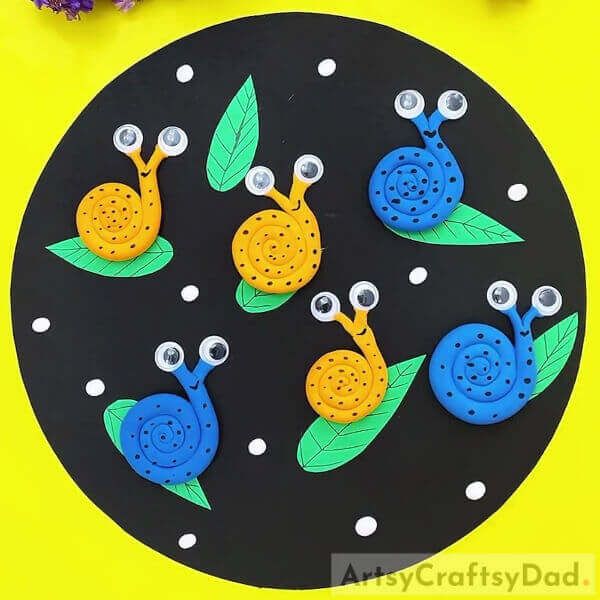
For the last step, dough tiny balls from a white clay stick them randomly onto the base, and press to flatten them on the base.
Woohoo! You have finally completed making your snails on the leaves! See the way they are looking at you, so adorable!
You should decorate this craft in your room to beautify the appreance of your room! You can also use it as your school craft project! This craft has definitely driven your curiosity to learn about these soft yet hard creatures! Did you notice? These snails look like they are space travelers! Don’t they? Black background, the space with white clay dotted stars, and the leaves are their spaceships! Well, that’s the way my imagination works! Hehe, tell me yours too in the comments section below!
If you loved the article and the craft idea, give this article a like and the feedback in the comments section! We would love to hear from you!
You May Also Like:
- Clay Heart Leaf Tree Craft Tutorial For Kids
- Clay-Paper Sunflower Garden Craft Tutorial
- Clay Chicks In Garden Craft Tutorial
- Harry Potter Polymer Clay DIYs for Kids
- Easy Craft Ideas from clay/Plasticine for Easter


