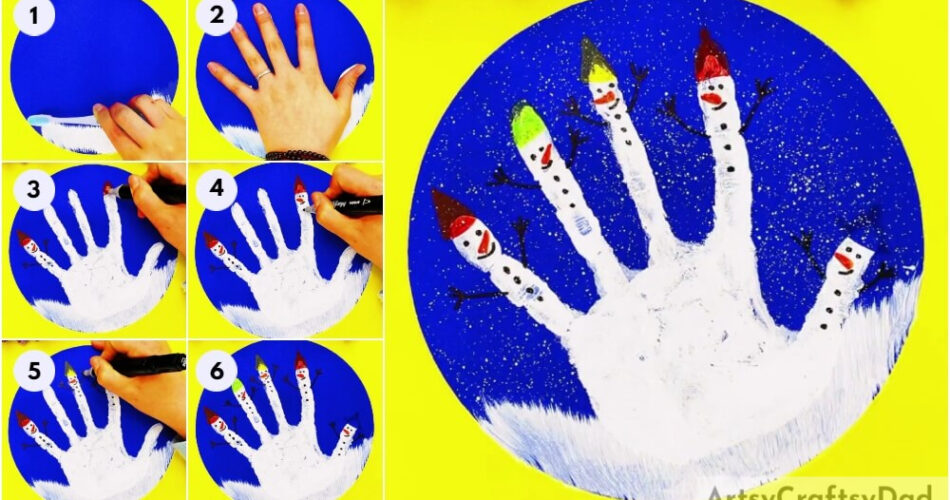
Welcome to this tutorial on how to make Handprint Snowmen Artwork with kids. A cost-friendly, efficient and enthralling art technique, this is the perfect activity to do with your kids today!
Prepare your children to get hands-on with paint for a creative Winter adventure to make Handprint Snowmen Artwork. Making artwork from one’s own handprint lends a unique, personal touch to one’s artistic showpiece and produces a warm feeling of self-satisfaction. This is one of the most stimulating art activities with no age limits, enjoyed by all. Follow the step-by-step tutorial given below to create the interesting Handprint Snowmen Artwork for Kids. Let us begin.
Easy Handprint Snowman Artwork For Kindergartners
Must Read: Clay Heart Leaf Tree Craft Tutorial For Kids
Supplies & Tools
- Blue construction paper
- White paint
- Toothbrush
- Paintbrush
- Coloured pens
- Black marker
Handprint Snowman Instructions
Step #1: Preparing The Background Scenery For The Snowmen
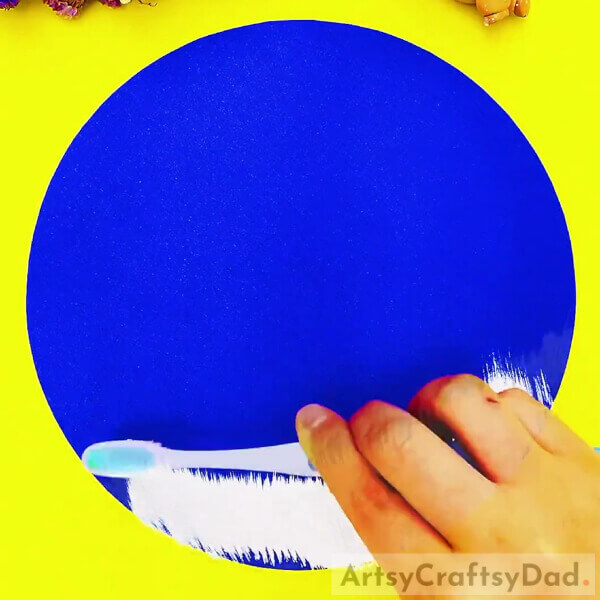
Take blue construction paper and a toothbrush. Dip the bristles of the toothbrush in white paint, and paint the bottom of the paper in gentle, upward strokes. This will depict the scenery of a snowy night as snow is built up on the ground.
Step #2: Transferring Your Painted Handprint Snowmen Onto The Paper
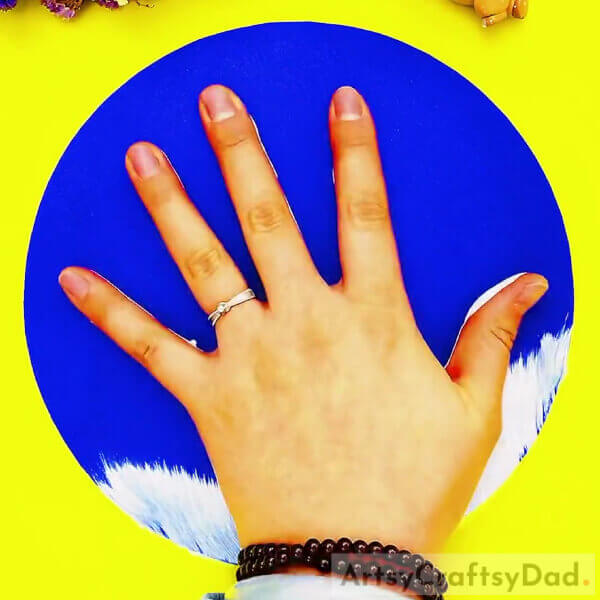
Take a paintbrush and colour the entire area of your palm with white paint. Make sure there is no space left uncovered, and the paint is not dry. Then position your painted palm right above the fallen snow and place it flat onto the paper applying full pressure on it. Leave it like that for at least 30 seconds as you ensure every area of your palm has made contact with the paper.
Step #3: Drawing The Snowman’s Face And Body Features
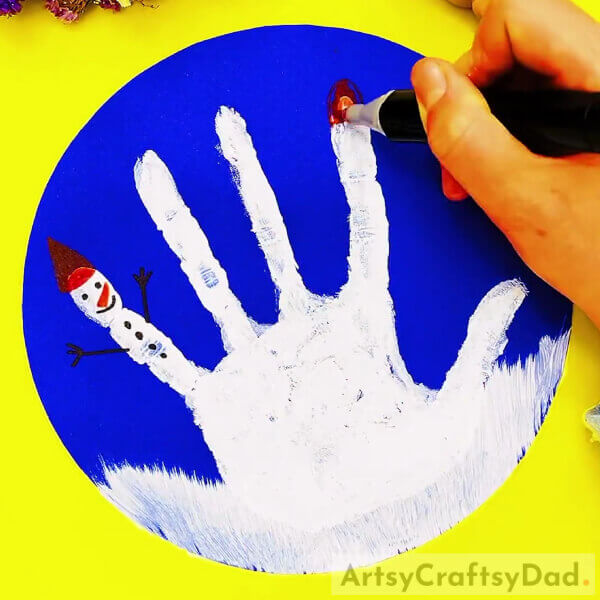
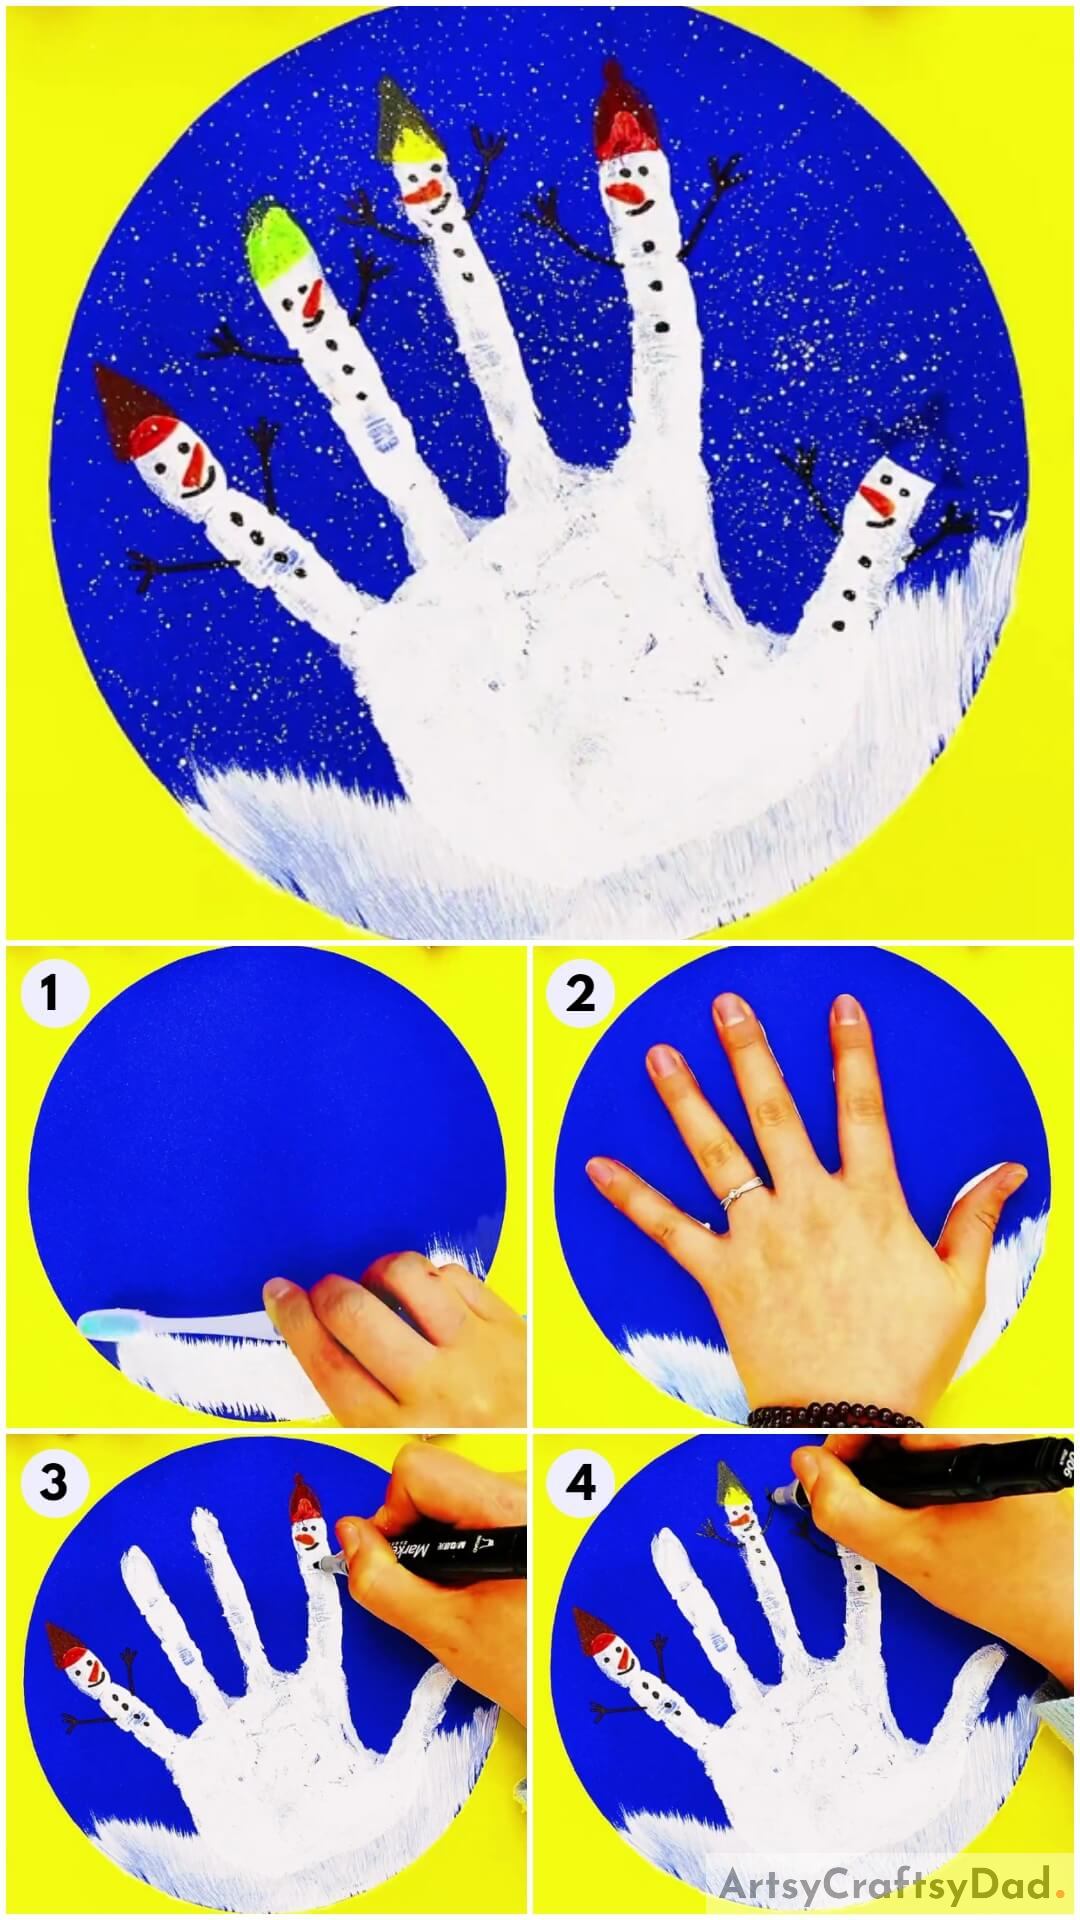
Using coloured pens and a black marker, on one fingerprint, make the characteristic Snowman smiley face with its cute carrot nose, a warm cap on its head and stick hands popping out of its body. You can even add little buttons on the torso of our stylist handprint Snowmen.
Step #4: Drawing The Second Snowman Face On Fingers
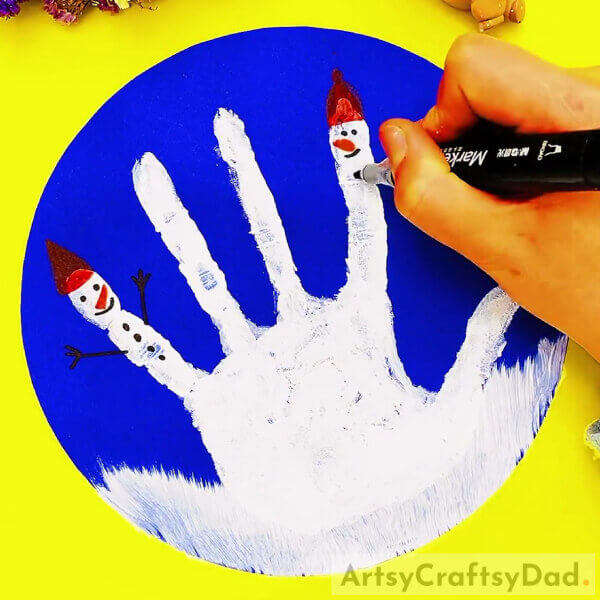
Give your second Snowman a unique smile, or a distinctive pointed nose with your trusted black marker and coloured pens.
Step #5: Add Dancing Hands To The Snowman Body
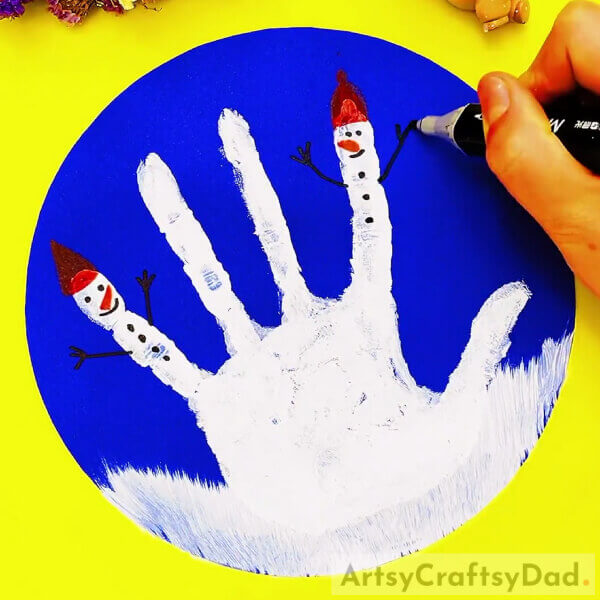
Let the snowman’s arms extend from its body and point them upwards to give it the appearance of dancing excitedly with cheer.
Step #6: Create Another Dancing Snowman On Another Finger
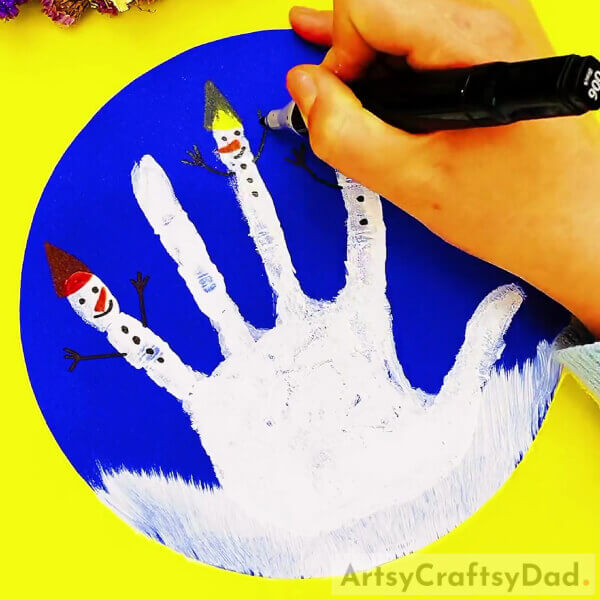
Create the third snowman on the third finger of your choice. Choose whichever colours you would like its warm cap to be and draw the necessary items according to your imagination and design.
Step #7: Complete The Family Of Snowmen
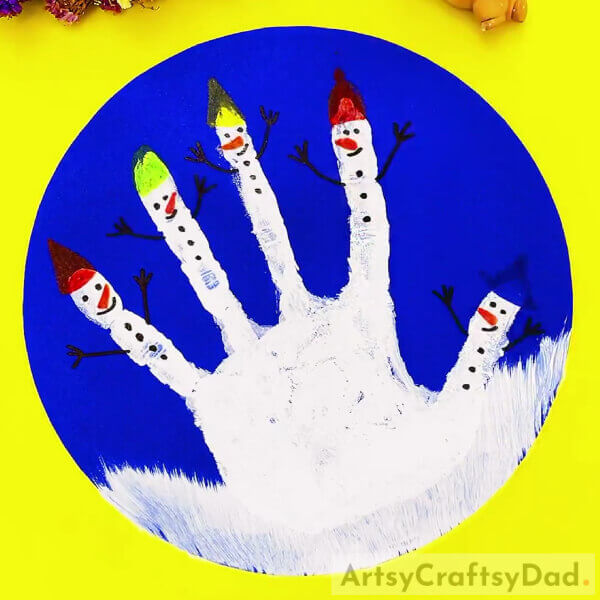
Introduce this newly-born family of snowmen to your friends, with a different snowman drawn on each finger. Adding diversity in the colours of clothing items and designs of bodily features gives each Snowman a unique identity and makes this artwork more engaging.
Step #8: Make It Snow With White Paint And A Paintbrush
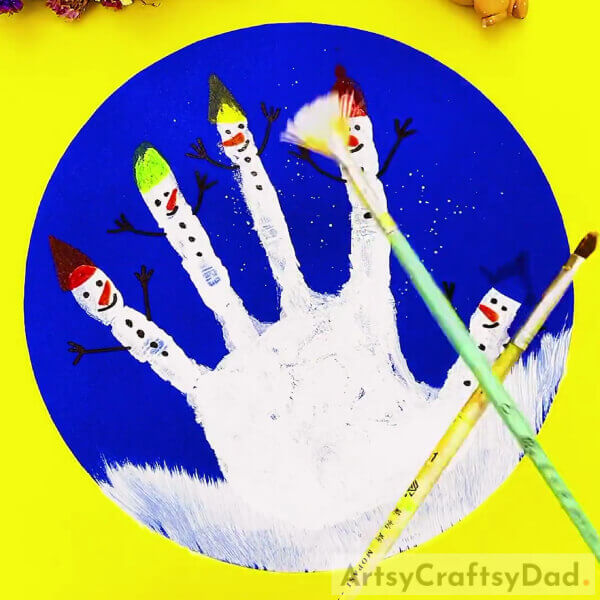
Create the effect of a snowy night by taking a paintbrush with white paint thinly spread over it and lightly shaking the paint onto the paper. Watch as the paint drops onto the paper to form small, white dots creating the effect of a beautiful and calm snowy night.
Handprint Snowmen Artwork Tutorial For Kids Is Complete!
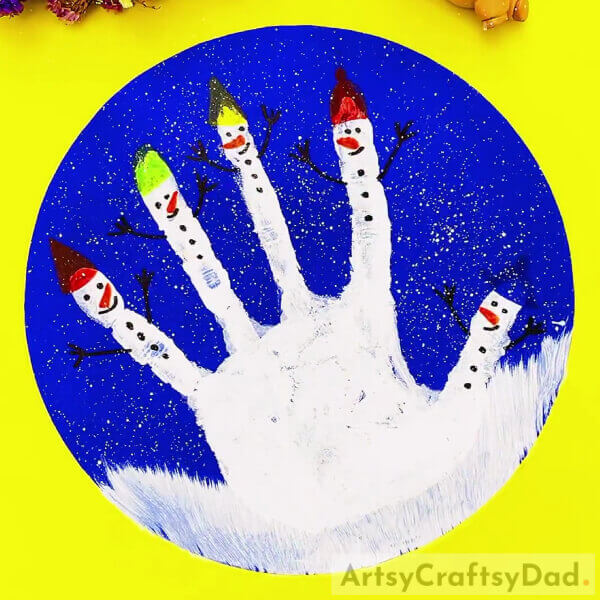
Your Handprint Snowmen artwork is complete! The beautiful white snow and the sight of five snowmen standing in the cold weather, wearing warm multicoloured caps, with their hands lifted in the snow exudes a relaxing, calming effect on the viewer. Follow this detailed tutorial and try this easy, hands-on activity with your kids today.
Share your experiences and feedback with us, in the comment section below. Check out our other articles for more tutorials, art and craft ideas and so on.
Thank you for visiting our website!
You May Also Like
- Easy Paper Plate Snowman – Winter Crafts for Kids
- Christmas Handprint Art and Craft Projects for Kids
- Handprint Art and Crafts For Preschoolers
- Christmas Tree Ornament – Button Felt Snowman (Tutorial)
- How To Make Snowman From Cotton (Step by Step Tutorial)
